Public Cloud
Virtalus HyperCX offer the possibility to build your own Public Cloud based in your Private environment. Some components should be modified, and some resources created so they are readily available for new users. HyperCX allow to create two kinds of Public Clouds, a Simple and an Advanced one. Regarding the billing, two modes are supported:
- Allocation mode: New users will be created and managed by an administrator and their resources will be limited to an agreed capacity. Monthly price will also be fixed.
- Pay as you go mode: Users can create accounts on their own, and monthly price will vary depending on the consumed resources. WHMCS must be used on this mode.
The Simple Cloud uses only the HyperCX platform with some customization, and only supports allocation mode. It is a basic way sell your private environment. For this, it is needed to add groups and users for your clients in a manual way. It allows to download Templates or upload your own in order to offer it to the clients and create virtual network. Users will only be allowed to create and manage VMs, and use the Simple View.
The Advanced Cloud provides advanced features not available on the previous mode. By leveraging this mode, users will be able to use the Advanced View besides the Simple View. Advanced clouds can leverage allocation mode and pay as you go mode.
Both for the Simple and the Advanced model, some operations will be required or recommended on the cluster. This guide will start on those requirements, and then will move to the specifics on each model. The user should start by the common configurations and jump after to his specific deployment model.
Common Configurations
Following configurations should be considered for both Simple and Advanced Cloud mode. After this section, the specifics of each mode will be mentioned.
Templates
Download the TEMPLATES that you will offer in the Cloud. You might want to offer at least Centos, Ubuntu, Debian and Windows templates. These templates should be downloaded from the marketplace provided by HyperCX.learn more
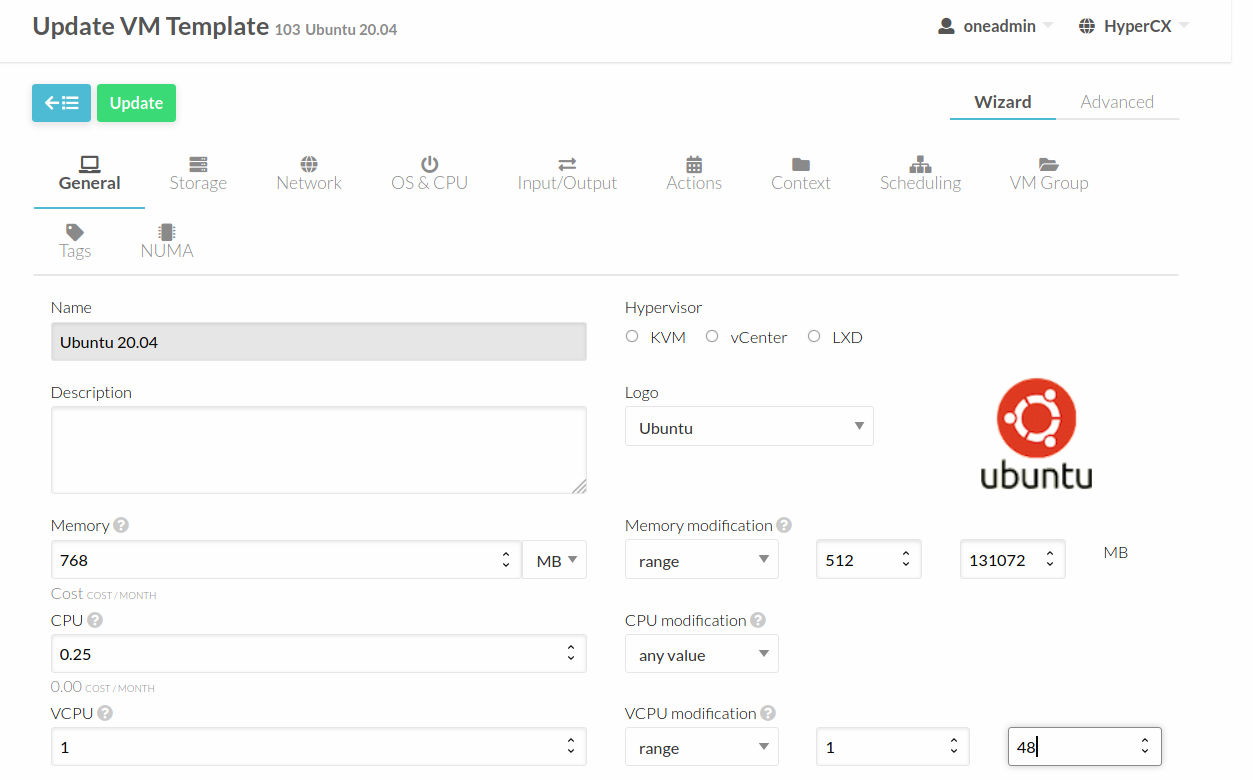
It is also recommended to limit the resources a user can set to any VM instantiated from any of these templates. For example, if the infrastructure uses 256GB RAM servers, it makes no sense a user can set more than that amount.
Public Network
The public network is recommended for the clients to access to virtual machines using a Public IP. It should be created before provisioning a user. This network already exists in HyperCX Private Clouds. Some clusters also come with an IPv6 network. This network can also be allowed for user.
Vault for Public Cloud
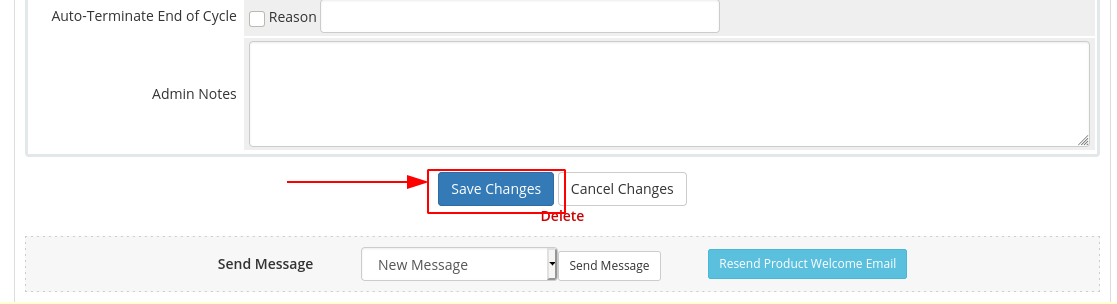
To use Vault for Public cloud one necessary modification is required in ACLs, to keep backups unique to each group. If this configuration step is missed every backup will be available to every group for download. Navigate to ACLs and delete the following ACL, be sure to double check everything in the image as well.

Note: for Public clouds managed by WHMCS this step isn't necessary, although if WHMCS is running on olders version or public cloud is architected manually without WHMCS this step might be necessary
Security Considerations
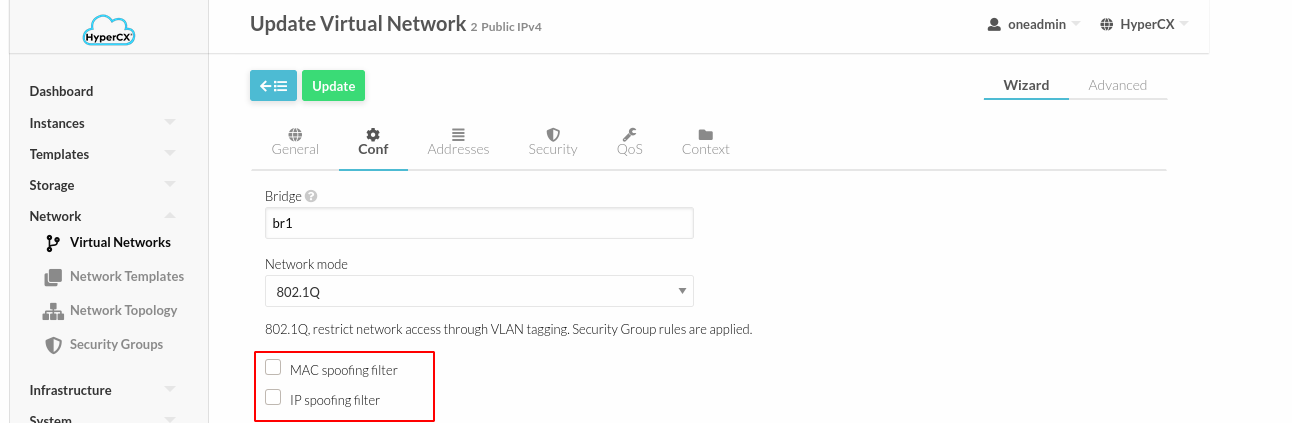
One of the most important things to avoid in a Public Cloud enviroment is duplicate ips. This can happen due to human error, or a user intentionally changin or adding IPs inside VMs. Although users can mostly only used their own virtual network, which are fully isolated, some networks like the Public VNET is shared among all the users. HyperCX avoids assigning duplicated IPs by internally maintaining an internal ipam from where the vms took their ips. Avoid users configuring other IPs inside VMs is a bit more complex since it include the human factor. However, HyperCX comes with a funcionality prepared for this: MAC and IP spoofing filter. By using this functionality, HyperCX makes sure that if client changes their ips manually, they don't work and will not affect other VMs that could be rightfully using that IP. It will only work with the ips assigned by the system from it's internal ipam. This is possible through rules that match the vm id with the mac and ip assigned.
Usage
To enable this functionality just follow the following steps:
-
Go to the desired vnet within network section.
-
Update the vnet.
-
Go to config section
-
Mark the two checkbox corresponding to MAC spoofing filter and IP spoofing filter.
That's it
Note
This is recommend only for the Public vnets since the Private ones are created by each client and it won't affect the rest of the users.
Note
At this moment, NIC aliases will not work with this feature enabled. This will be implemented in future versions.
New Address Ranges
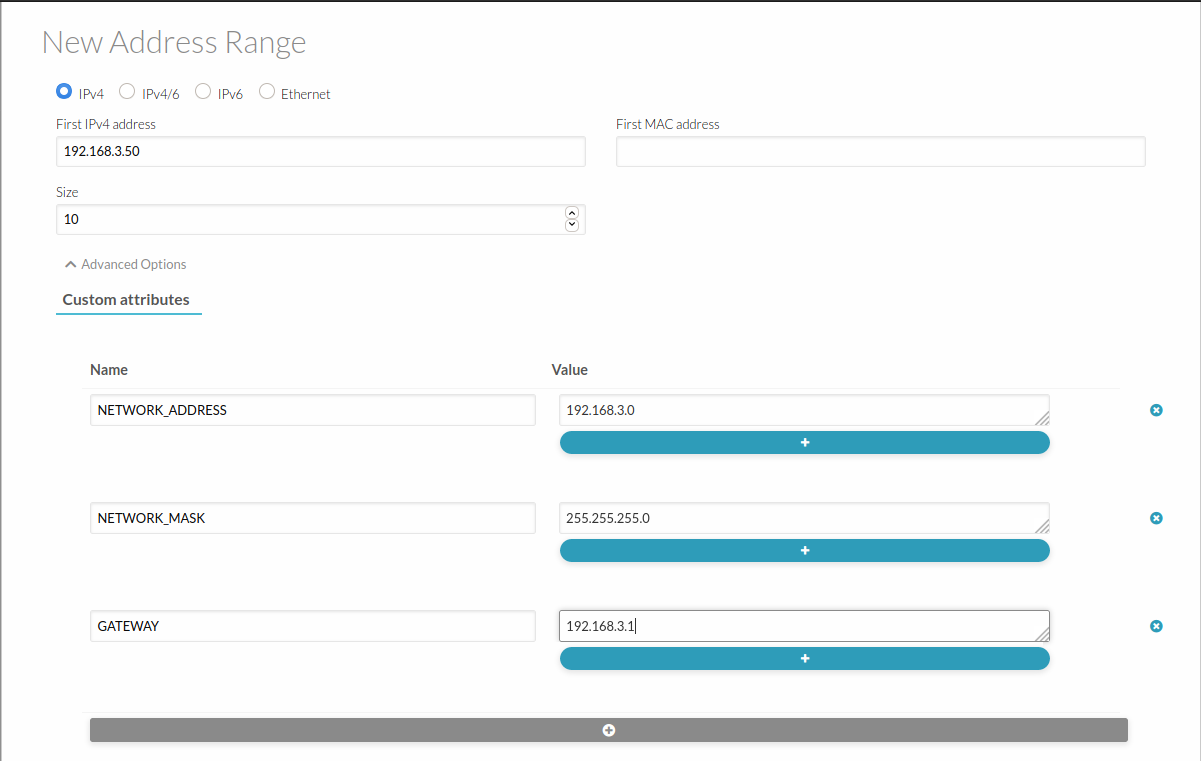
Public Clouds consume many public ips and in some cases the ranges are not large enough so it is necessary to add more public ranges on the same vnet as it is not recommended to show more than one public vnet to users.
The solution for this is to add other address ranges (AR) to the vnet by overwriting some properties like NETWORK_MASK, NETWORK_ADDRESS or GATEWAY. To do this, follow the steps below:
-
Go to the Public Network within the Virtual Network section.
-
Go to the Address section within the vnet.
-
Add new AR.
-
Overwrite the necessary settings.
- Add it
Note
For this to work the new address ranges most use the same vlan.
Allow resources to be used
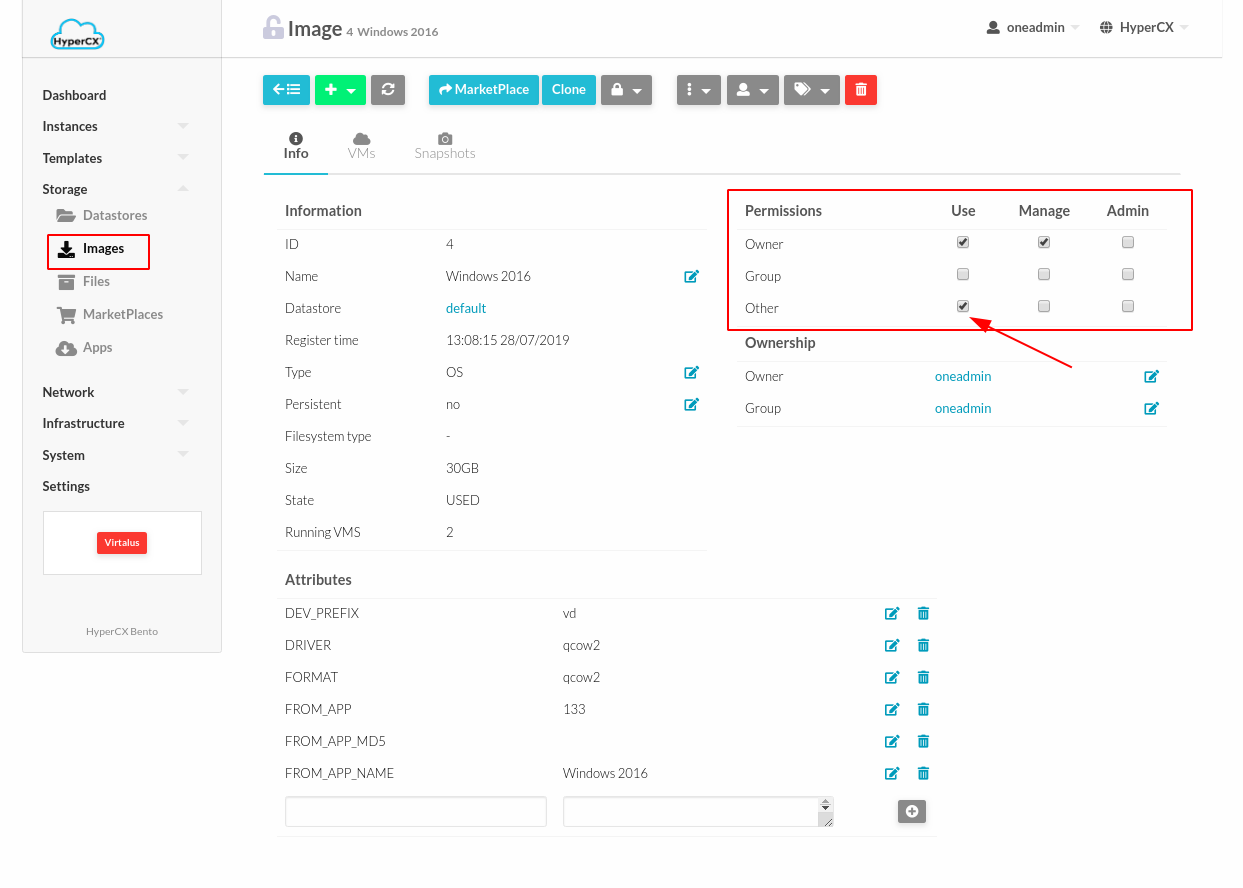
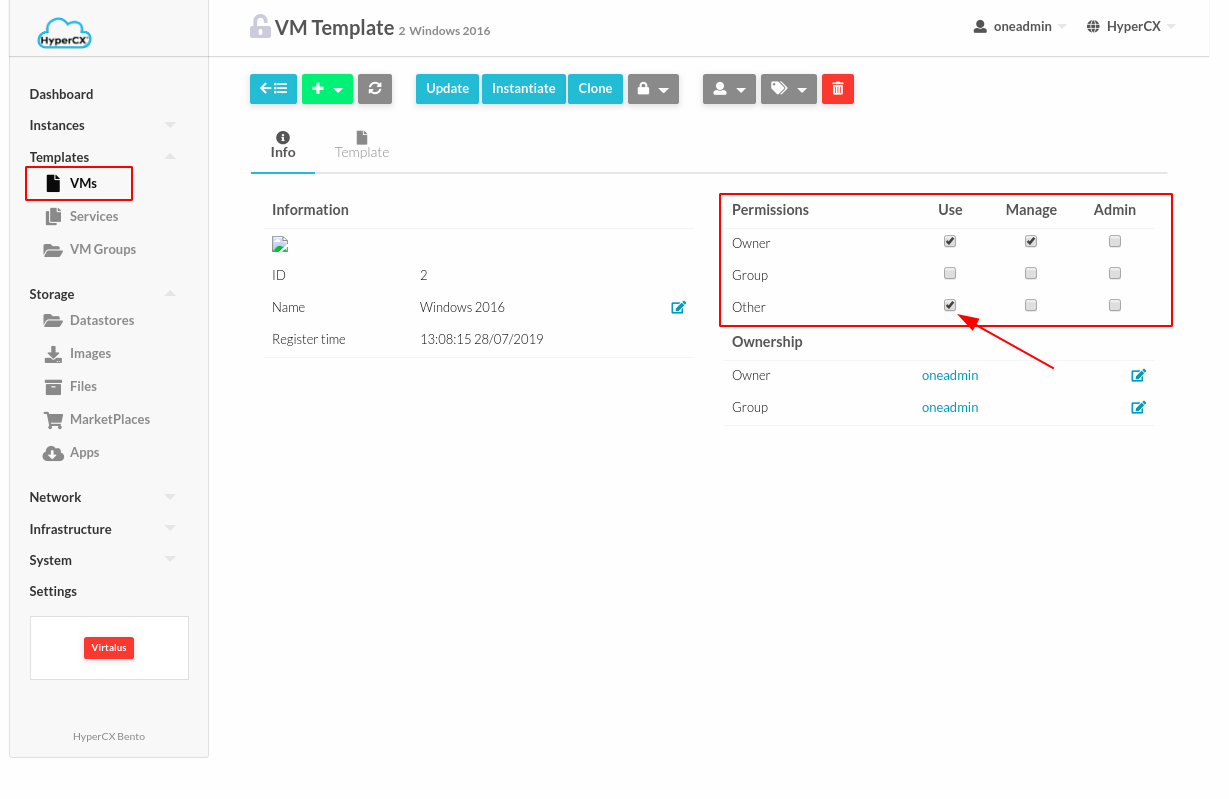
Templates, images and virtual networks must be allowed to be used by others, so users from different groups will be able to use them.
Simple Cloud
In this mode, users will not be created automatically. Instead, the cluster administrator must create an account for each end user. This option is convenient in some cases where administrators want to keep a more strict control on the cluster's users. For this case, it is recommended to create at least a group to hold these users, and set limits (quotas) at an user level. More than one group can be created to lump together similar users and share resources among them.
Create Groups
Only allocation mode is supported for public clouds, so cluster administrators must create and manage existing users. It is recommended to create one or several groups for the public cloud users and assign all the future users to any of those groups. Groups could establish quotas but it is recommended to let them unlimited and instead set the quotas to the users.
Groups for the simple cloud should allow only the simple view for it's users and set this view as default. Leave the admin views empty since this group should not have a group admin (unless you want to delegate the responsibilities of creating and managing public cloud users to someone different than the cluster administrator, if this is the case, create a group admin and simple, advanced and group_admin view to the group admin). Group permissions should only allow users to create VMs.
The newly created group will allow that every user can see and use all the virtual networks. This most likely will not be the desired behavior in this case. To disable this behavior the ACL that allows the group to use the resource Virtual Networks must be deleted.
Create users
At this point, users can be created normally inside this group, just set the quotas requested by the end users.learn more
Advanced Cloud
If pay as you go mode is desired, you will need an extra layer upon HyperCX to handle users registration and advanced billing. HyperCX provides an connector to WHMCS, a world's leading web hosting automation platform.
Compaitability Table
| WHMCS Version | Hypercx Version | Hypercx Backups(Optional) |
|---|---|---|
| v1.2.8 or above | v10.5.2 or above | Latest can be deployed |
| v1.2.7 or below | v10.5.2 or below | Latest can be deployed |
WHMCS installation and configuration
WHMCS will provide the auto-provision portal and the billing system for the Cloud.
A running WHMCS is an indispensable requirement for this environment if pay as you go mode is used. Virtalus HyperCX offers a WHMCS appliance ready to work with the platform that you can download from the marketplace. Follow the next steps:
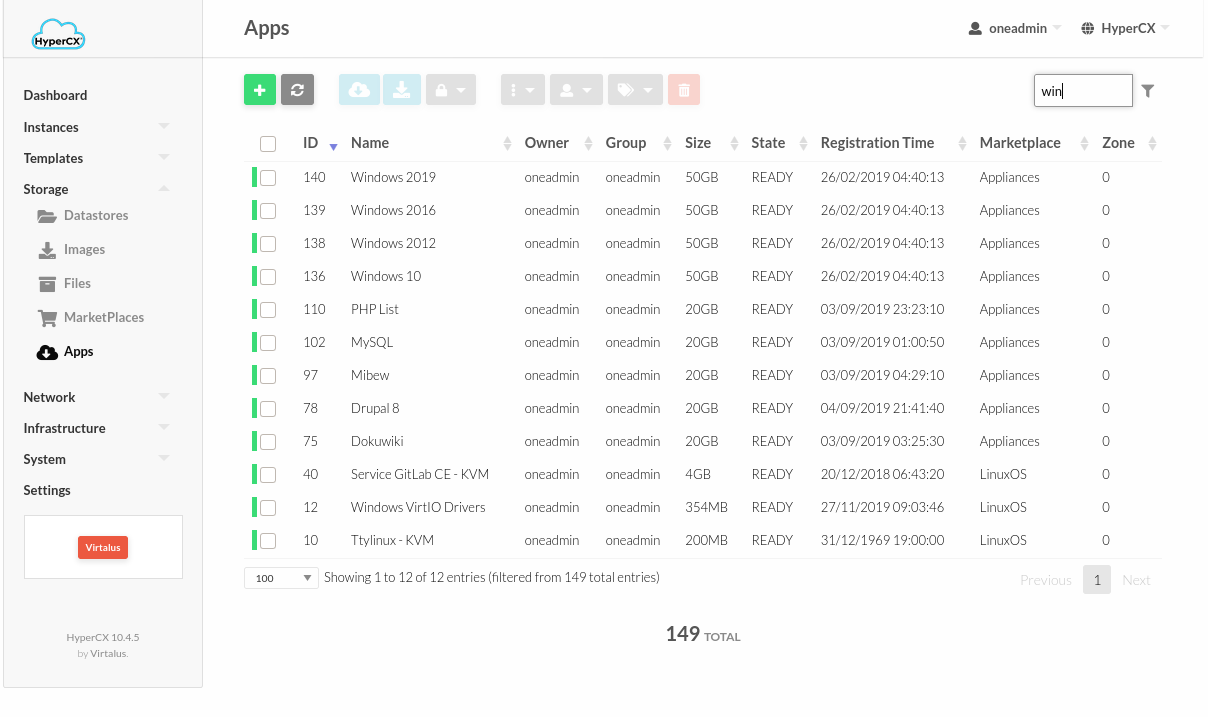
- Download the appliance from the marketplace. For this GO to Apps within Storage section and download the appliance called hypercx-whmcs
-
Create a new VM using the previously downloaded appliance, it should use a public ip. Here you should specify a previously configured DNS entry (optional) and if you are using a public ip a certificate will be generated for this DNS. The VM will take around 2 minutes to be fully configure.

-
Using ssh, access the VM to collect the information necessary to complete the WHMCS installation.
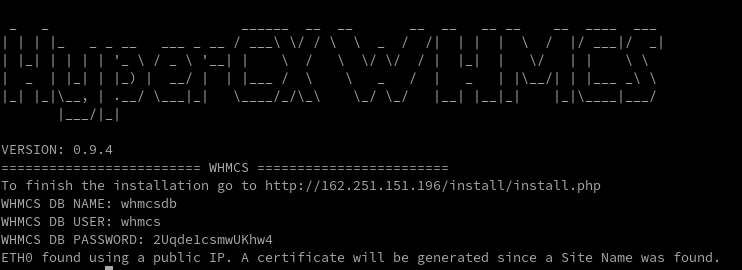
-
Go to the link displayed on the VM and start the installation.
- Go to WHMCS page or simply click on the Members Area link on the web to purchase a license.
-
Set up the license and database data on the web.
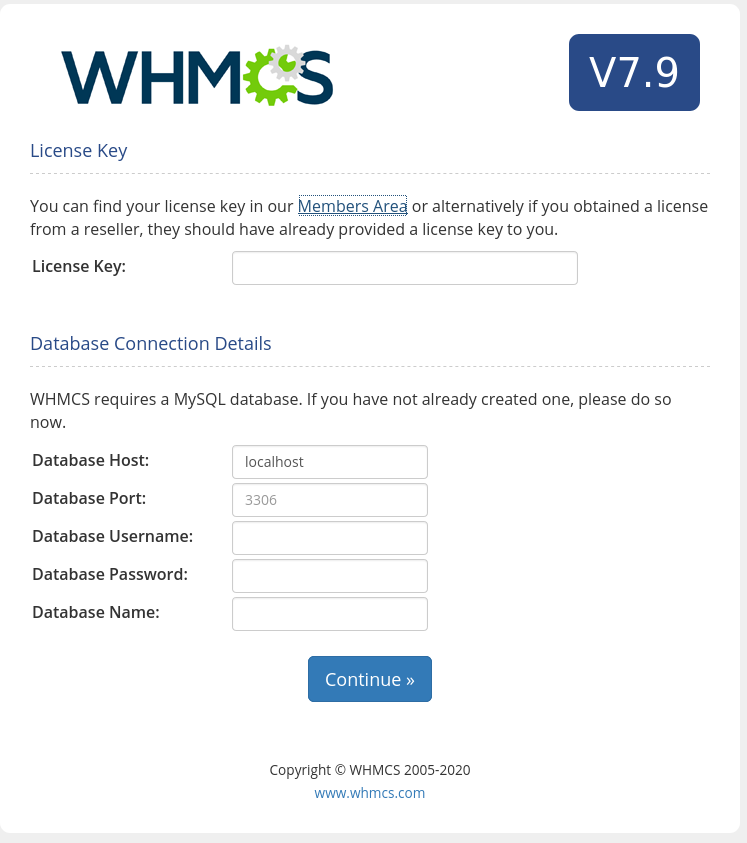
-
Set up the administrator account details so that you can manage once the installation process is complete.
- Access the server via ssh and run the following command:
# rm -rf /var/www/whmcs/install
- Go to
http://<<web site ip or fqdn>/adminand enjoy!!!
Virtalus HyperCX offers a HyperCX Module to connect to your private infrastructure that is integrated in the appliance. With this module, every new user account created through WHMCS will create a new user and group into HyperCX platform with unlimited resources for the end user. The groups and users should look like this:
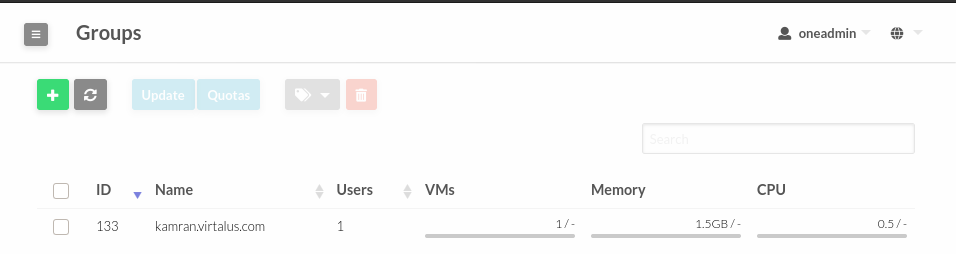
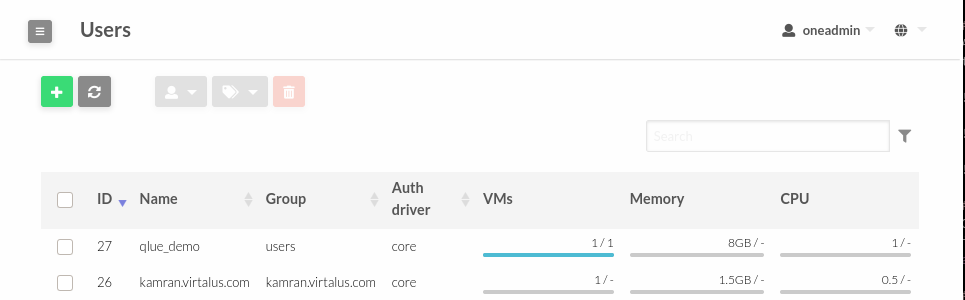
The new user will be a group admin of his own group, and will be able to create more users inside his own group.
There is another option and that is to implement WHMCS on your own. In this case, you can relay on WMMCS Installation Guide to do so.
Note
This last option is not supported by Virtalus.
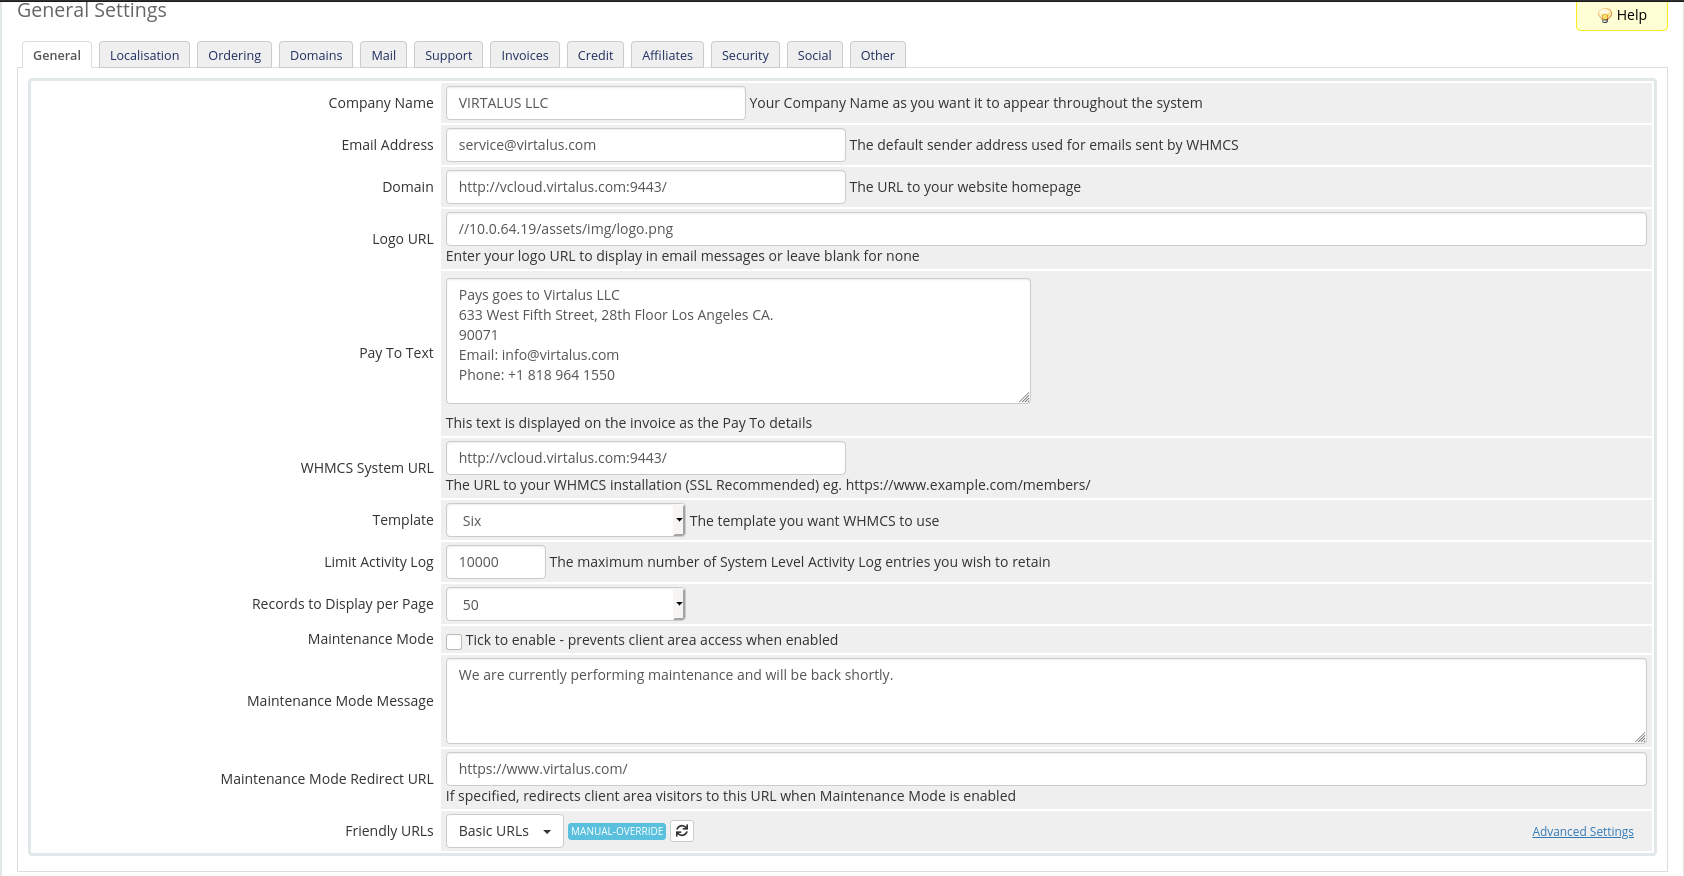
General Settings
1- Access to WHMCS portal http/https://<web site ip or fqdn>/admin
2- Go to Setup>>Settings to make the general configurations as described below:
General
Fill out the following information

- Company Name  ***Your Company Name as you want it to appear throughout the system***
- Email Address  ***The default sender address used for emails sent by WHMCS***
- Domain   ***The URL to your website homepage***
- Pay To Text  **This text is displayed on the invoice as the Pay To details**
- WHMCS System URL  ***The URL to your WHMCS installation (SSL Recommended) eg. https://www.example.com/members/***
- Maintenance Mode Redirect URL  ***If specified, redirects client area visitors to this URL when Maintenance Mode is enabled***
Example
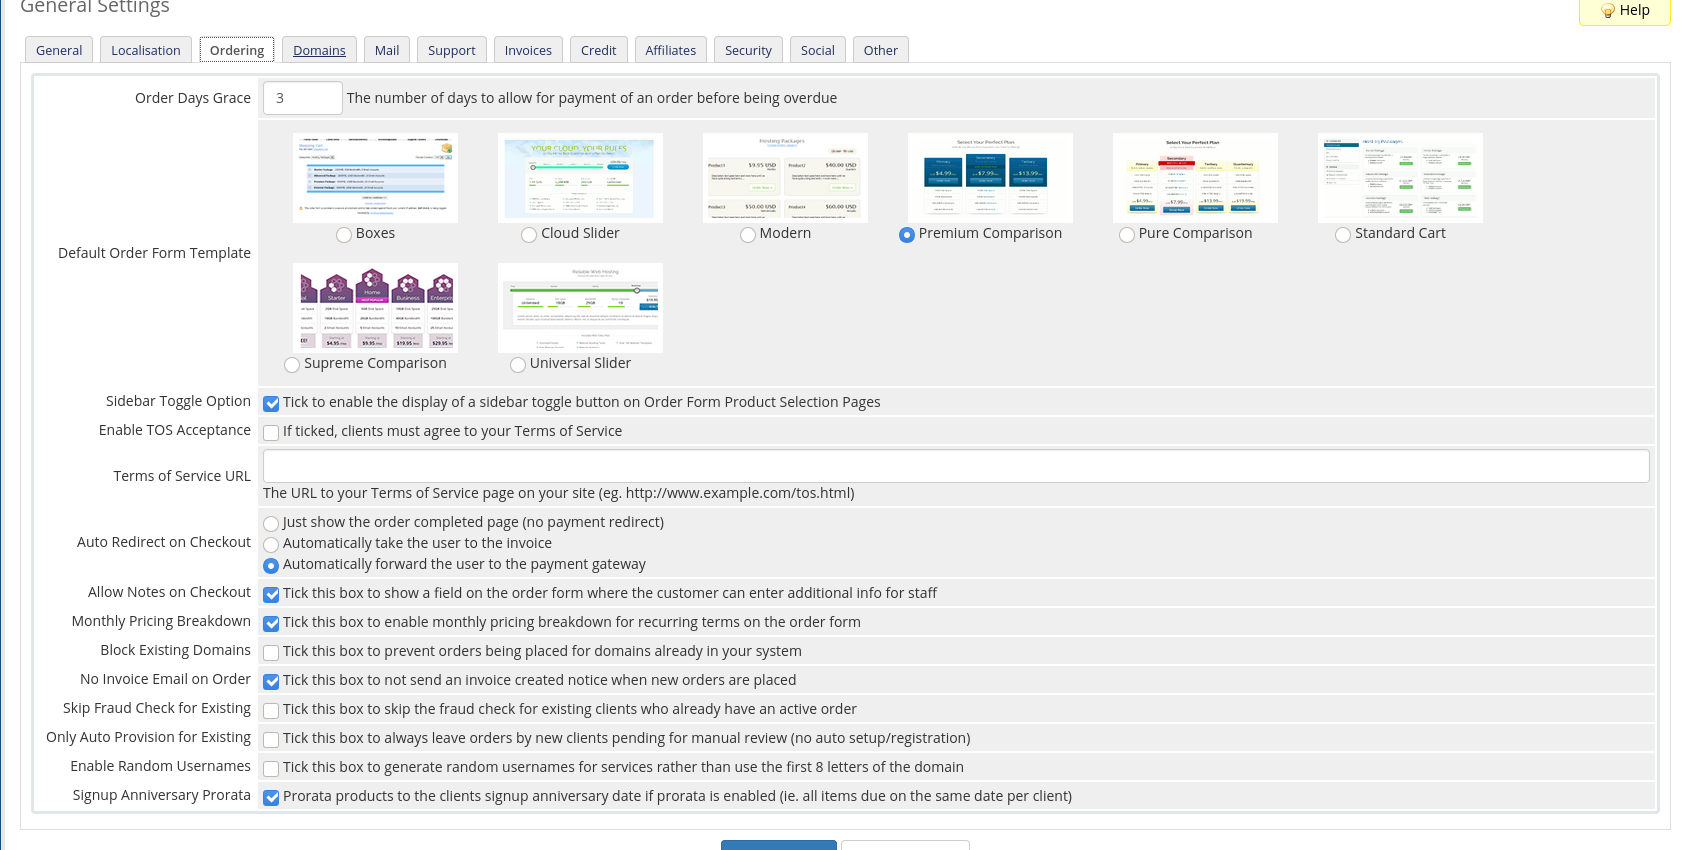
Ordering
Configure the following parameters

- Order Days Grace   ***The number of days to allow for payment of an order before being overdue***
- Default Order Form Template
- Auto Redirect on Checkout   ***Usually "Automatically forward the user to the payment gateway"***
//Don't enable the other options
Example
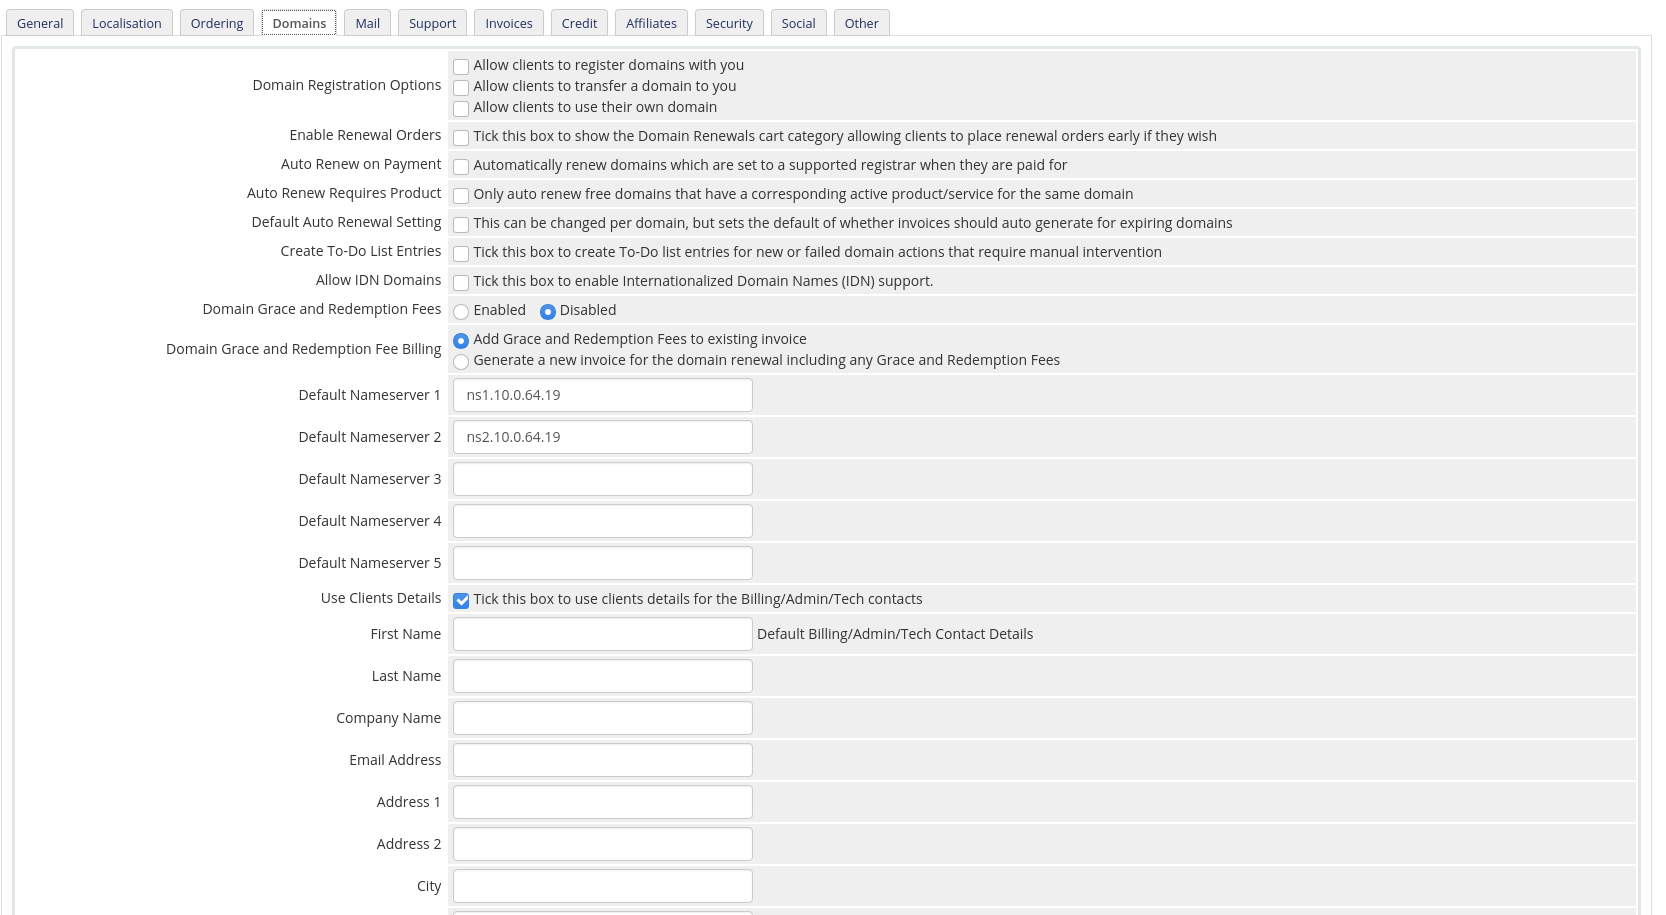
Domains
Disable the use of domains

- Domain Grace and Redemption Fees
Example
Fill out the following parameters

- Mail Type
- SMTP Port
- SMTP Host
- SMTP Username
- SMTP Password
- SMTP SSL Type
- Global Email Signature
- System Emails From Name
- System Emails From Email
Example
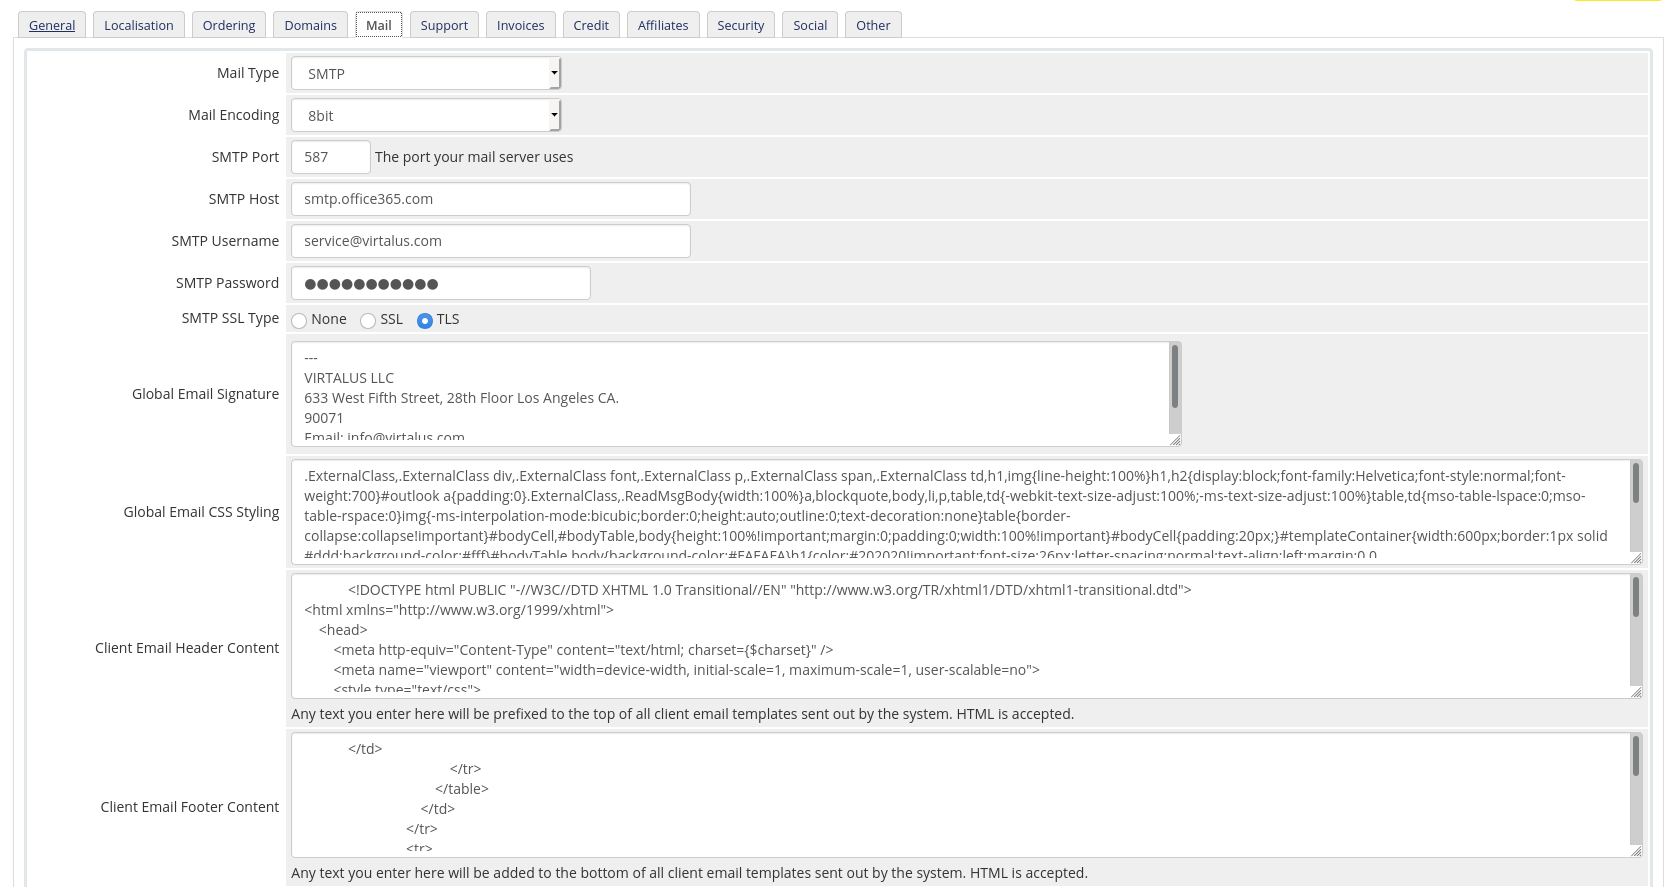
Note
All mail parameters correspond to your own mail server. The above image is only and example
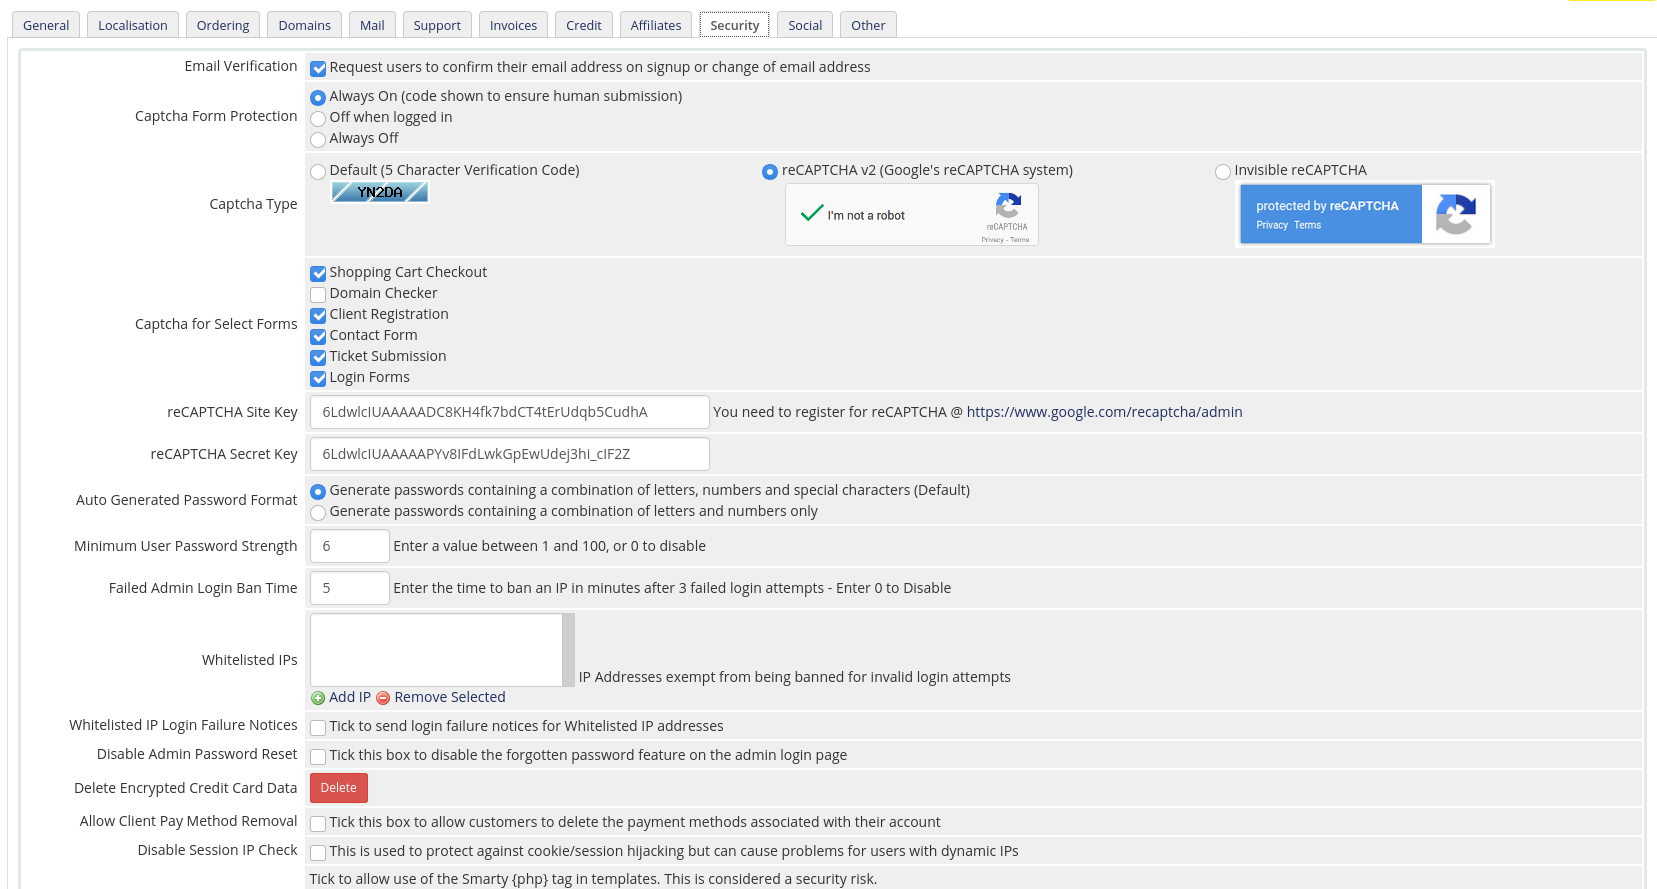
Security
Set the following parameters to text between the quotation marks:

- Email Verification   "Enabled"
- Captcha Form Protection   "Always On (code shown to ensure human submission)"
- Captcha Type   "Invisible reCAPTCHA (Google's reCAPTCHA system)"
- Captcha for Select Forms     "Shopping Cart Checkout, Client Registration, Contact Form, Ticket Submission, Login Forms"
- reCAPTCHA Site Key  **You need to register for reCAPTCHA @ https://www.google.com/recaptcha/admin**
-  reCAPTCHA Secret Key
- API IP Access Restriction   **IP Addresses allowed to connect to the WHMCS API**
-  Log API Authentication    "Enabled"
- CSRF Tokens: General      "Disabled"
Note
This is the recommended configuration for security. For this to work, you must register at google recaptcha and request the reCAPTCHA keys. If you don't want that much security, you can disable the CAPTCHA and everything will still work fine.
Example
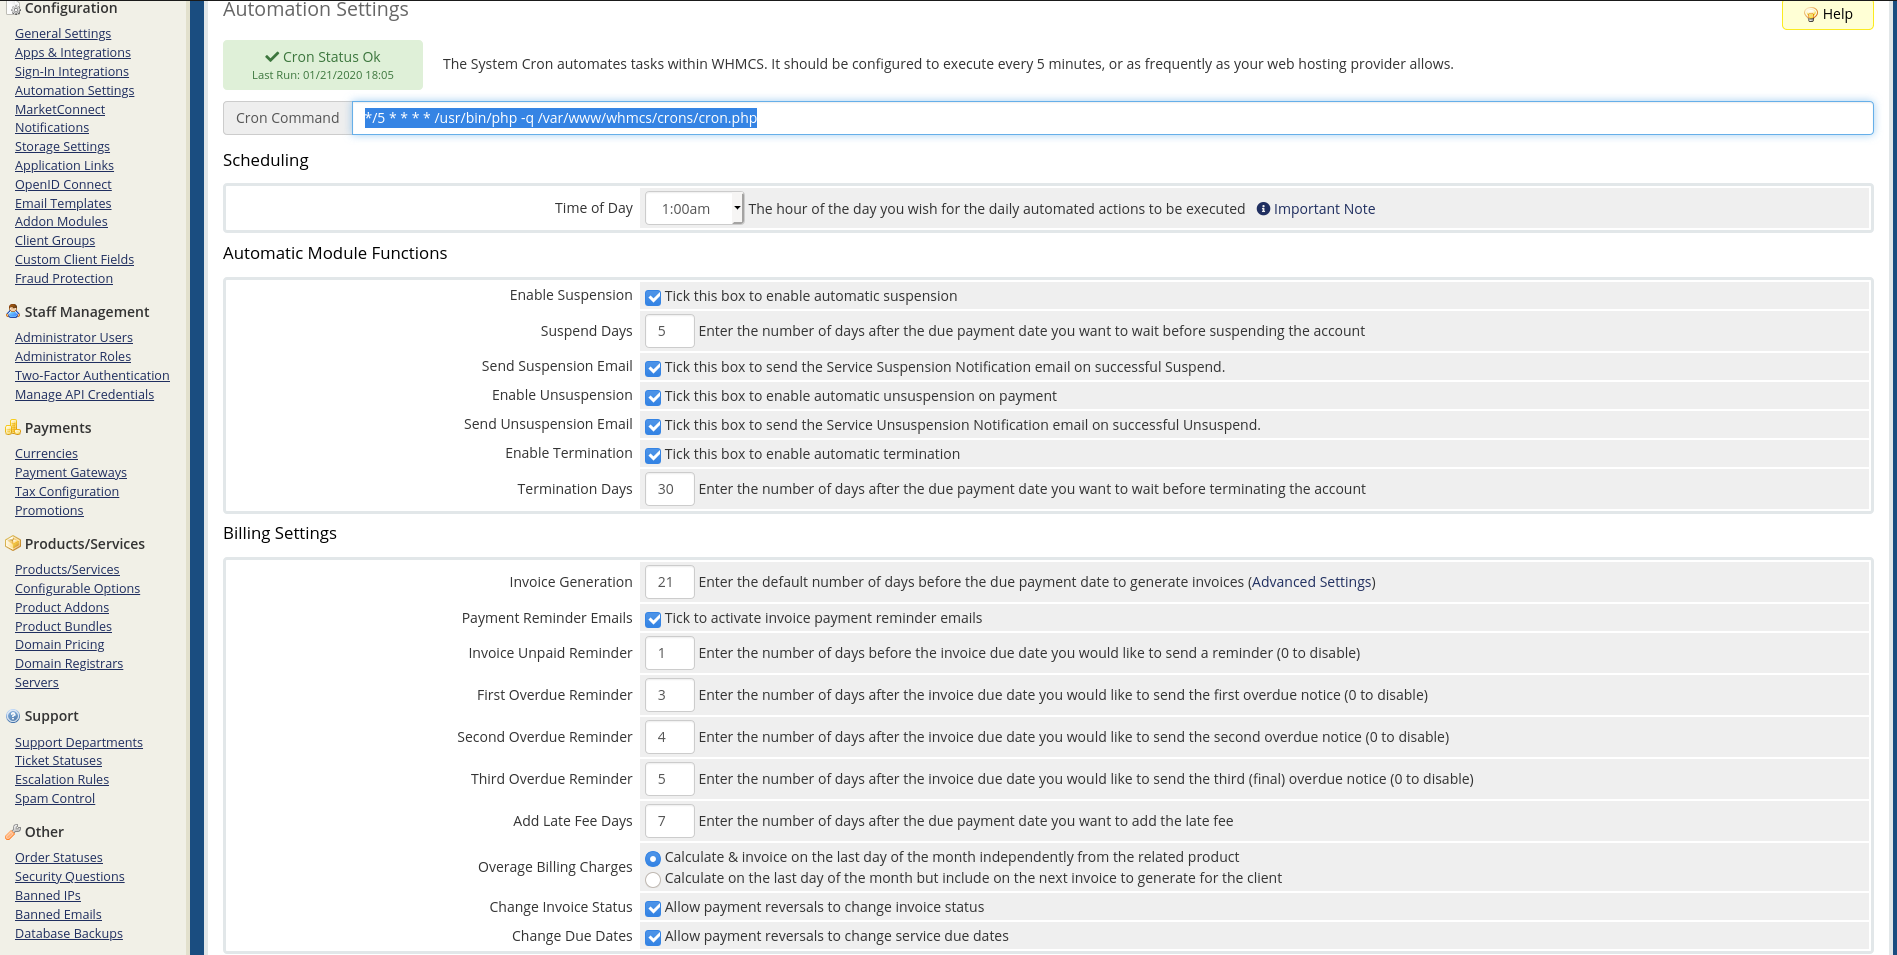
Automation Settings
1- Access via ssh to WHMCS server and set a cron job. Without it, WHMCS will not generate invoices automatically, suspend accounts, send payment reminders and update the disk usage statistics.
# crontab -e
//Add this line
*/5 * * * * /usr/bin/php -q /var/www/whmcs/crons/cron.php*
//This job will run every 5 minutes
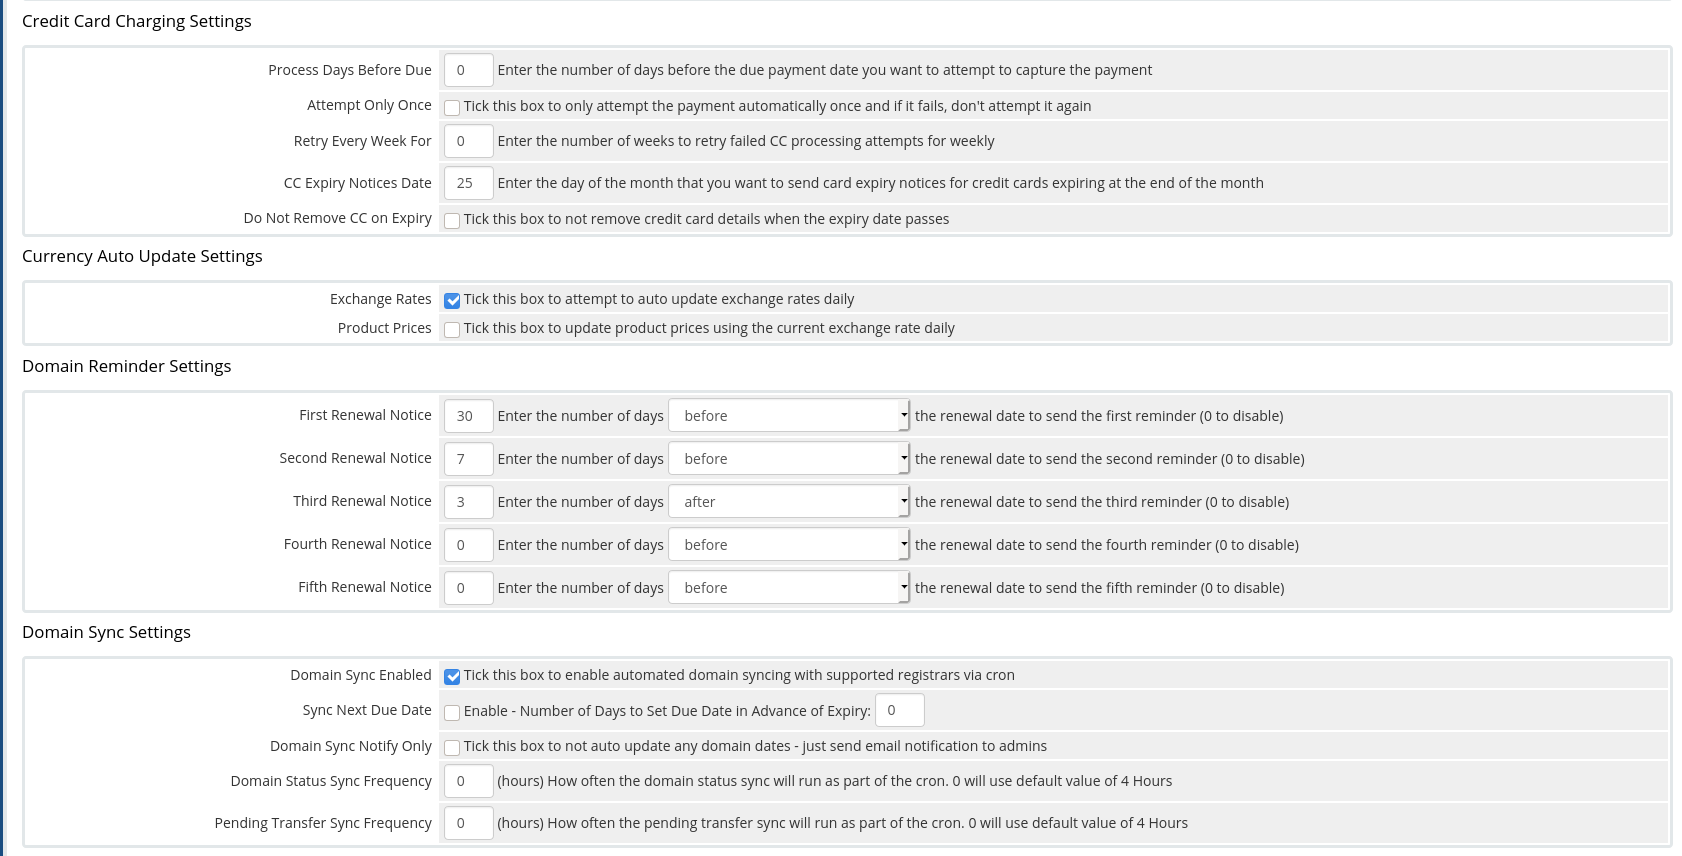
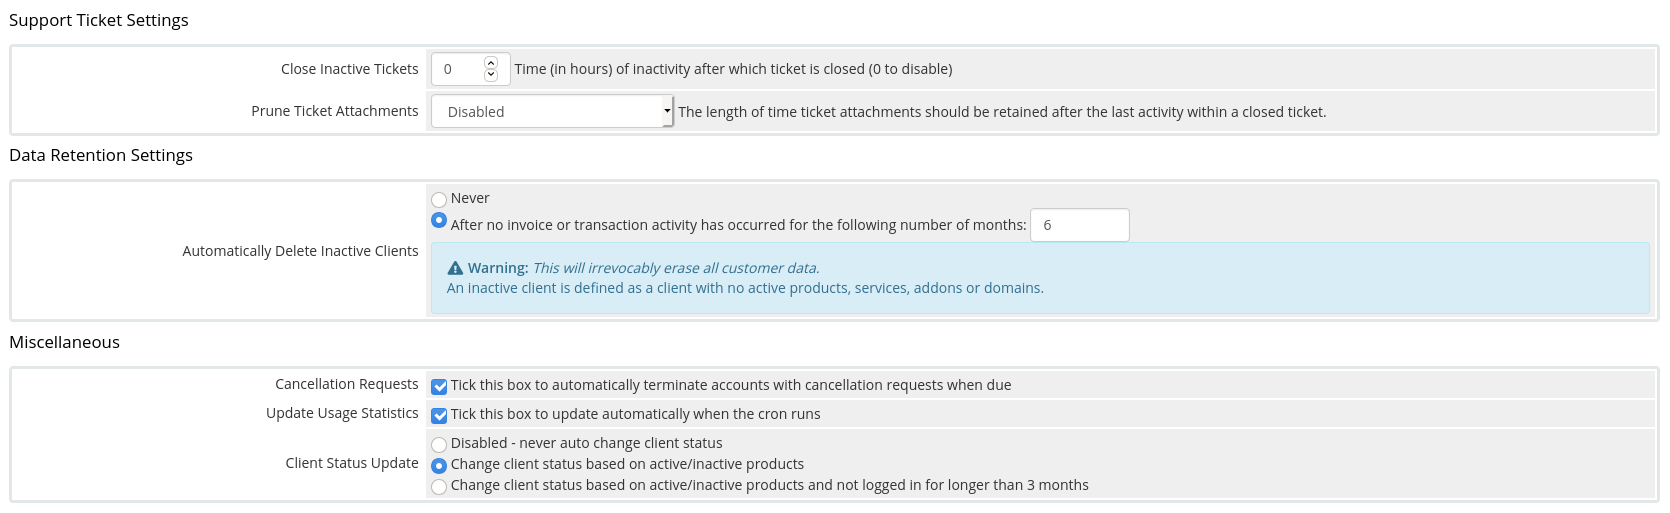
2- There are other configurations that need to be configured inside Automation Settings like Automatic Module Functions, Billing Settings, etc.
Example
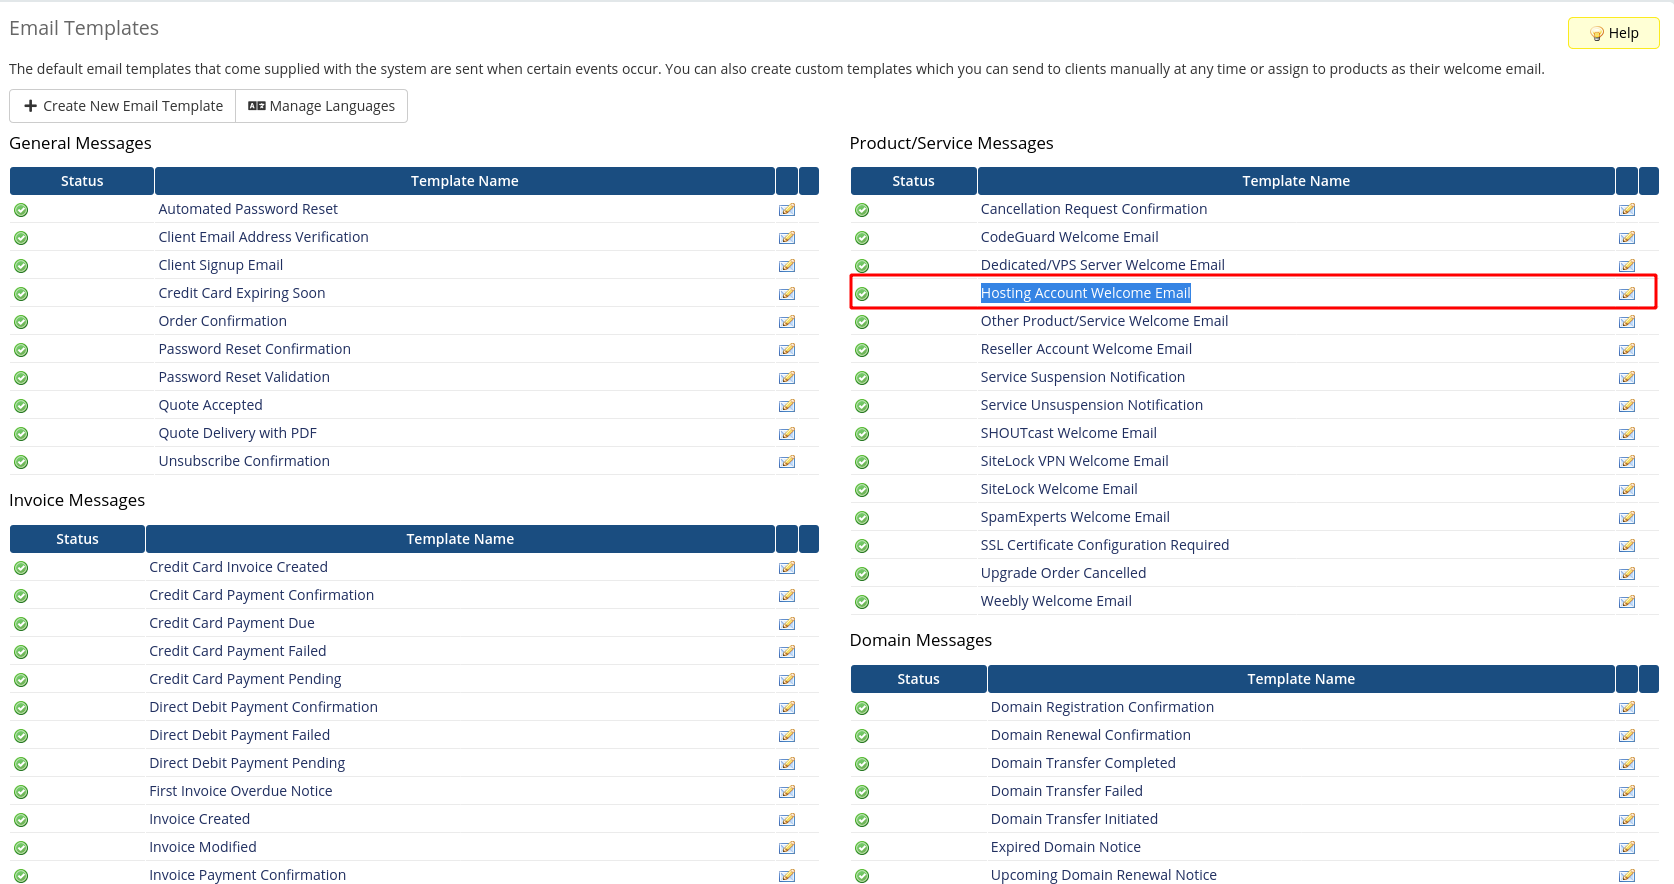
Email Templates
This option hold all the Templates that WHMCS send for diferent reasons, like the Welcome Email. Here you could modify every template according to your needs.
Example
Dear {$client_name},


PLEASE READ THIS EMAIL IN FULL AND PRINT IT FOR YOUR RECORDS


Thank you for your order from us! Your hosting account has now been setup and this email contains all the information you will need in order to begin using your account.


 We have provided an url which you could use to manage your resources and deploy your services.


New Account Information


Hosting Package: {$service_product_name}
Billing Cycle: {$service_billing_cycle}
Next Due Date: {$service_next_due_date}


Login Details

Username: {$client_email}
Password: {$service_custom_fields.0}


Control Panel URL: https://{$service_server_hostname}


Server Information


Server Name: {$service_server_hostname}


Thank you for choosing us.


{$signature}
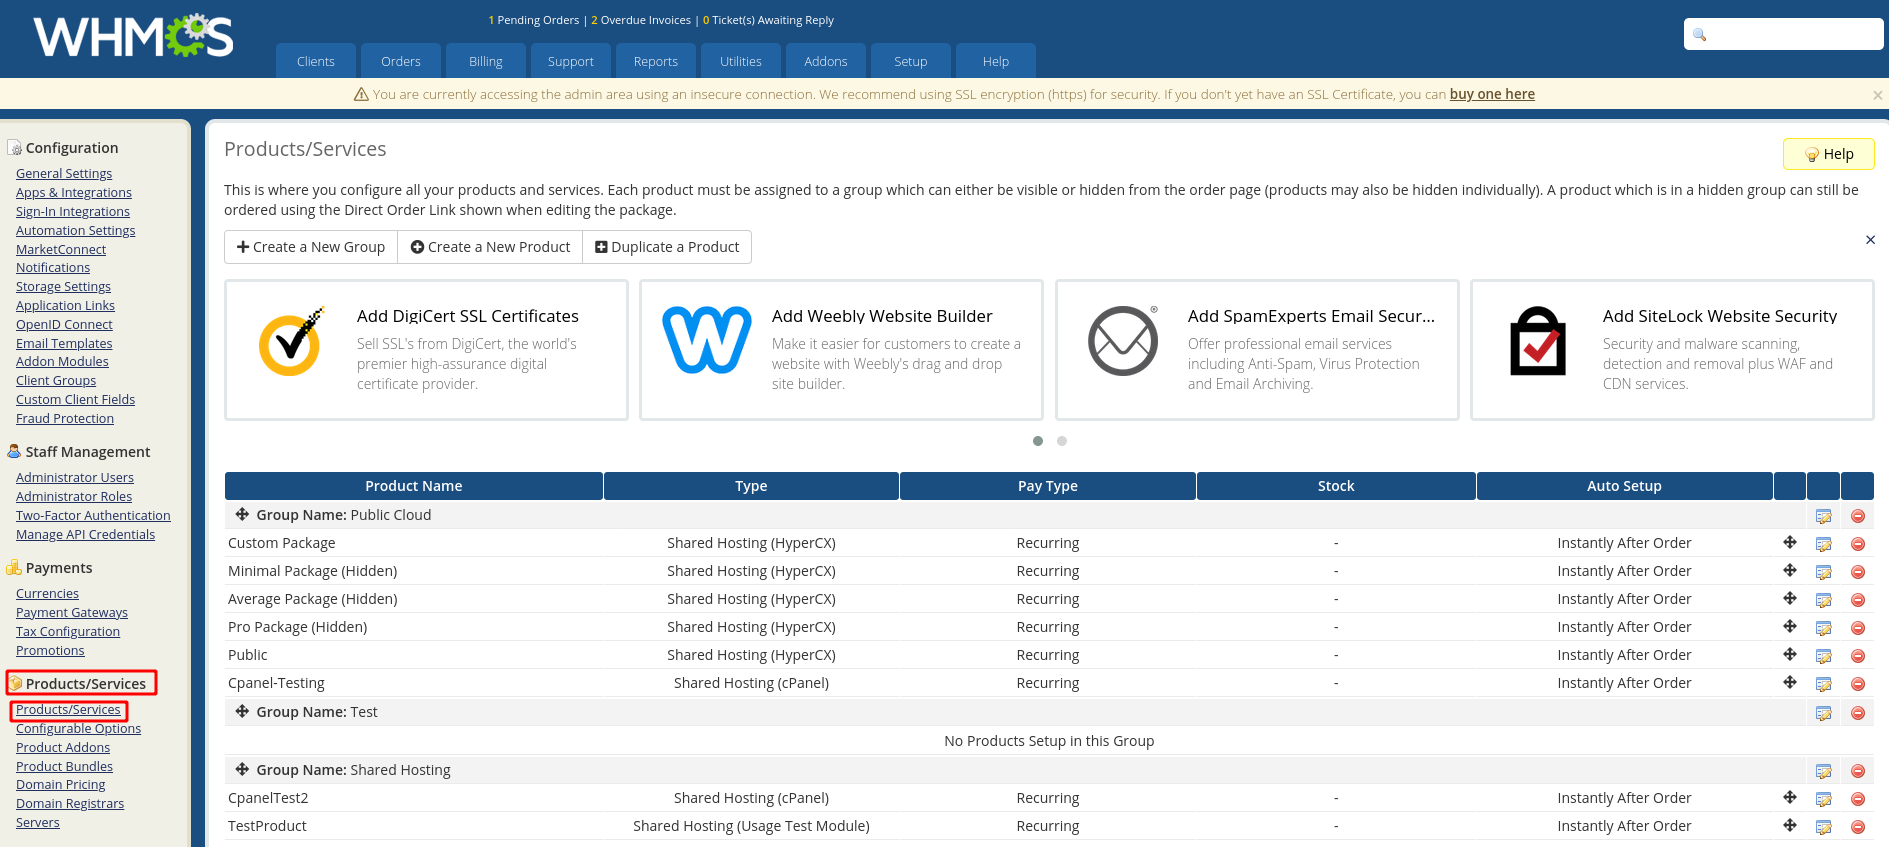
Products/Services
In this section you will create the servers that will provide the resources for your client requests. Also, you will create the products that should be offered.
Create a Group and a Server. This Server (HyperCX Server) will be used to provision the users and their quotas
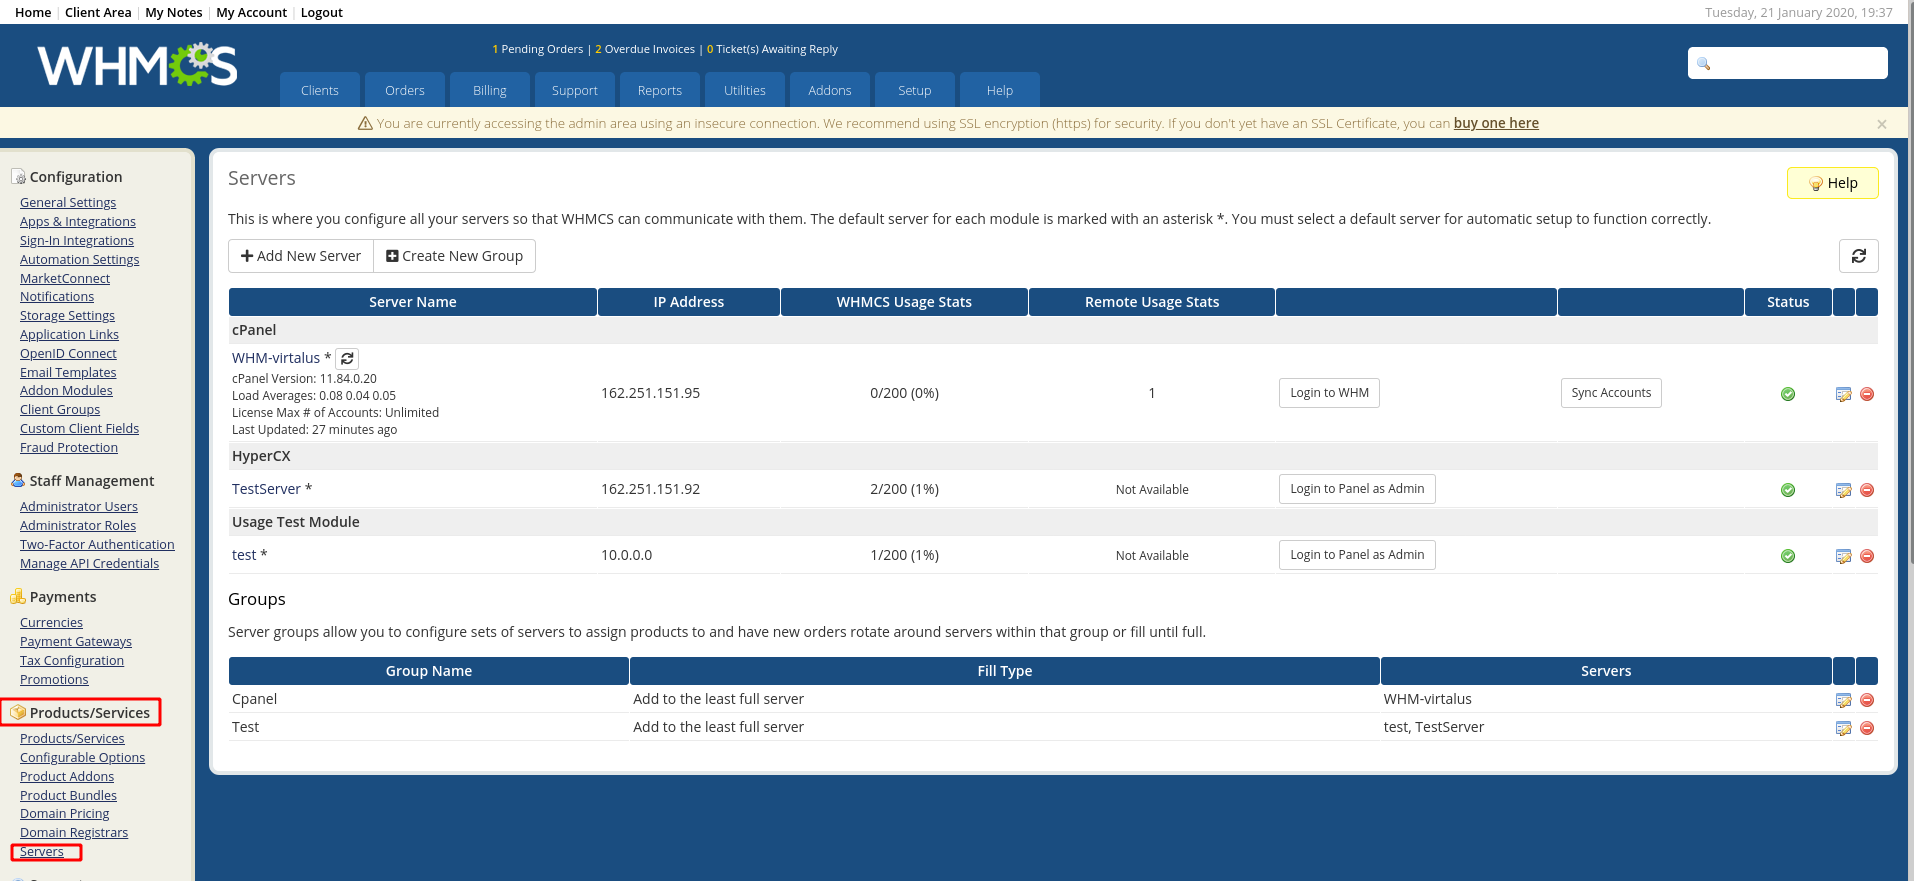
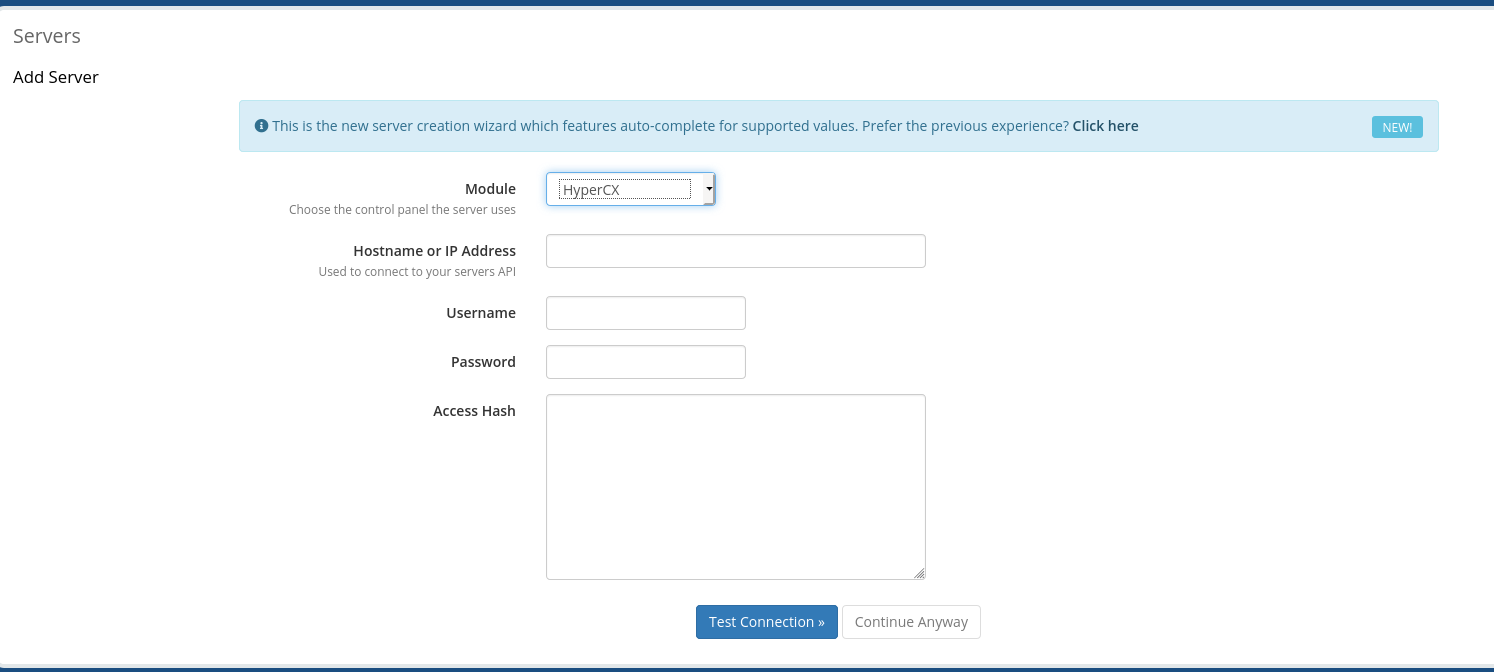
Example
Note
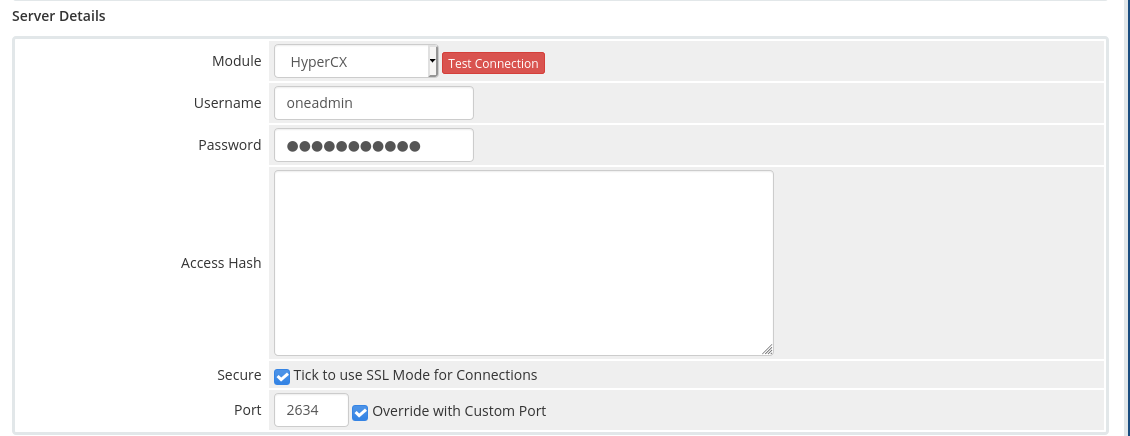
HyperCX uses SSL for API connections, so when adding a server it is necessary to enable the Secure Option and change the Port to 2634.
Create a Group and a Product to offer in the cloud.
Example
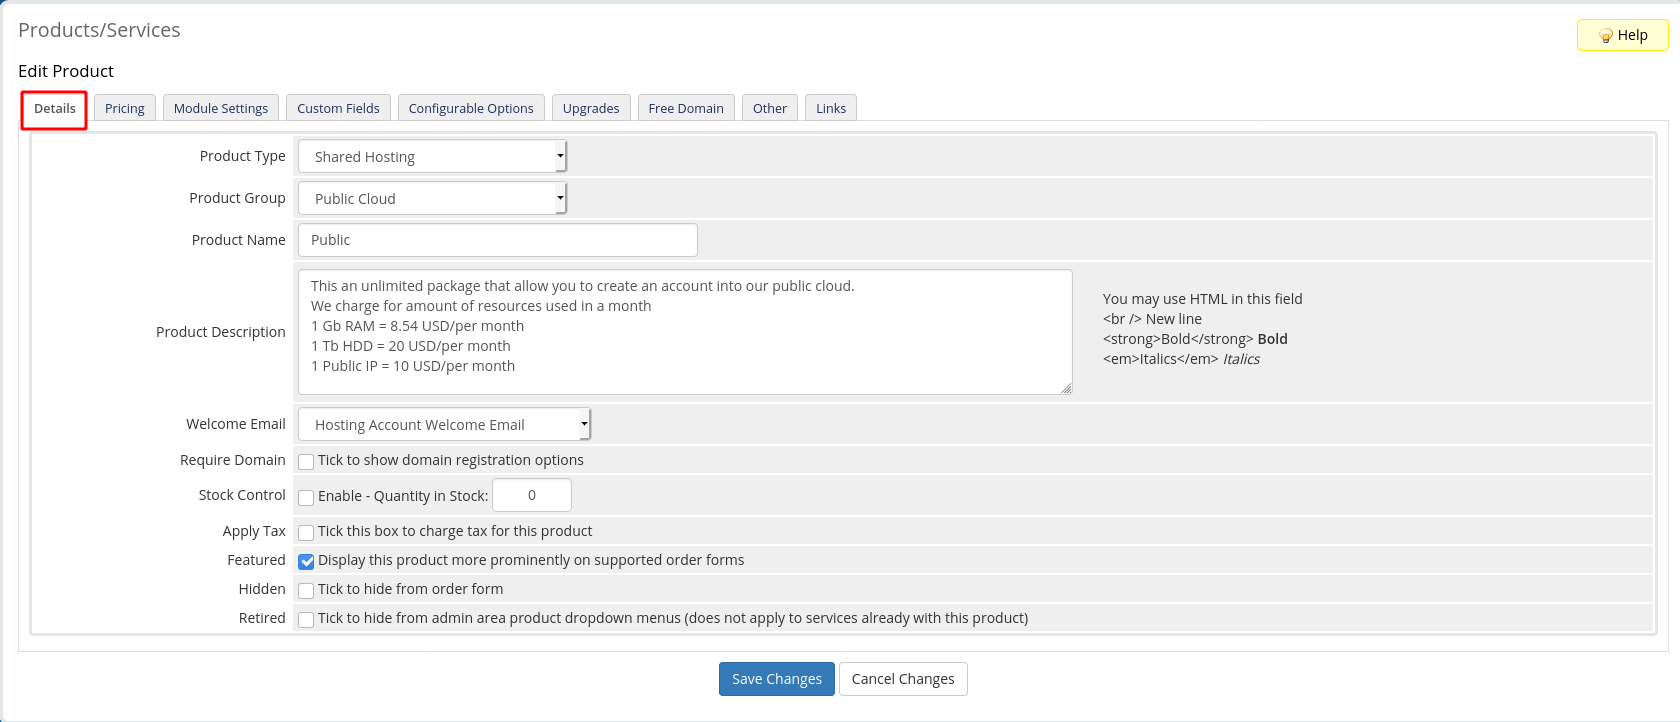
Note
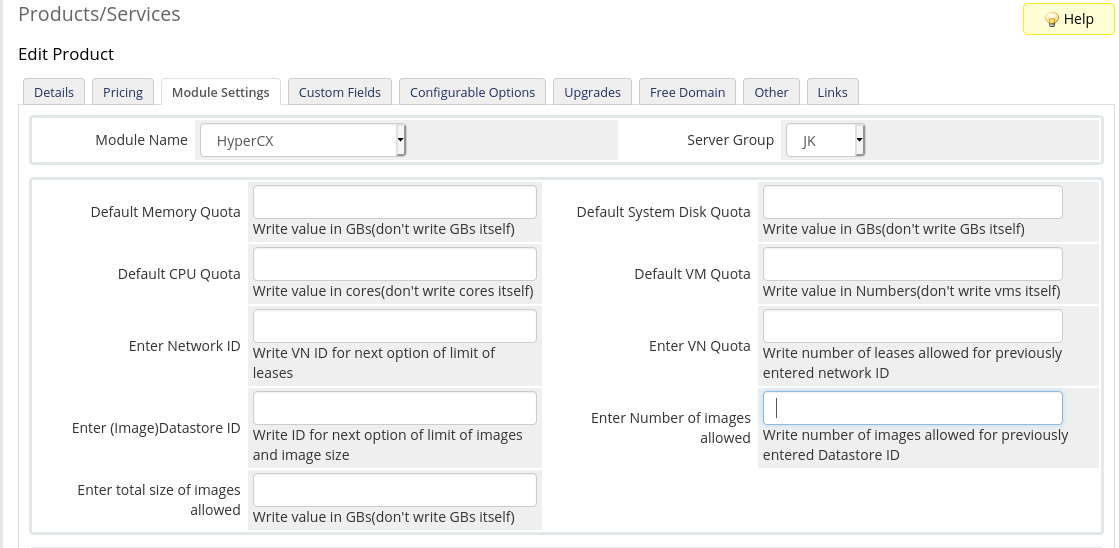
HyperCX offers the ability to set quotas to the products.
Important
Note that when a user is approved to cancel, all of their HyperCX cluster resources will be destroyed.
Custom Web
WHMCS allows you to customize the web interface to meet yuor requirements. You are able to change the colors, modules ubication, etc.. The main files to modify are:
- styles.css    /var/www/whmcs/templates/six/css/
- header.tpl    /var/www/whmcs/templates/six/
- all.min.css   /var/www/whmcs/templates/six/css/
Virtual Network templates
For the advanced mode users can create their own virtual networks. Administrators can limit this feature, if that is your case skip this section. In order for the user to create his own virtual networks he must instantiate an existing VNET template. It is recommended to provide one or several Virtual Network Templates for the clients to instantiate their own private networks. You could find more information related to it in Virtual Networks. A use case can be found on is Virtalus managed Public Cloud, more information here. Most HyperCX private clusters come with a default VNET template. Simply allowing users to use this template is enough on most cases.
NFV features
When users are allowed to create their own virtual networks, they should also be allowed to create virtual routers. This virtual routers use HyperCX NFV features in the back. HyperCX NFV offers the posiblity to create and manage your own L4 and L7 load balancer, Client and S2S VPN, firewall and router. More information can be found in HyperCX NFV.
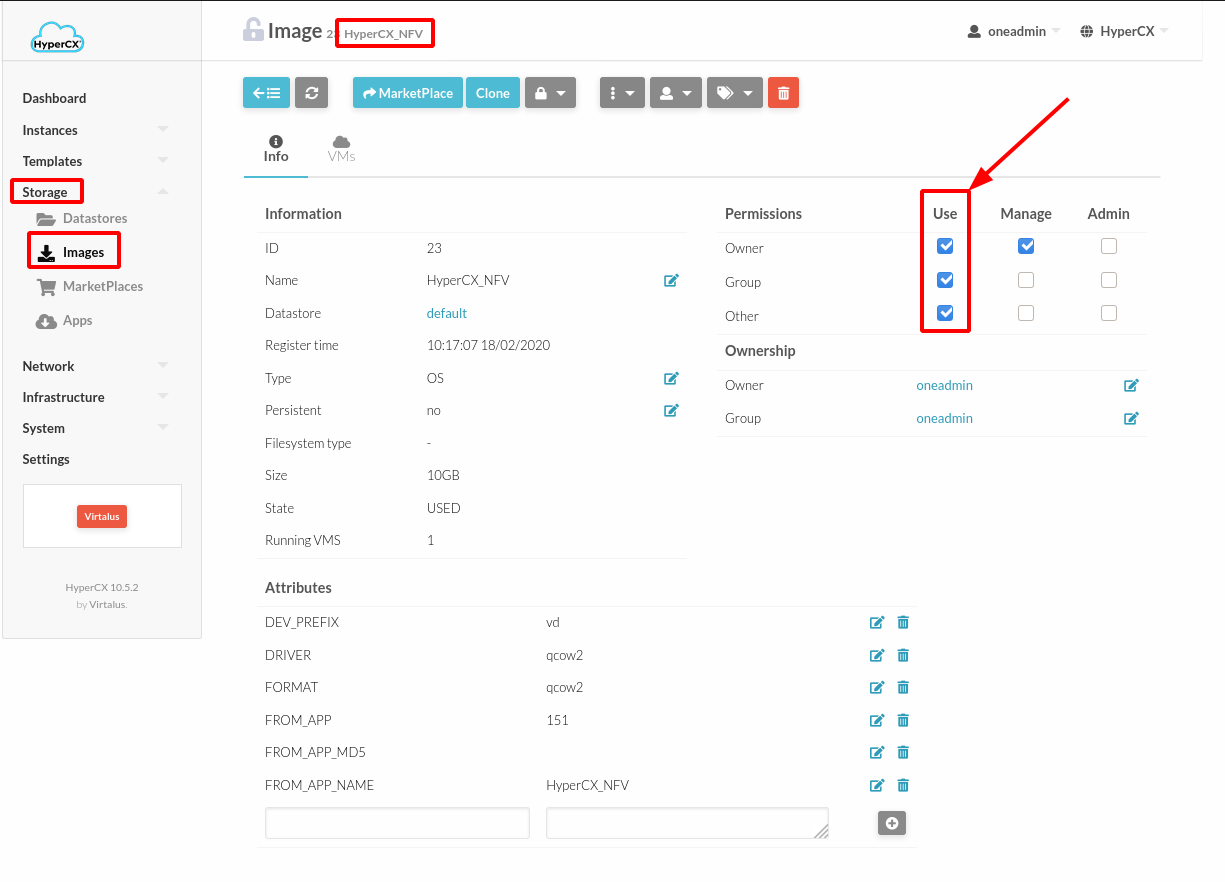
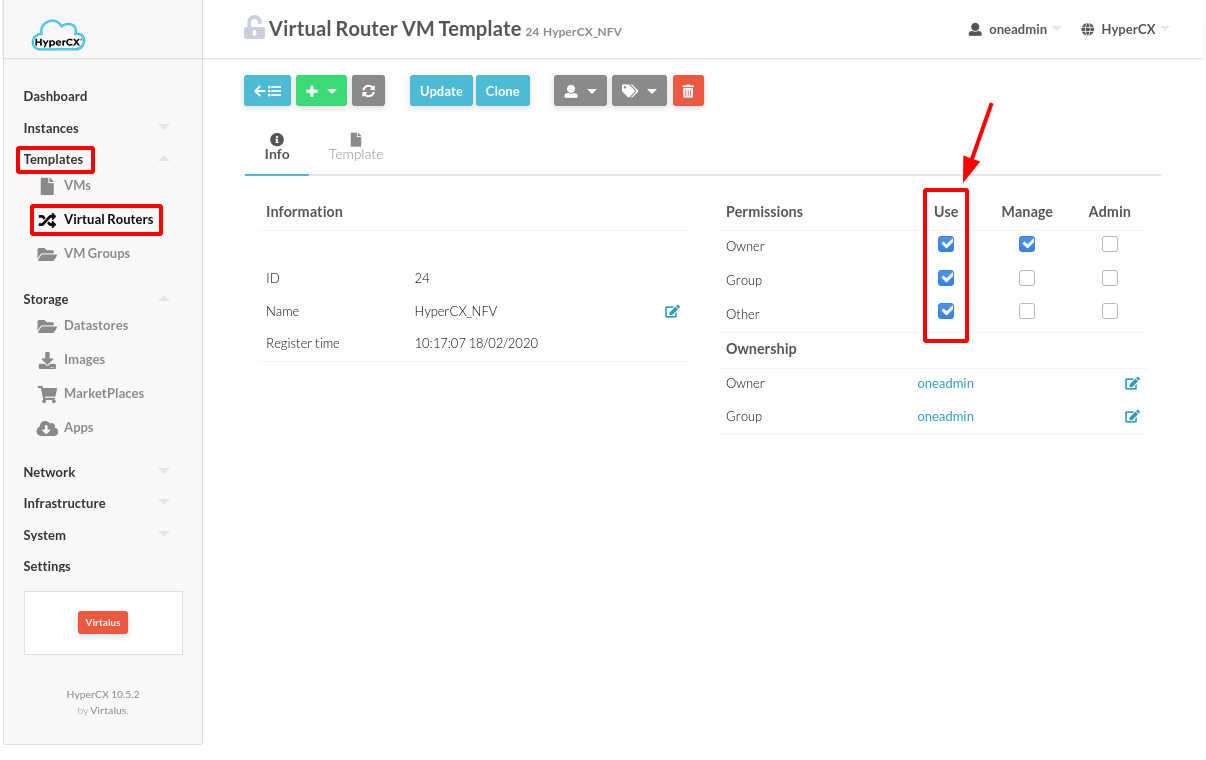
Administrators should download the HyperCX NFV template from the marketplace and allow users to use it.
Allocation Mode
Allocation Mode is a mode in which customers pay a fixed price for a speficied number of resources. With the WHMCS Connector developed by Virtalus it is easy to do so.
There are two main ways to assign the resources, by product or by client. In the former, the quotas in the product are defined and all users who request it will be ruled by them, easy to administer. In the second, the resources are customized to each client in line with their demands, more complex for administer.
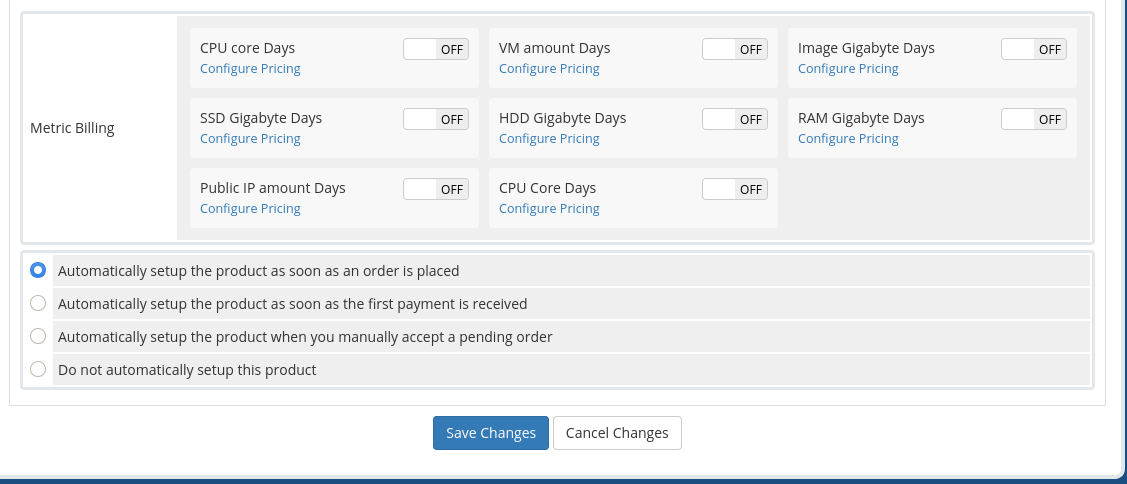
Configuring Quotas
By Product
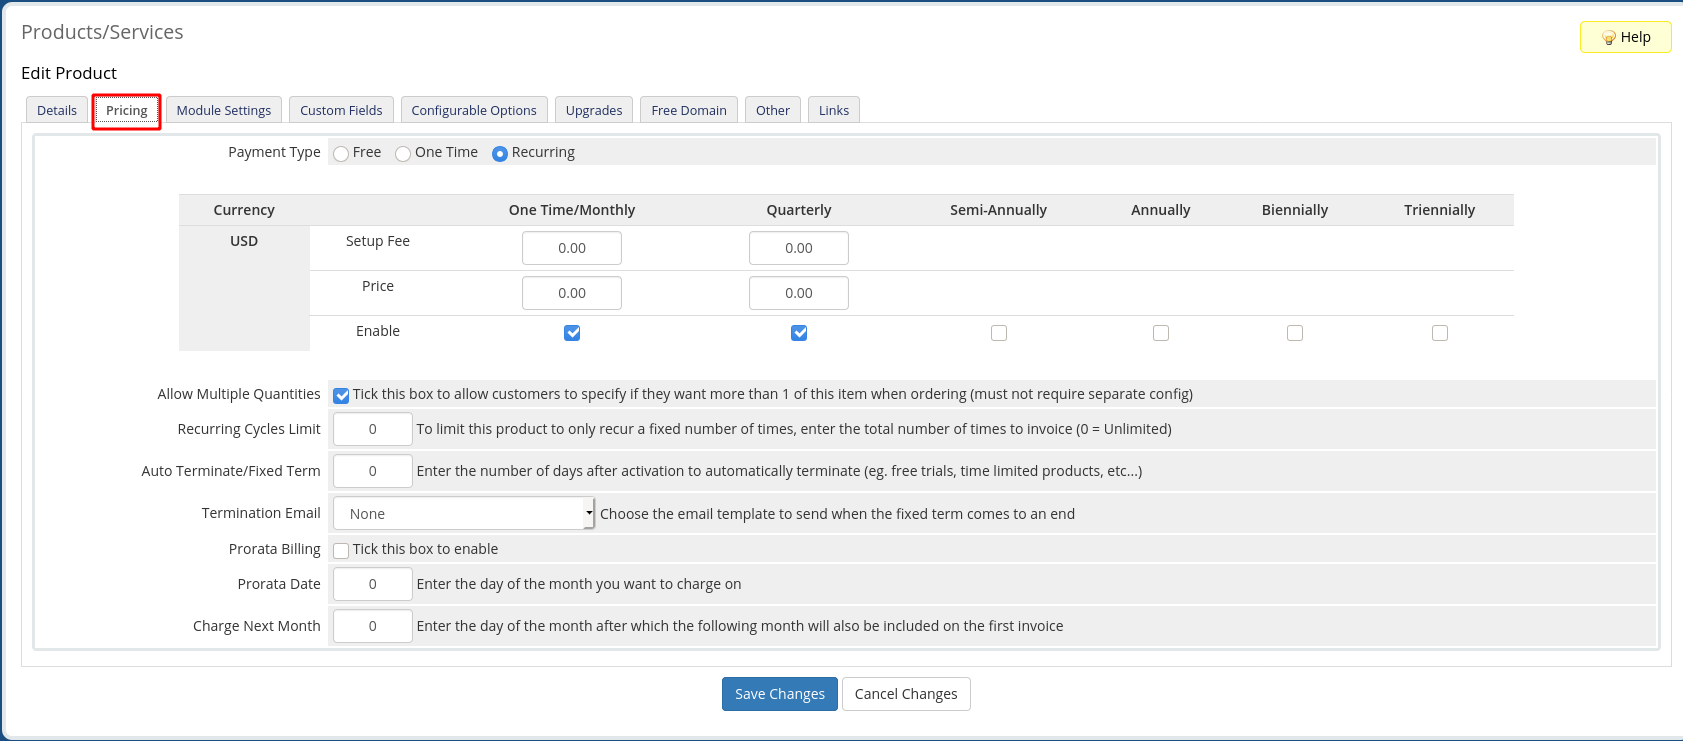
A product destined for Allocation Mode must be restricted in the amount of resources it wants to offer. So when creating it, you need to specify CPU, RAM, Storage, VM number, IP number, Storage for images and number of images quotas.
To create the product, do as follow:
-
Login to WHMCS Admin Portal with your account.
-
Go to Setup > Products/Services > Products/Services.
-
Create new Product
-
Configure the basic settings, similar to the example above.
-
Configure the quotas in the Module Settings section.
- Save the configurations.
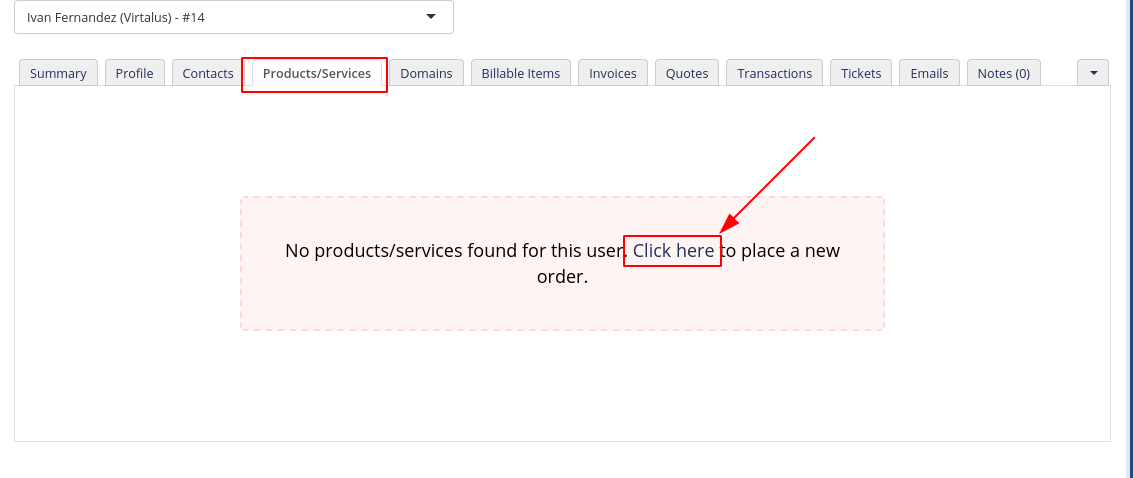
By Client
Configuring quotas pwe client is more flxible as it allows each customer to have the desired amount of resources. In this case there is a requirement, the customer must register in the cloud first.
To deploy the service, do the following:
-
Login to WHMCS Admin Portal with your account.
-
Go to the client list.
-
Select the user.
-
Go to the Products/Services section.
-
Click to create a new order.
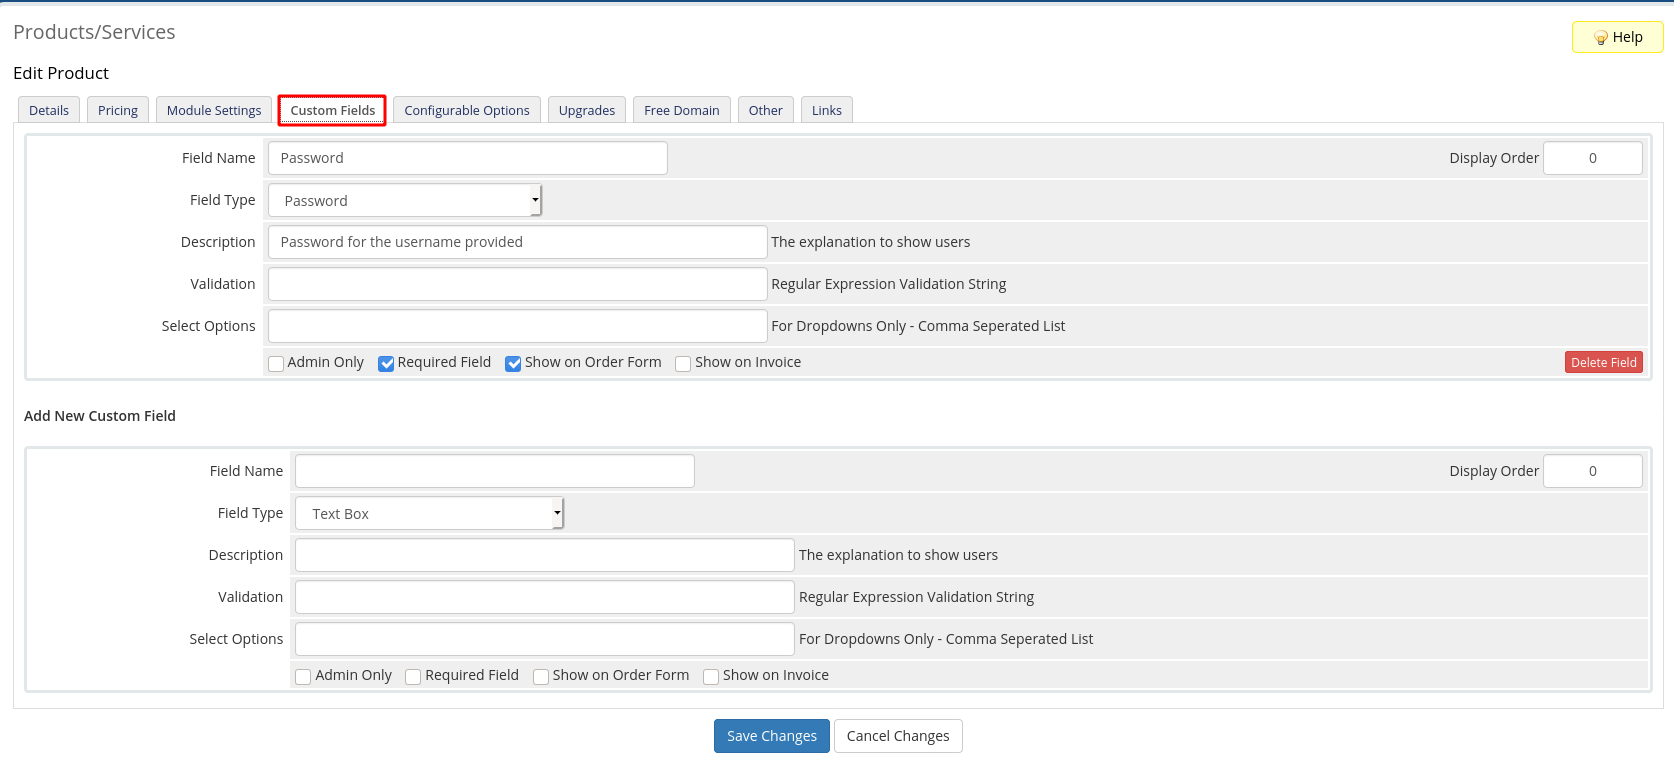
- Select the Product, the billing cycle and fill in the price.
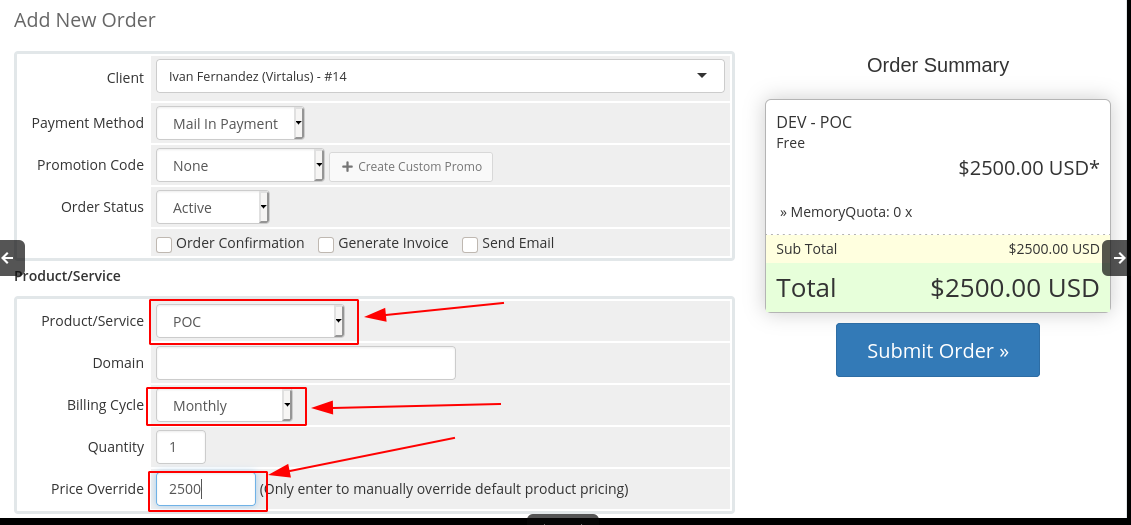
- Fill in the fields indicated with the password and the quotas.
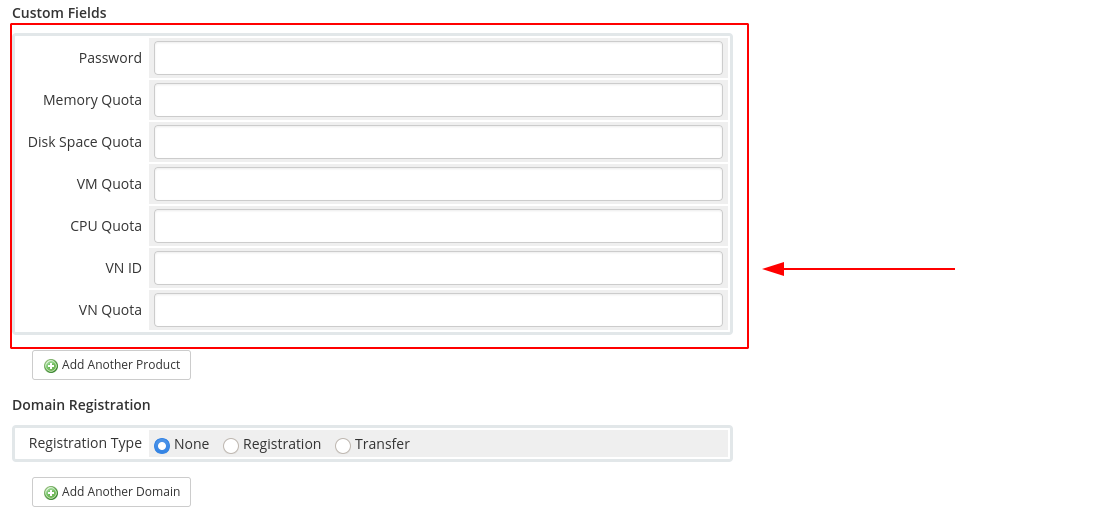
- Submit the order.
Updating Customer Quotas
Sometimes it is necessary to modify the quotas for a specific customer. To do that follow the next steps:
-
Login to WHMCS Admin Portal with your account.
-
Go to the client list.
-
Select the user.
-
Go to the Products/Services section.
-
Set the new desired quotas.
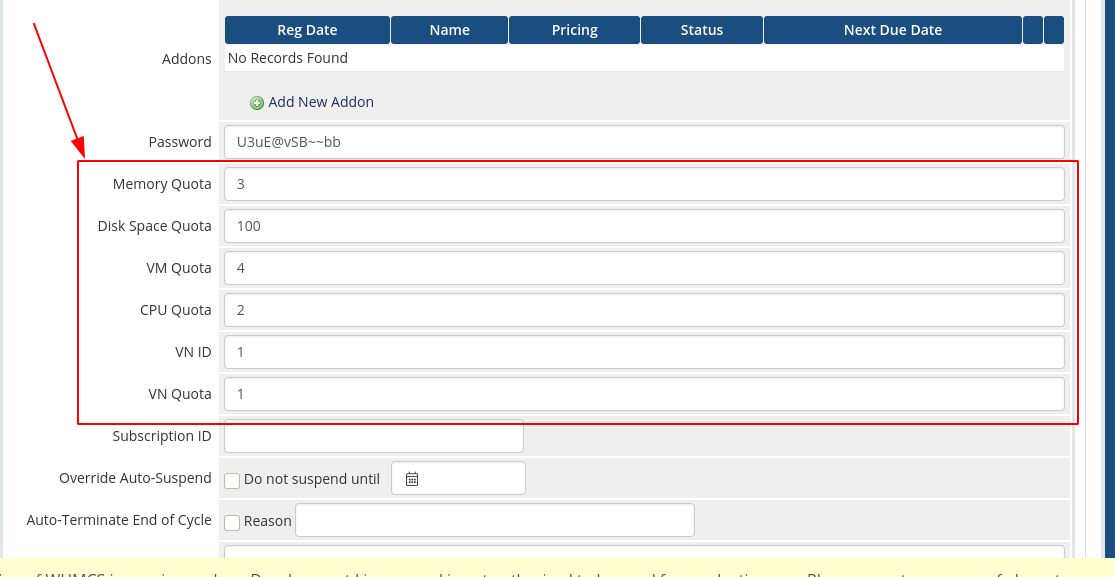
- Save the changes.
Security Groups
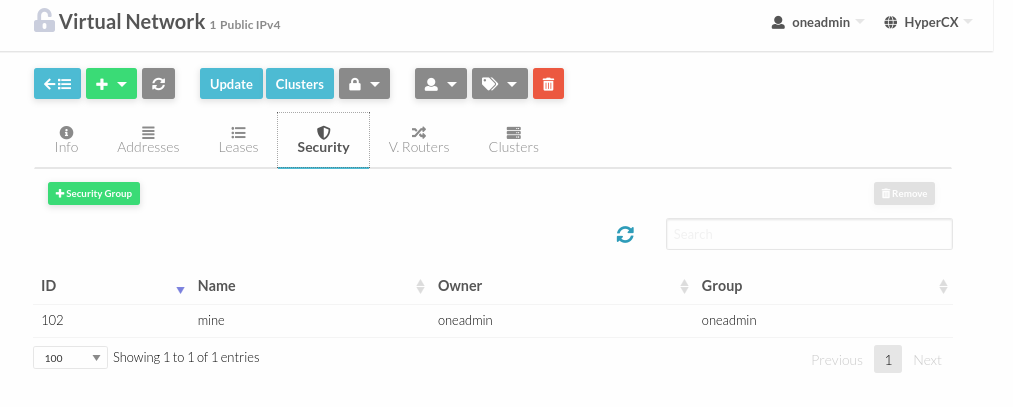
By default, there is a security group that allows all inbound and outbound traffic, and it applies to all networks by default. If you want customers to use their own security groups on the Public IPv4 network, you must first deselect the default security group on this network.
Before
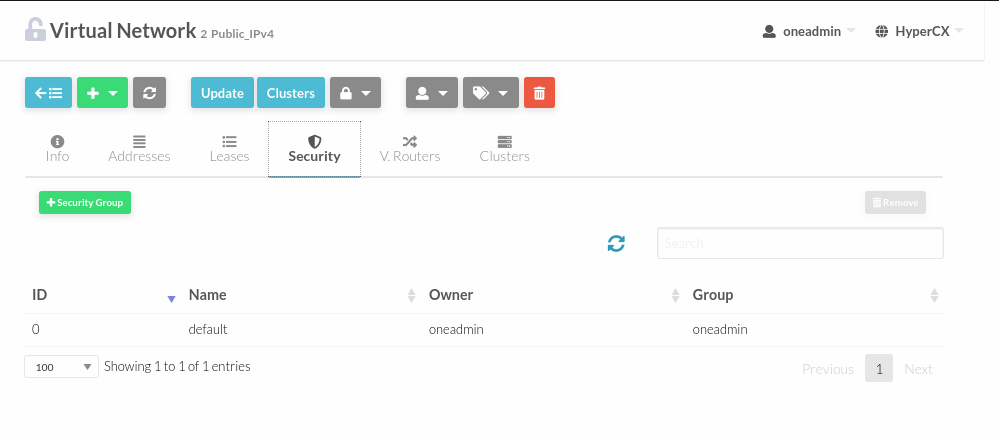
After that, you must create your own security group that allows basic traffic like icmp and port 22. This security group will be used by default on the Public IPv4 network which will allow customers to use their own security groups on that network.
Information related to the creation of security groups could be found here.
After
Users and groups for allocation mode
If allocation mode is desired, administrators must create and manage users and groups. If allocation mode is desired either alone or together with pay as you go mode, read this section. If not, it can be skipped.
For the advanced cloud it is desired that users can create other users inside their group. This is the default when WHMCS is used, and resources consumed by these other users are billed to the user who creted the account. In case of allocation mode, quota should be set for the group instead for individual users. This will enable that the original user (and owner of the group) can create new users inside his group, and resources used by these new users will fill out the original user's quota.
To implement this behavior, a group will be created for each user of the public cloud. This new group will allow simple and advanced views for group users, and simple, advanced and group_admin views for group admins. Advanced view should be the default for users while group_admin view should be the default for the group admin. A group admin will be created for this group, and this is the account that will be used by the user. This way, the user will be able to create new users inside his group. This group should enable it's users to create all of the resources.
The newly created group will allow that every user can see and use all the virtual networks. This most likely will not be the desired behavior in this case. To disable this behavior the ACL that allows the group to use the resource Virtual Networks must be deleted. This must be done for each group that was created. When groups are created through WHMCS this is already taken care of.
Upgrade WHMCS Connector
The WHMCS Connector is a feature developed by Virtalus to integrate WHMCS with HyperCX. It comes with the WHMCS appliance provided on Virtalus Marketplace and once the appliance is already deployed you have an easy way to update it without downtime.
To update the WHMCS Connector just follow the steps below:
- Download the connector
git clone https://gitlab.com/virtalus/whmcs_connector
- Move the package to the WHMCS folder
mv <path_to_folder>/hypercx <path_to_folder>/whmcs/modules/servers/