Managing Images
The Storage system allows HyperCX administrators and users to set up Images, which can be operating systems or data, to be used in Virtual Machines easily. These Images can be used by several Virtual Machines simultaneously, and also shared with other users.
Image Types
The following types of images are supported:
- OS: An bootable disk Image. Every VM template must define one DISK referring to an Image of this type.
- CDROM: These Images are read-only data. Only one Image of this type can be used in each VM template.
- DATABLOCK: A datablock Image is a storage for data. These Images can be created from previous existing data, or as an empty drive. Can not be used with LXD containers.
Image Persistency
Image persistency controls how the data is managed inside the image, and how the VM behaves. This is an important concept that should be understood. When creating OS images and DATABLOCKS, or updating any of those types of images, persistency can be specified between two options:
-
Persistent images: When persistent images are used, each image can only be used by a single virtual instance (container or VM). When deploying a workload with persistent image(s), a link is created on the corresponding system datastore, pointing directly to the image in the images datastore. This reduces the deployment time of the VM and, after destroying the VM, the data is kept inside the image. This mode is not recommended for production workloads, only to create golden images that will be used later as non-persistent images.
-
Non-persistent images: When non-persistent images are used, each image can be used many times on different virtual instances. When deploying a workload with non-persistent image(s), the image is fully copied to the corresponding system datastore. This increases the deployment time (PROLOG state) and, after destroying the VM, the data from the virtual instance is fully destroyed. This is the equivalent to any instance deployed in a public cloud and it is the mode that should be used on production workloads.
Bus and mapping driver
Two options under Advanced options should be taken into consideration when creating an image:
Bus
So-called "full virtualization" is a nice feature because it allows you to run any operating system virtualized. However, it's slow because the hypervisor has to emulate actual physical devices such as SCSI/SATA or IDE drives. This emulation is both complicated and inefficient. On most cases, Virtio drivers are recommended. Virtio is a virtualization standard for network and disk device drivers where just the guest's device driver "knows" it is running in a virtual environment, and cooperates with the hypervisor. This enables guests to get high performance network and disk operations, and gives most of the performance benefits of paravirtualization. SCSI/SATA or IDE bus is only recommended for Operating Systems without Virtio drivers. All images provided on Virtalus marketplaces use Virtio as Bus.
Image mapping driver
This options allows to specify the image format. The two most common formats are:
-
raw: Raw disk image format. This format is slightly faster compared to the others since there is no metadata or abstraction layers. Although Raw images provide better performance, only very basic features are available with a Raw image.
-
qcow2: QEMU Copy On Write uses a disk storage optimization strategy that delays allocation of storage until it is actually needed (thin provisioning). This format imposes metadata and an abstraction layer, making it slightly slower than raw format. This is the recommended format to use whenever possible.
Warning
When uploading new images, the mapping driver must be the same that was used when creating the image. If not, the VM or container will fail when being deployed.
Image Life-cycle
| Short state | State | Meaning |
|---|---|---|
| lock | LOCKED | The Image file is being copied or created in the Datastore. |
| lock | LOCKED_USED | Image file is being copied or created in the Datastore, with VMs waiting for the operation to finish. |
| lock | LOCKED_USED_PERS | Same as LOCKED_USED, for Persistent Images |
| rdy | READY | Image ready to be used. |
| used | USED | Non-persistent Image used by at least one VM. It can still be used by other VMs. |
| used | USED_PERS | Persistent Image is use by a VM. It cannot be used by new VMs. |
| disa | DISABLED | Image disabled by the owner, it cannot be used by new VMs. |
| err | ERROR | Error state, a FS operation failed. See the Image information with the Administrator for an error message. |
| dele | DELETE | The Image is being deleted from the Datastore. |
| clon | CLONE | The Image is being cloned. |
Managing Images
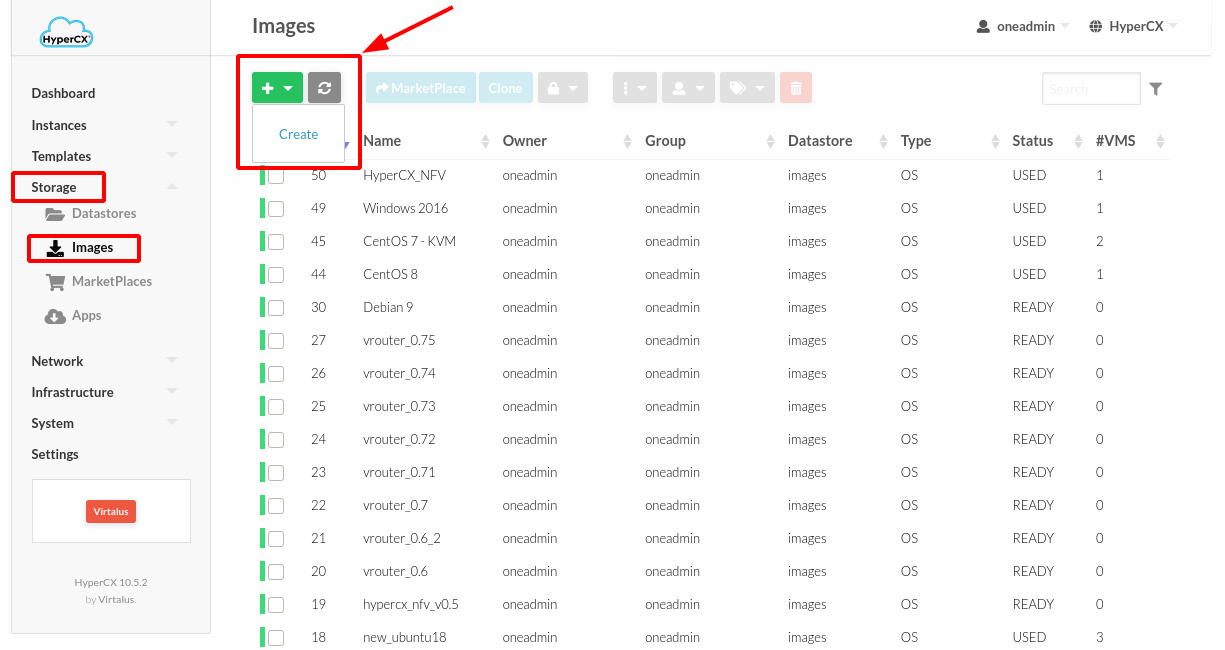
Users can manage their images using the HyperCX web portal, selecting the Images tab. By default this tab is available in all the views except for the Simple view.
Create Images
OS and CDROM types of Images can be created from an existing file, but for datablock Images you can specify a size and let HyperCX create an empty Image in the Datastore.
If you want to create an OS Image, you need to prepare a contextualized virtual machine, and extract its disk.
Once you have a disk you want to register, you can upload it directly using HyperCX:
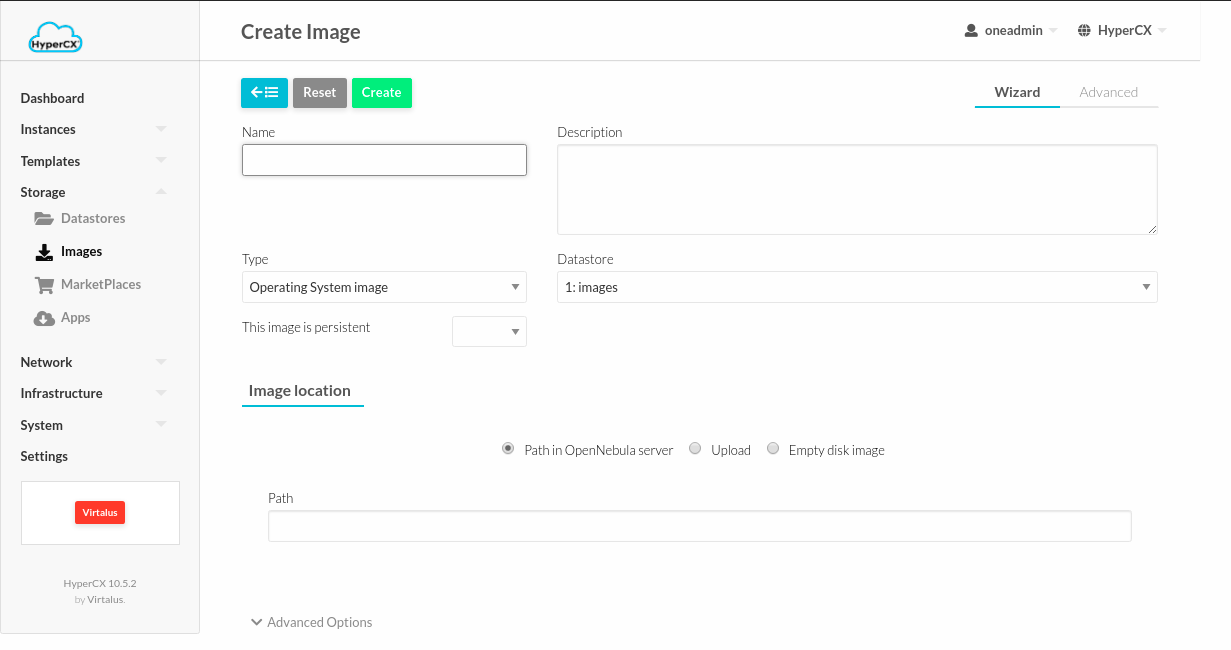
You need to choose the Datastore where to register the new Image.
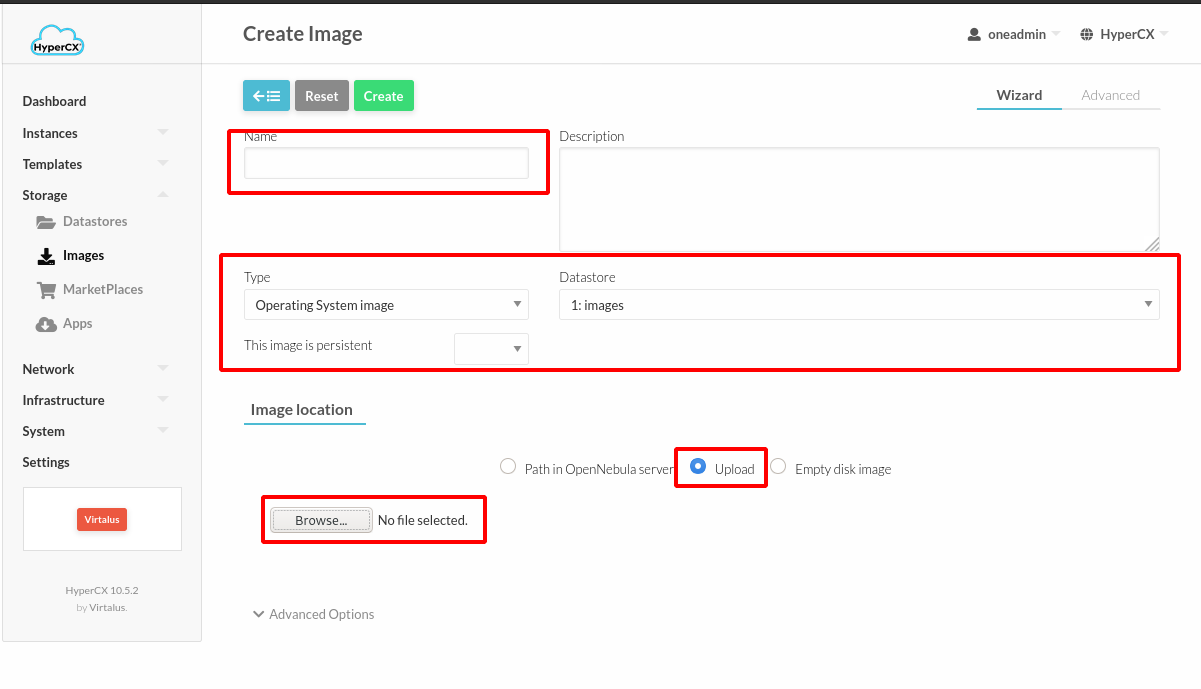
Upload new images
Images can be uploaded to the cloud. Just like in the case of templates, uploaded images will only be seen by the owner, and can be shared among the owner's group. To learn more follow [this link](../UserGuides$
Limitations when Uploading Images from HyperCX
Image file upload to the server via the client browser is possible. The process is as follow:
- Step 1: The client uploads the whole image file to the server in a temporal file.
- Step 2: HyperCX registers an Image setting the PATH to that temporal file.
- Step 3: HyperCX copies the image file to the datastore.
- Step 4: The temporal file is deleted and the request returns successfully to the user (a message pops up indicating that Image was uploaded correctly).
Note that when file sizes become big (normally over 1GB), and depending on your hardware, it may take long to complete the copying in step 3. Since the upload request needs to stay pending until copying is successful (so it can delete the temp file safely), there might be Ajax timeouts and/or lack of response from the server. This may cause errors, or trigger re-uploads (which re-initiate the loading progress bar).
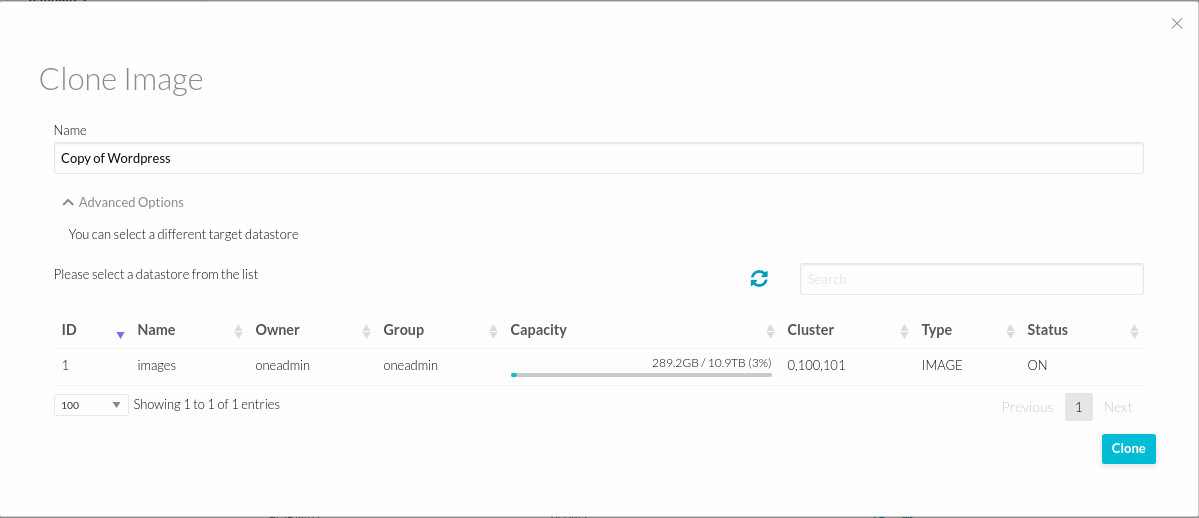
Clone Images
Existing Images can be cloned to a new one. This is useful to make a backup of an Image before you modify it, or to get a private persistent copy of an Image shared by other user. Note that persistent Images with snapshots cannot be cloned. In order to do so, the user would need to flatten it first, see the snapshots section for more information.
The Images tab contains a dialog for the clone operation: 
Sharing Images
The users can share their Images with other users in their group, or with all the users in HyperCX. See the Users and Groups documentation for more information.
Convert Images
HyperCX use qcow2 format for images.
This guide focuses on converting different image formats to qcow2 format, which is required especially when users are migrating from different platforms e.g VMware, Hyper-V.
Linux
The required package, qemu-img is commonly available in Linux repository.
For example in Ubuntu, update repository using Terminal
sudo apt update
Download package qemu-utils
sudo apt install qemu-utils
-
Convert VMDK to QCOW2
qemu-img convert -f vmdk image.vmdk -O qcow2 image.qcow2 -
Convert VHD to QCOW2
qemu-img convert -f vpc image.vhd -O qcow2 image.qcow2 -
Convert VDI to QCOW2
qemu-img convert -f vdi image.vdi -O qcow2 image.qcow2 -
Convert RAW to QCOW2
qemu-img convert -f raw image.raw -O qcow2 image.qcow2
Windows
In Windows OS, download & install qemu-img package available at
https://www.qemu.org/download/#windows
-
Configure Enviroment Variables
- Choose Start > Computer and right-click Properties.
- Click Advanced system settings.
- In the System Properties dialog box, click Advanced > Environment Variables.
- In the Environment Variables dialog box, search for Path in the System Variable area and click Edit. Add C:\Program Files\qemu to Variable Value. Use semicolons (;) to separate variable values.
- Click OK
-
Converting Images
- Open cmd and navigate to qemu-img installation path e.g. C:\ProgramFiles\qemu.
- Run the following command to convert the image file format from VMDK to QCOW2:
qemu-img convert -p -f vmdk -O qcow2 centos6.9.vmdk centos6.9.qcow2
After the conversion is complete, see Upload New Images guide to upload newly converted qcow2 images to HyperCX.