Networking
Welcome to our Quick Start guide for setting up networking function in HyperCX. The idea is to quickly setup basic Virtual Router and Private Network in HyperCX.
In this guide you will learn:
* Creating Virtual Network
* Setup of Virtual Router
* OpenVPN Client Configurations
Creating Virtual Network
HyperCX is designed to provide easy user experience managing network functions. To create a new Virtual Network follow the steps below:
-
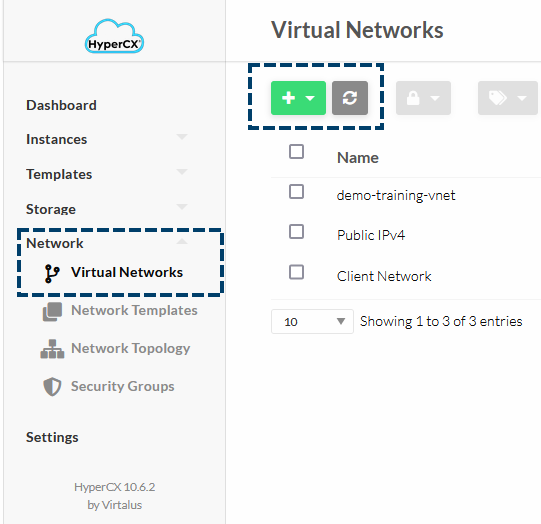
In HyperCX frontend, go to Network section and then to Virtual Networks
-
Click on Add and Instantiate
-
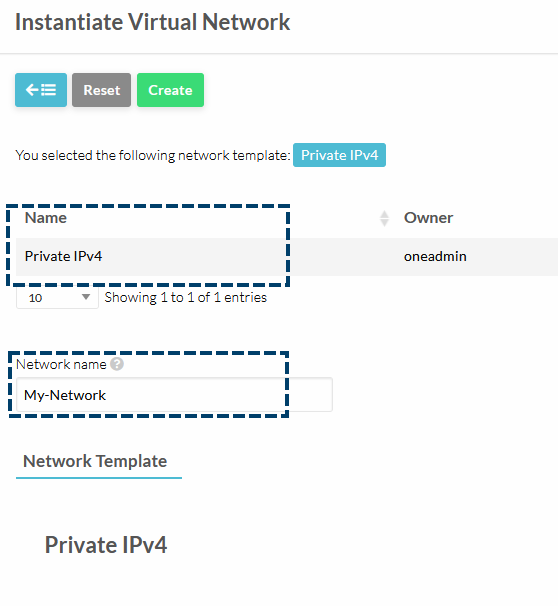
Select Private IPv4 and give name to your new virtual network
-
Scroll down and click on Add Address Range. In the popup dialog, Select the IP version, add First IP address and Size (IP Address Range) then press Add
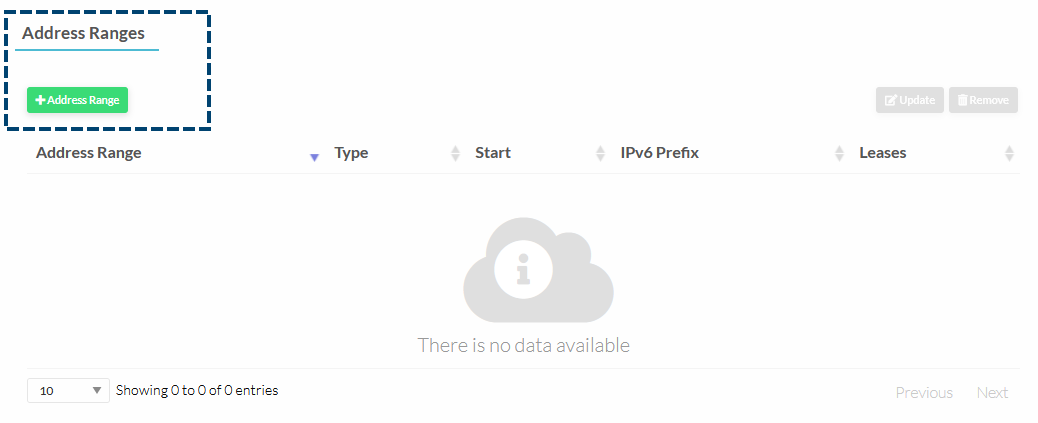

!!! note The First IP address will be used as a gateway for your network in Virtual Router later
-
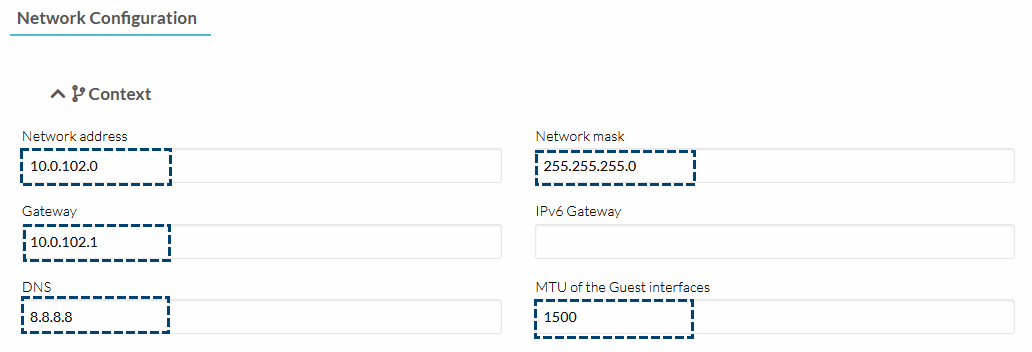
Scroll down further to Network Configuration, click on Context and fill in the following details according to your IP Address range that you added in previous step
-
Scroll back to top and click on Create. You will now see your new network in the list of Virtual Networks
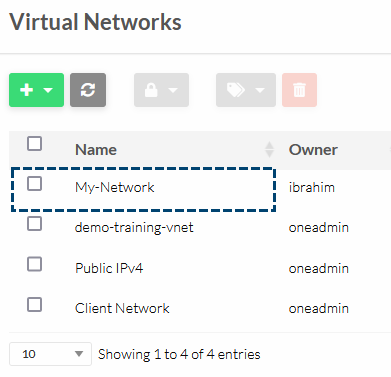
You have now succesfully created a new Virtual Network.
Setup Virtual Router
After you have created your new Virtual Network, you need a Virtual Router to route traffic to it. For this purpose, HyperCX provides ready-made package called HyperCX NFV. It functions like a router and also supports features such as OpenVPN, Load Balancing, Site-to-Site VPN and others.
To create and instantiate a Virtal Router follow the steps below:
-
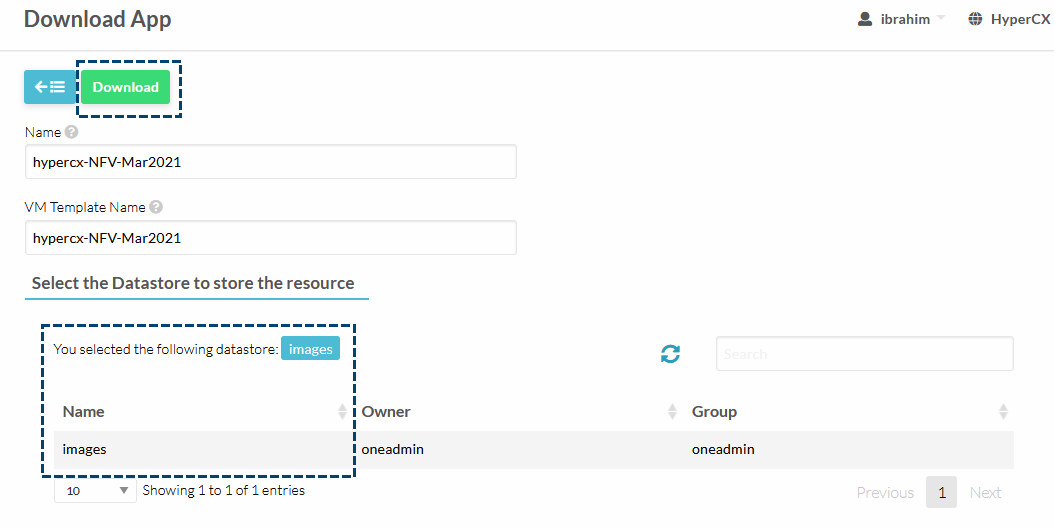
In HyperCX frontend, go to Storage then Apps and search for NFV. Select NFV appliance then Import To Datastore.

-
Select Image in Datastore and click on Download as shown below
-
After few seconds, go to Instances section then Virtual Routers. Click on Add button, Initialize your new router and select VPN. In the dialog below, write Username and Password to generate OpenVPN Client file.
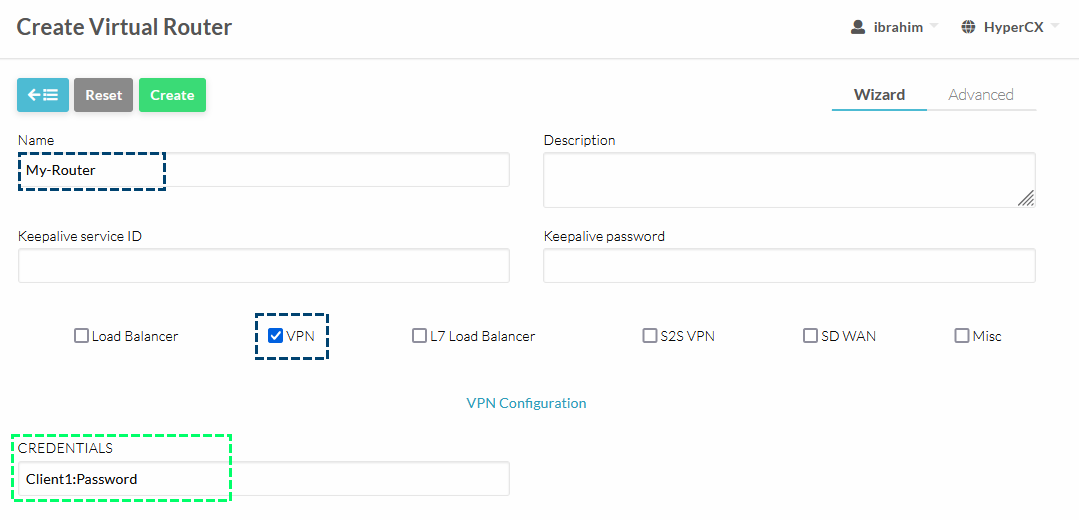
Note
You can add multiple user. The format is user1:pass user2:pass user3:pass
-
Add a name for Virtual Router and under Network click on Add Network Interface. Select Public IPv4 and Default in Security Group. Similarly, Add another Network Interface and this time add your Virtual Network. The configuration will look something like this

-
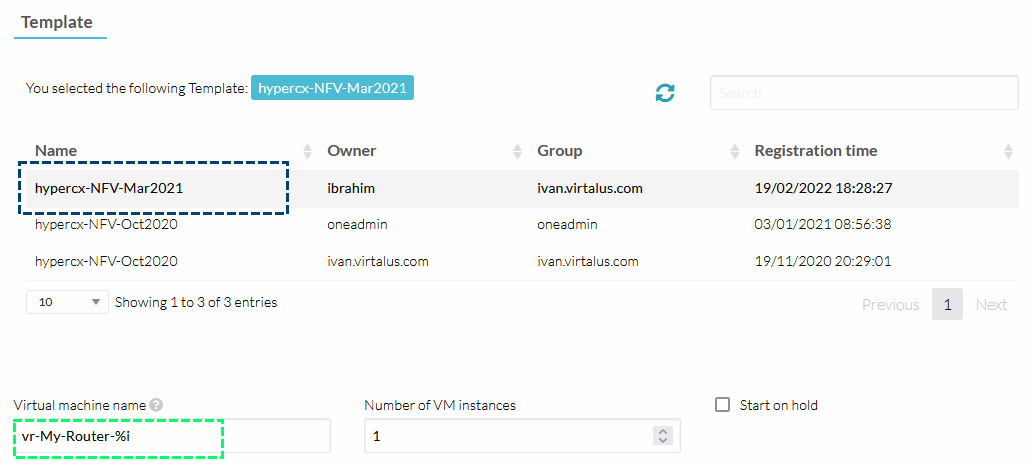
Under Template, select the newly downloaded HyperCX-NFV appliance and enter a name for it. You can also leave name field blank, HyperCX will auto generate a name for it like shown below.
-
Under Custom Attributes, Set Password for Virtual Router's Root user that will be used to login.
Important
We recommend using ssh keys for login. They can also be added later when the Virtual Router is instantiated.

-
Go to VMs section and your new Virtual Router should be created. Wait few seconds for Status to show Running state.

You have now successfully deployed a Virtual Router!
OpenVPN Client File
HyperCX Virtual Router leverages OpenVPN for VPN connections. In order to provide seamless experience, our engineers have packaged OpenVPN with HyperCX NFV which creates ovpn files for you.
To obtain OVPN files:
1. Connect to your Virtual Router Log in to your Virtual Router
2. You will be greeted with the following screen. The OpenVPN Client files are present in vpn_config_files in / directory
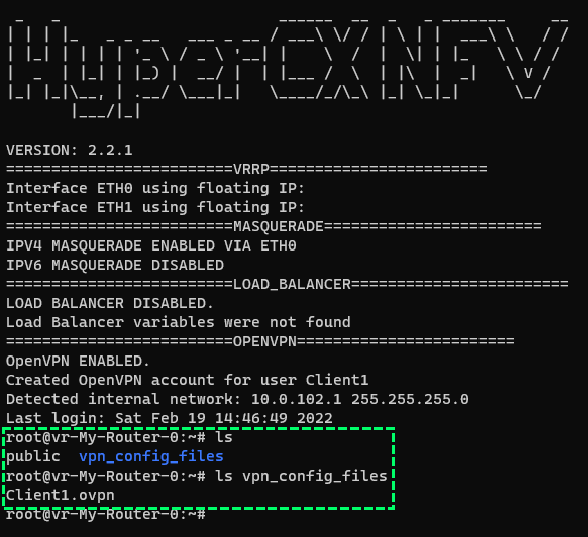
The VPN will connect automatically on startup. You can also confirm with the following command
root@vr-My-Router-0:~# ip a
3: eth1: <BROADCAST,MULTICAST,UP,LOWER_UP> mtu 1500 qdisc fq_codel state UP group default qlen 1000
    link/ether 02:00:0a:00:66:01 brd ff:ff:ff:ff:ff:ff
    inet 10.0.102.1/24 brd 10.0.102.255 scope global eth1
       valid_lft forever preferred_lft forever
You have now successfully set up a Private Network and Virtual Router. You may now create a new Virtual Machine and add your private network. The VM will be accessible after connecting to VPN. You can also generate new ovpn files within Virtual Router for other users.