HyperCX GPU
Overview
Graphics Processing Units (GPUs) have become the tool choice in computationally demanding fields such as scientific computing and machine learning. GPU capable VMs enables every virtual machine to get the same GPU benefits as a physical desktop. Because work that was typically done by the CPU has been offloaded to the GPU, the user has a much better experience and more users can be supported, besides enabling additional fields.
GPU feature is available only on specific HyperCX clusters. For enabled clusters, one or several servers will contain GPU cards ready to be used. These can be seen by selecting the host under Infrastructure --> Hosts and selecting PCI tab.
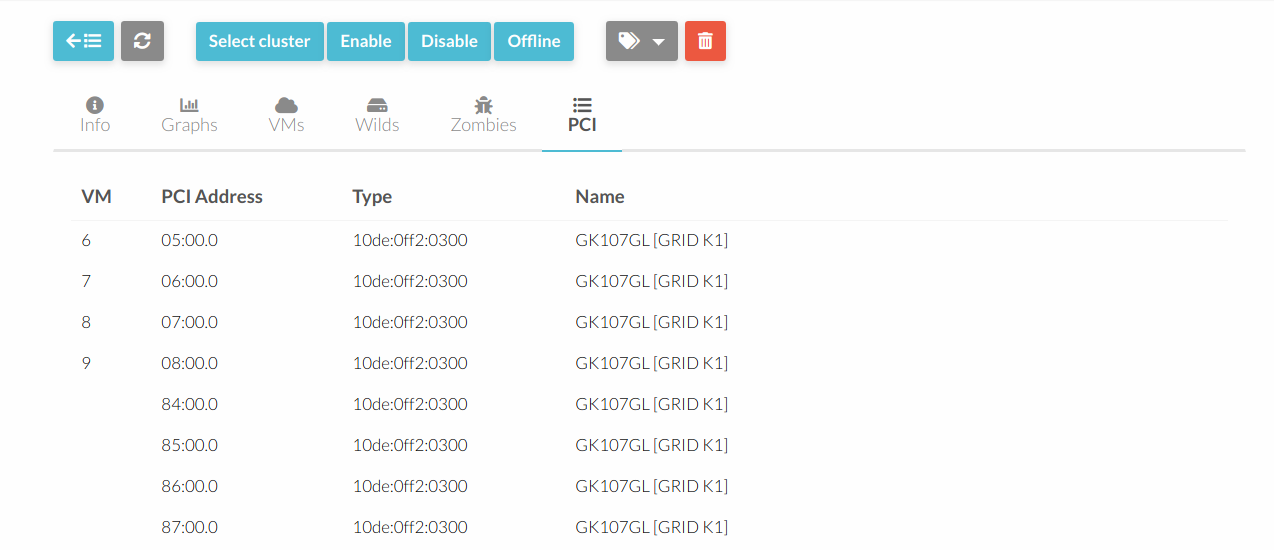
All the available GPU cards can be seen on this tab, and which VM is using a specific card, if any. Each card can only be assigned to a single VM.
Adding a GPU card to a template
In order to use a GPU card on a VM, it must be configured on the template first, and then that template must be instantiated. HyperCX's scheduler will find a host with the specified GPU available and will only deploy the VM in that host. If no hosts match, an error will occur and the VM will stay in PENDING state. If it is manually deployed on a host (bypassing the scheduler) it will go into FAILURE state since the specified device it is not available on that host.
To add a GPU to a template, update the template, go to Input/Output tab and add the device under PCI Devices.
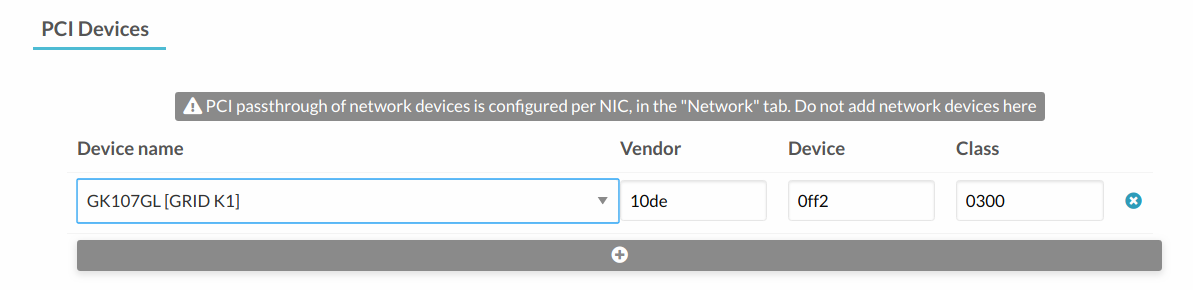
Note: The server might contain several cards from the same model of the same manufacturer. In this case, only one device will be shown on the template when adding the new PCI device. This is because Vendor, Device and Class match among all the available GPU cards in the server and it is the expected behavior. Once the device is selected, HyperCX will assign an unused card of the specified device model to each VM instantiated until the GPU cards run out.
Guest OS configuration
After deploying the VM, assuming an appliance from the market was used, the GPU drivers will need to be installed. In this case, an example will be provided using Windows Server 2019 and Nvidia Grid K1.
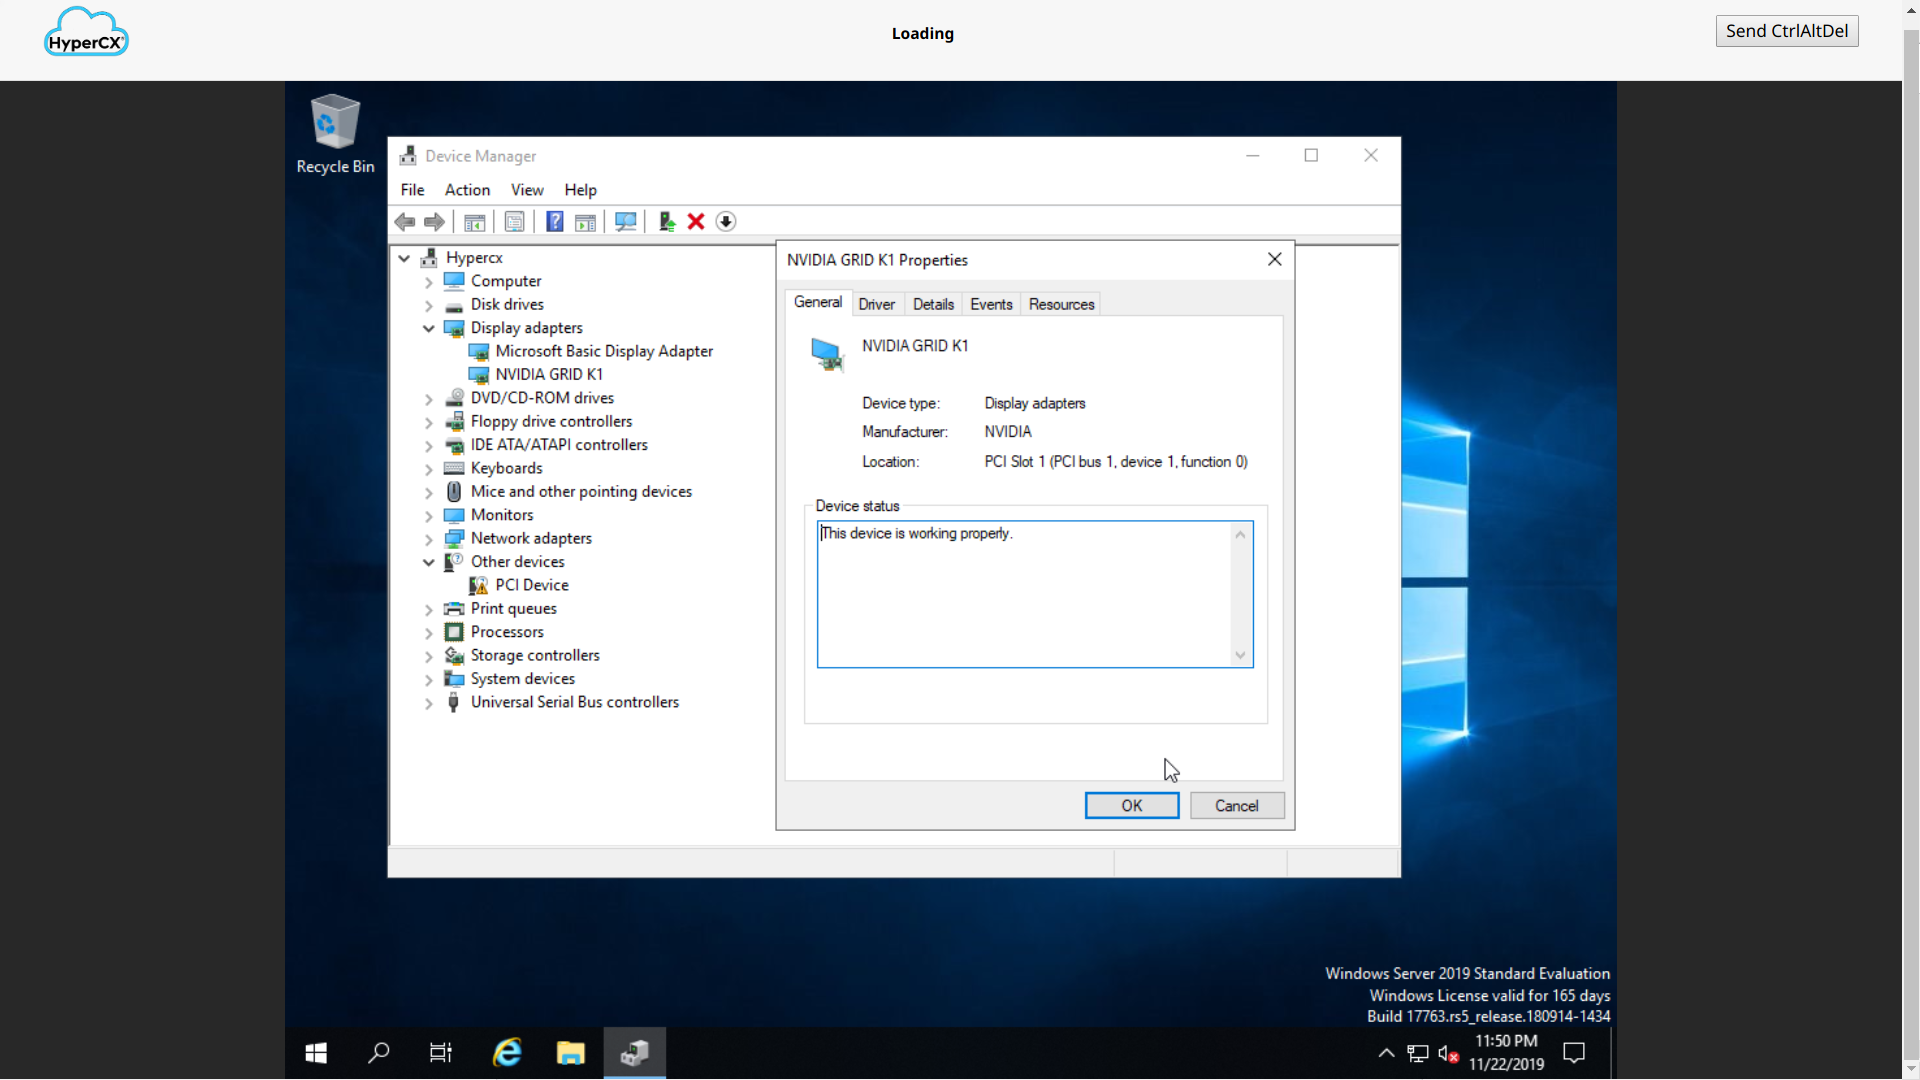
Before installing the drivers, the guest OS should show something like this:
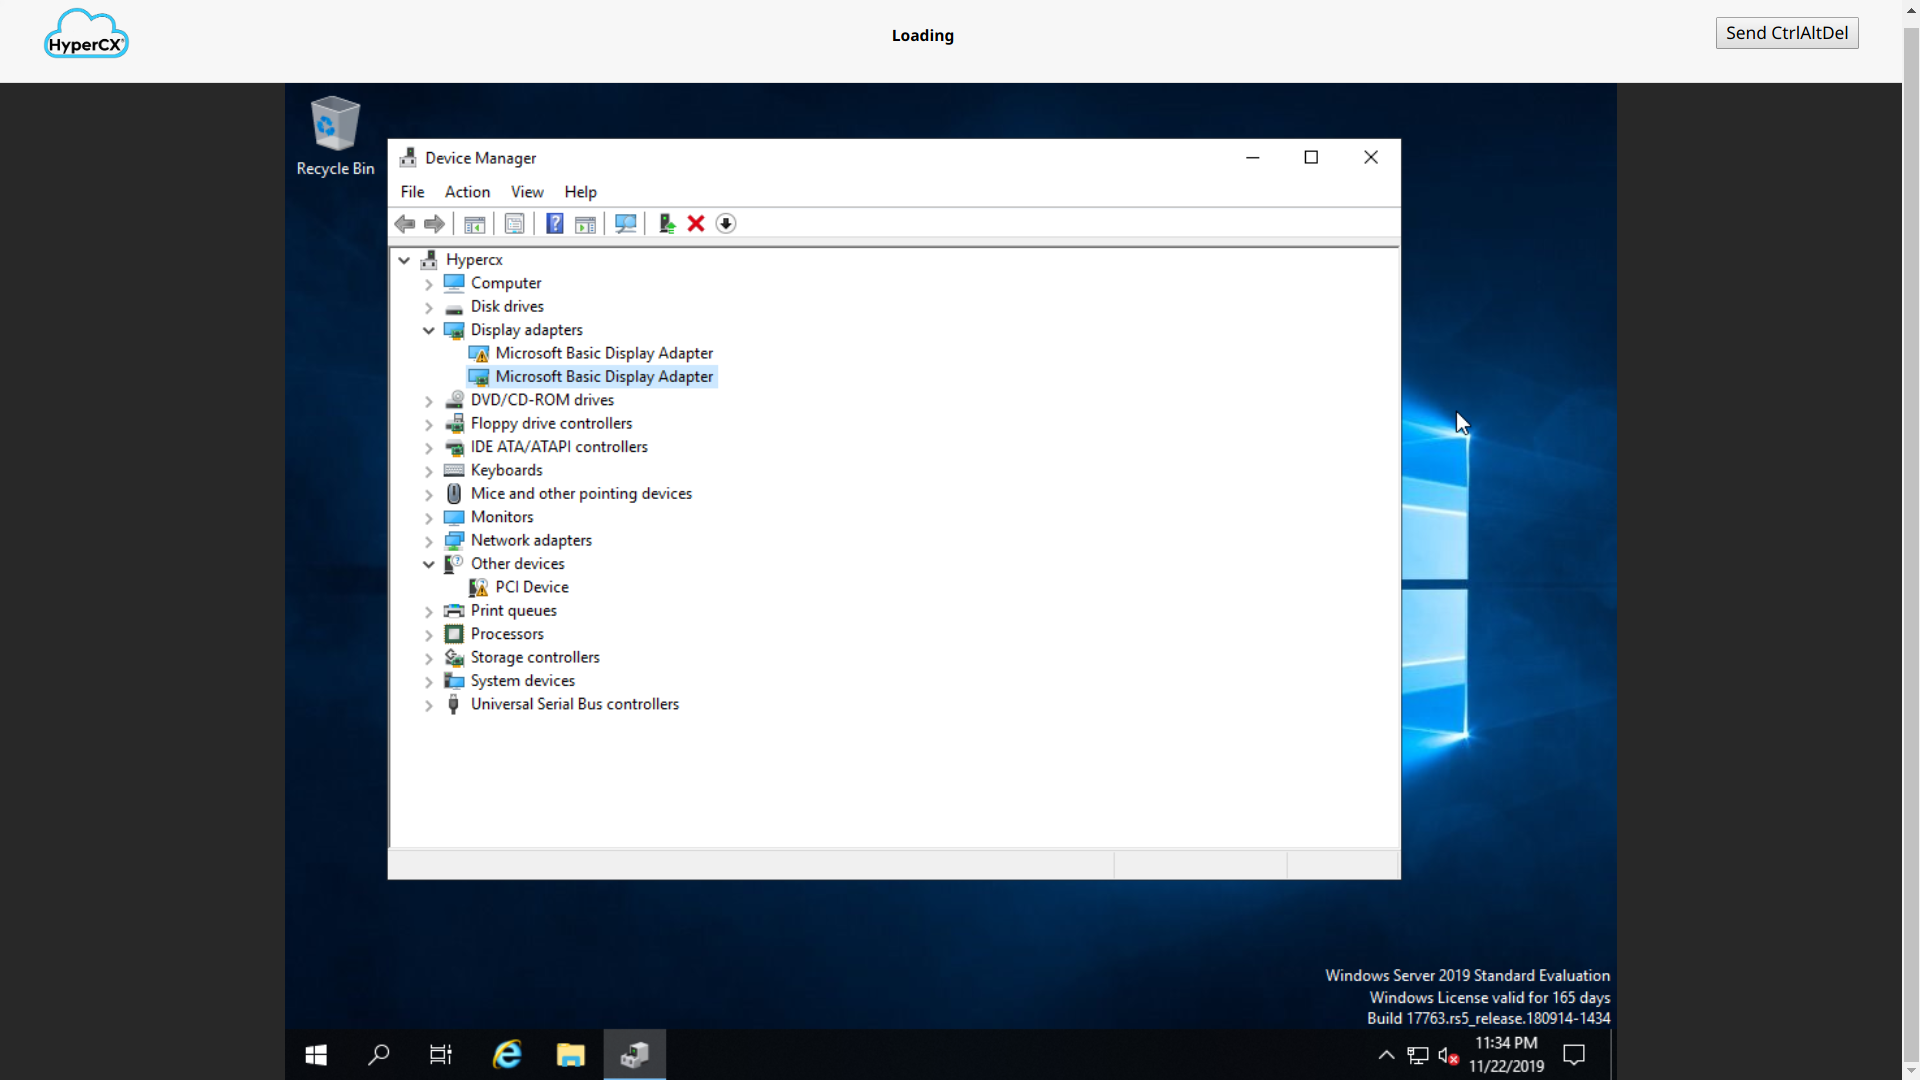
There are two video cards since once is the internal used by QEMU. This is the video card used to render the VNC connection. The second video card is the Nvidia Grid in this example. Drivers for the video card can be obtained from the manufacturer site. In this case, Nvidia Drivers Download site. Select GRID under Product Type, then GRID Series and GRID K1. Select your Operating System, download and install.
In case of Windows operating systems, the VNC connection must be removed from the VM once the GPU driver is installed. This is necessary to avoid hardware conflicts between the two graphic devices that the VM contains, the dedicated GPU card and the dedicated VNC card.
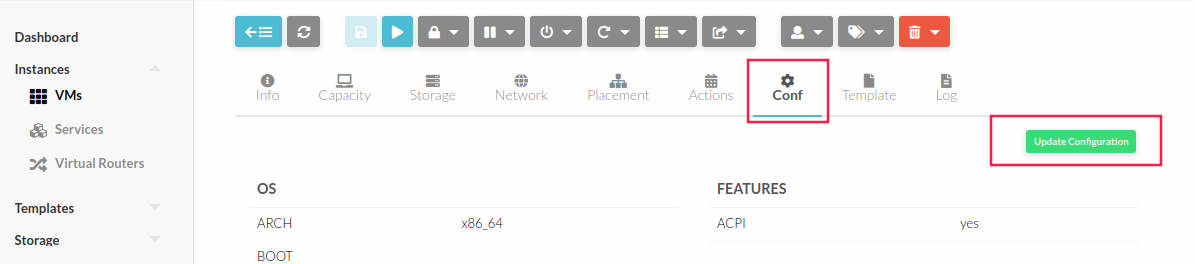
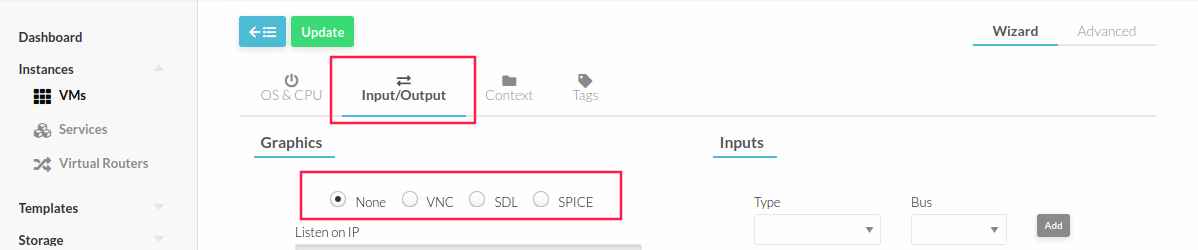
To do this, the VM must be turned off and then access its configuration. In the Conf tab, click on the Update Configuration button and then on Input/Output and select None in the Graphics section, then click on the Update button to save the changes. Once finished start the VM.
Note: When removing the VNC connection, access to the VM will not be available in this way in the portal, so we suggest that before removing the VNC card, remote access to the VM through RDP or another method should be configured.
In case it is necessary to access the VM using the HyperCX VNC connection for some reason, it can be restored by performing the steps described above but this time selecting the option VNC instead of NONE.
After a successfull installation you will be ready to use the GPU card.