Templates
Overview
In HyperCX, Virtual Machines are instantiated from VM Templates. This section explains how to describe the wanted-to-be-ran Virtual Machine. The VM Template Pool allows HyperCX administrators and users to register Virtual Machine definitions in the system, to be instantiated later as Virtual Machine instances. These Templates can be instantiated several times, and also shared with other users.
The most important aspects in a template are:
-
Capacity in terms of Memory and CPU
-
Set of virtual NICs attached to one or more virtual networks
-
Set of virtual disks created from images on a Datastore.
-
Optional attributes like VNC graphics, the booting order, context information, etc.
In short VMs are instantiated from a Template. Settings can be changed on the VM during instantiation or after being instantiated, but the initial configuration is inherited from the Template. Templates are stored in the system to easily browse and instantiate VMs from them.
Templates Management
HyperCX allows admins to manage templates that can be accessed by the end user
Access Rights
For a user to manage templates admin should have given access to the user for managing those templates. Templates can only be allowed by an admin for a user to use and manage. Access Control List also play a vital role in allowing users manage templates, images and virtual networks.
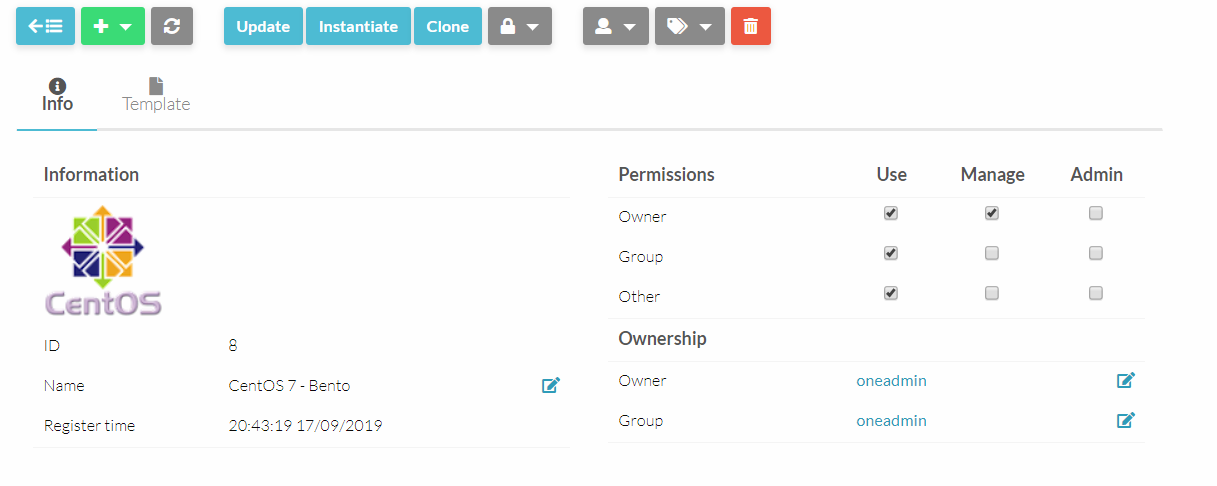
Permissions
Permissions define which users can have access to the VM template and what rights they reserve on that specific template. Following table explains the permission rights and their usage
| Use | Manage | Admin | |
|---|---|---|---|
| Owner | Owner can use this template | Owner can manage this template | Owner is the admin to this template |
| Group | The group of owner can use this template | The group of owner can use this template | The group of owner is the admin to this template |
| Other | Everyone can use this template | Everyone can manage this template | Everyone is the admin to this template |
Updating template
HyperCX provides preconfigured templates that can be obtained from the market but user can make changes to these templates to define its configurations and other elements that might be necessary for a successful execution. User can update a template’s configuration by,
-
Selecting the template.
-
Click on
 .
.
General
General section includes most user-friendly configuration of a VM template that needs to be defined. Following are it’s attributes
| Attribute | Description | Mandatory |
|---|---|---|
| NAME | Name of the Template. Will be also used by the VM if no name is specified for the VM during instantiation | YES For Templates NO For VMs |
| MEMORY | Amount of RAM required for the VM, in Megabytes | YES |
| CPU | Percentage of physical CPU divided by 100 required for the Virtual Machine, half a processor is written 0.5. | YES |
| VCPU | Number of virtual cpus. This value is optional, the default hypervisor behavior is used, usually one virtual CPU | No |
Note
CPU overprovisioning means using a vCPU to CPU ratio bigger than 1. This is a common technique used in Cloud Computing and it is totally safe. The recommended overprovisioning ratio is 4 to 1, but can change depending on the system requirements. On Virtalus Public Clouds, for example, users are not able to set the CPU value, instead, it is automatically calculated from the vCPU amount. On Private Clouds, administrators are allowed to tune this ratio per VM if desired.
Storage
Each disk is defined with a DISK attribute. A VM can use three types of disk:
- Use a persistent Image: changes to the disk image will persist after the VM is terminated.
- Use a non-persistent Image: a copy of the source Image is used, changes made to the VM disk will be lost.
- Volatile: disks are created on the fly on the target host. After the VM is terminated the disk is disposed.
Warning
Persistent images are only recommended to create golden images. One use case is to modify a generic Ubuntu VM by installing a custom software. After the operations are done, because the image was persistent, the changes will persist after the VM is destroyed. At this moment, the image can be changed back to non-persistent to be used normally as a custom template modified inside HyperCX.
Warning
Depending on the specific cluster, persistent images might not perform as expected. This and the fact that only one VM can be deployed from a template that uses at least one persistent image are the reasons why persistent images are not recommended in HyperCX for normal operations.
User can chose to add more disks based on needs of the template, user can add more disks by clicking on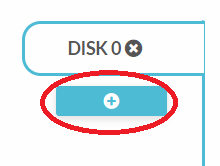 .
.
Network
In this section networking capabilities are managed, user can add or delete networking interface cards using the predefined virtual networks. Network interfaces added here will be automatically added when a template is initialized. Either way HyperCX gets the work done in terms of template’s networking capabilities.
Network interfaces can be defined in two different ways:
- Manual selection: interfaces are attached to a pre-selected Virtual Network. Note that this may require to build multiple templates considering the available networks in each cluster.
- Automatic selection: Virtual networks will be scheduled like other resources needed by the VM (like hosts or datastores). This way, you can hint the type of network the VM will need and it will be automatically selected among those available in the cluster.
NOTE: When an instance has two or more network cards belonging to different virtual networks the gateway of the first network card is the one configured inside the VM by the context packages.learn more
Network Interfaces Alias
Network interface alias allows you to have more than one IP on each network interface. This does not create a new virtual interface on the VM. The alias address is added to the network interface. An alias can be attached and detached. Note also that when a nic with an alias is detached, all the associated alias are also detached.
The alias takes a lease from the network which it belongs to. So, for HyperCX it is the same as a NIC and exposes the same management interface, it is just different in terms of the associated virtual network interface within the VM.
Note
The network of the alias can be different from the network of the nic which is alias of.
OS & CPU
This section defines CPU and machine architecture attributes that might be necessary to execute the VM it depends upon the nature of the OS that needs to be deployed. This is optional and HyperCX will assume the best settings.
CPU Topology
Although changing the CPU Topology of a VM generally does not affect its behavior, some applications may require a specific topology. This is possible by customizing the template, but all the VMs generated from it will be created with the specified topology. To make the modification, follow these steps:
- Go to the desired VM Template
- Update Configuration
- Enable Numa Topology within NUMA window
- Set up the desired topology
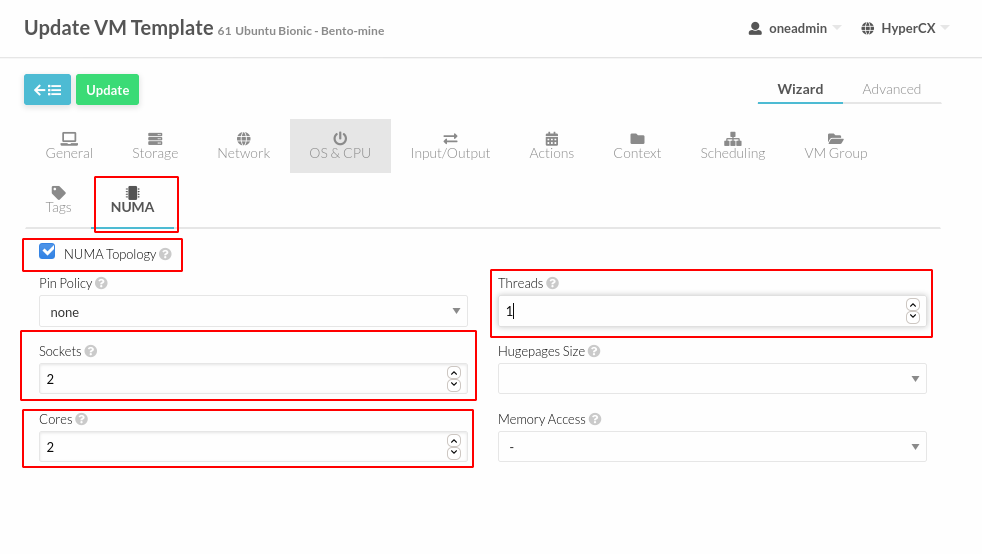
Note
The Pin Policy must remain as none
Actions
This feature allows HyperCX users to schedule actions based on their requirements.
Context
HyperCX uses a method called contextualization to send information to the VM at boot time. It's most basic usage is to share configuration(Network, User access credentials and more) with the VM so it can be configured. For a new VM user can set passwords (Although we recommend passwordless SSH), hostname, network settings and much more. Contextualization at this moment only works on templates downloaded from the marketplace (appliances).
Note
VMs on reboot always recontextualizes the data from the VM template therefore changes made inside the VM will be restored to the ones defined here. To avoid this you need to remove the specific context configuration in the VM you do not want HyperCX to configure.
Next, the most important contextualization options are explained.
User Credentials
One of the other very important things you have to configure is user credentials to connect to the newly created Virtual Machine. This comes pre-configured for OS appliances downloaded from the marketplace, next you will be able to know how it works and fine tune it if needed.
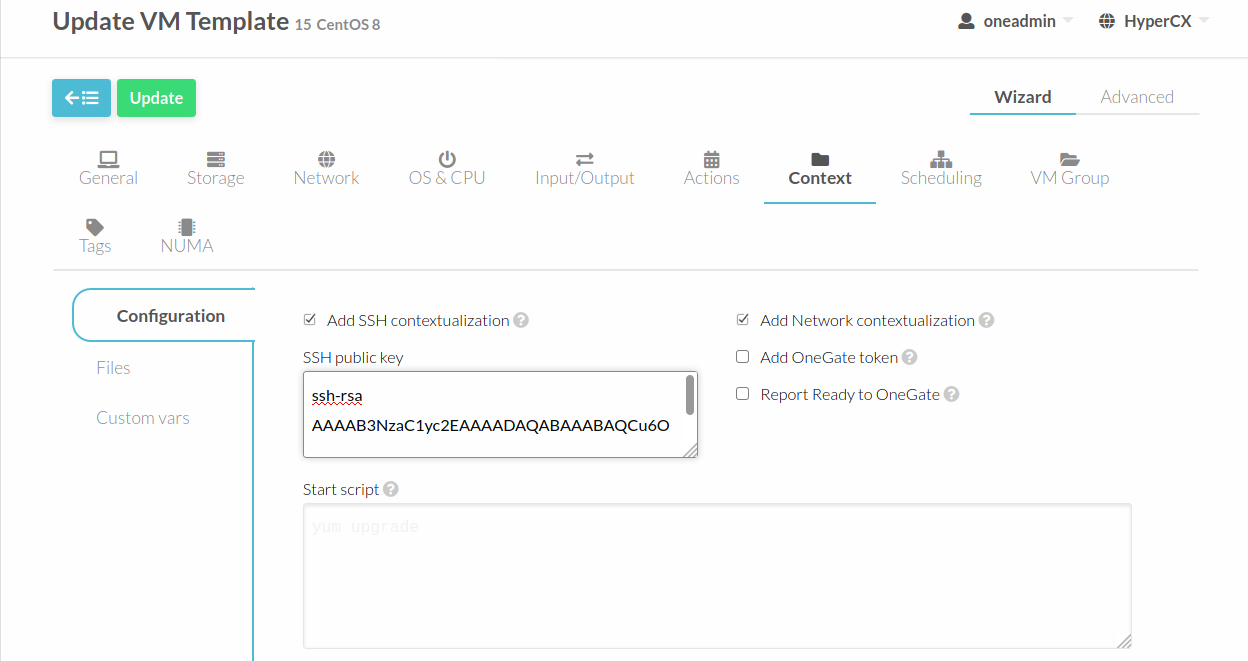
Linux
We recommend using SSH public key authentication and using it with HyperCX is very convenient, just add the SSH public key to your user settings or directly into the template and HyperCX does the magic next time you create a VM out of this template your public key will be automatically contextualized to that VM.
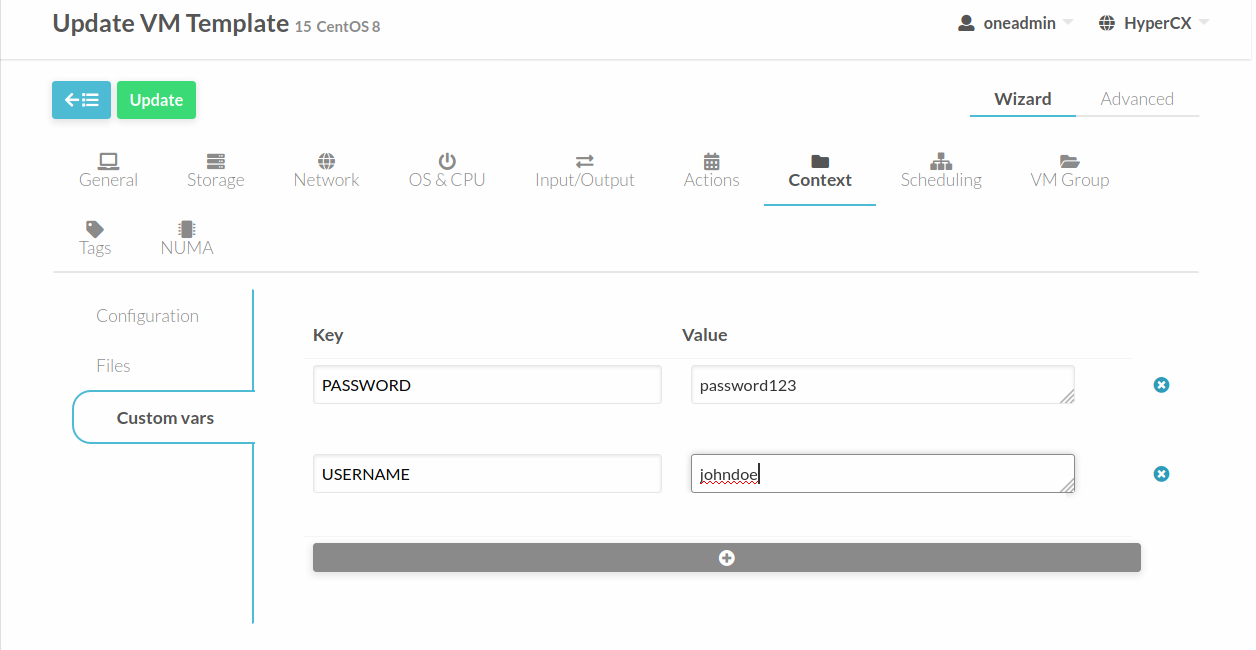
If you still want to add username and password to your Linux template go to “Custom vars” click on “+” button, in the key add PASSWORD and value enter your selected password, this will contextualize the VM with your given password for the root user. If you do not want to use the root user, you can also set another key called USERNAME with the user you want to use, and the defined password will be used for this user instead.
Windows
For Windows machines SSH is not available but you can use the options USERNAME and PASSWORD to create and set the password of an initial administrator. Go to “Custom vars” click on “+” button to add a new value, in the key add “USERNAME” and in value enter your selected username, now add another custom variable and in the key add “PASSWORD” and in value enter your selected password, this will contextualize the VM with your given password.
Startup scripts
To be able to execute commands immediately after boot, for example, to install some software, you can use the option START_SCRIPT. When this option is used a new file that contains the value of the option will be created and executed. For Windows machines this is a PowerShell script. For Linux machines this can be any scripting language as long as it is installed in the base image and the proper shebang line is set (shell scripts don’t need shebang). Go to “Custom vars” click on “+” button to add a new value, in the key add “START_SCRIPT” and in value add your script.
To add more complex scripts you can also use the option START_SCRIPT_BASE64. This option gets a base64 encoded string that will be decoded before writing the temporary script file.
Custom Network
In order to customize the network, for example, create bridges, within the VM OS you can uncheck the Add Network contextualization. When this option is unchecked, HyperCX will not run the contextualization scripts. This allows modifying the network in any way, but you should always keep in mind the IPs used because since HyperCX will not configure the vm network, there is a possibility of duplicate IPs if you are not extremely careful. Go to Configuration within Context and uncheck the option Add Network contextualization.
Note
All vms instantiated from the modified Template will be created without using HyperCX contextualization.
Supported keys
The following table shows all the keys that can be used for contextualization:
| Attribute | Description | Support |
|---|---|---|
| VARIABLE | Variables that store values related to this virtual machine or others. The name of the variable is arbitrary (in the example, we use hostname | All |
| START_SCRIPT | Text of the script executed when the machine starts up. It can contain shebang in case it is not shell script. Ex: START_SCRIPT="yum upgrade" |
All |
| START_SCRIPT_BASE64 | The same as START_SCRIPT but encoded in Base64 |
All |
| TARGET | Device to attach the context ISO. | All |
| NETWORK | YES to fill automatically the networking parameters for each NIC, used by the Contextualization packages | All |
| SET_HOSTNAME | This parameter value will be the hostname of the VM | All |
| DNS_HOSTNAME | YES to set the VM hostname to the reverse dns name (from the first IP) | Linux only |
| GATEWAY_IFACE | This variable can be set to the interface number you want to configure the gateway. It is useful when several networks have GATEWAY parameter and you want to choose the one that configures it. For example to set the first interface to configure the gateway you use GATEWAY_IFACE=0 |
Linux only |
| DNS | Specific DNS server for the Virtual Machine. If not specified, the DNS declared on the Virtual Network will be used | Linux only |
| ETHx_GATEWAY | Default IPv4 gateway for the interface "X". If not specified, the Gateway declared on the Virtual Network will be used | All |
| ETHx_GATEWAY6 | Default IPv6 gateway for the interface "X". If not specified, the Gateway declared on the Virtual Network will be used | Linux only |
| ETHx_MTU | MTU value for the interface "X". If not specified, the MTU declared on the Virtual Network will be used | All |
| USERNAME | User to be created in the guest OS. If any password attribute is defined (see below) it will change this user (defaults to root) | All |
| CRYPTED_PASSWORD_BASE64 | Crypted password encoded in base64. To be set for the user USERNAME | Linux only |
| PASSWORD_BASE64 | Password encoded in base64. To be set for the user USERNAME | Linux only |
| CRYPTED_PASSWORD | Crypted password. To be set for the user USERNAME. This parameter is not recommended, use CRYPTED_PASSWORD_BASE64 instead | Linux only |
| PASSWORD | Password to be set for the user USERNAME. This parameter is not recommended, use PASSWORD_BASE64 instead |
Linux only |
| SSH_PUBLIC_KEY | Key to be added to USERNAME authorized_keys file or root in case USERNAME is not set | Linux only |
LXD Specifics
Some specific attributes exist to better tune LXD templates. These attributes can be seen when selecting LXD as Hypervisor under the General tab when updating the template.
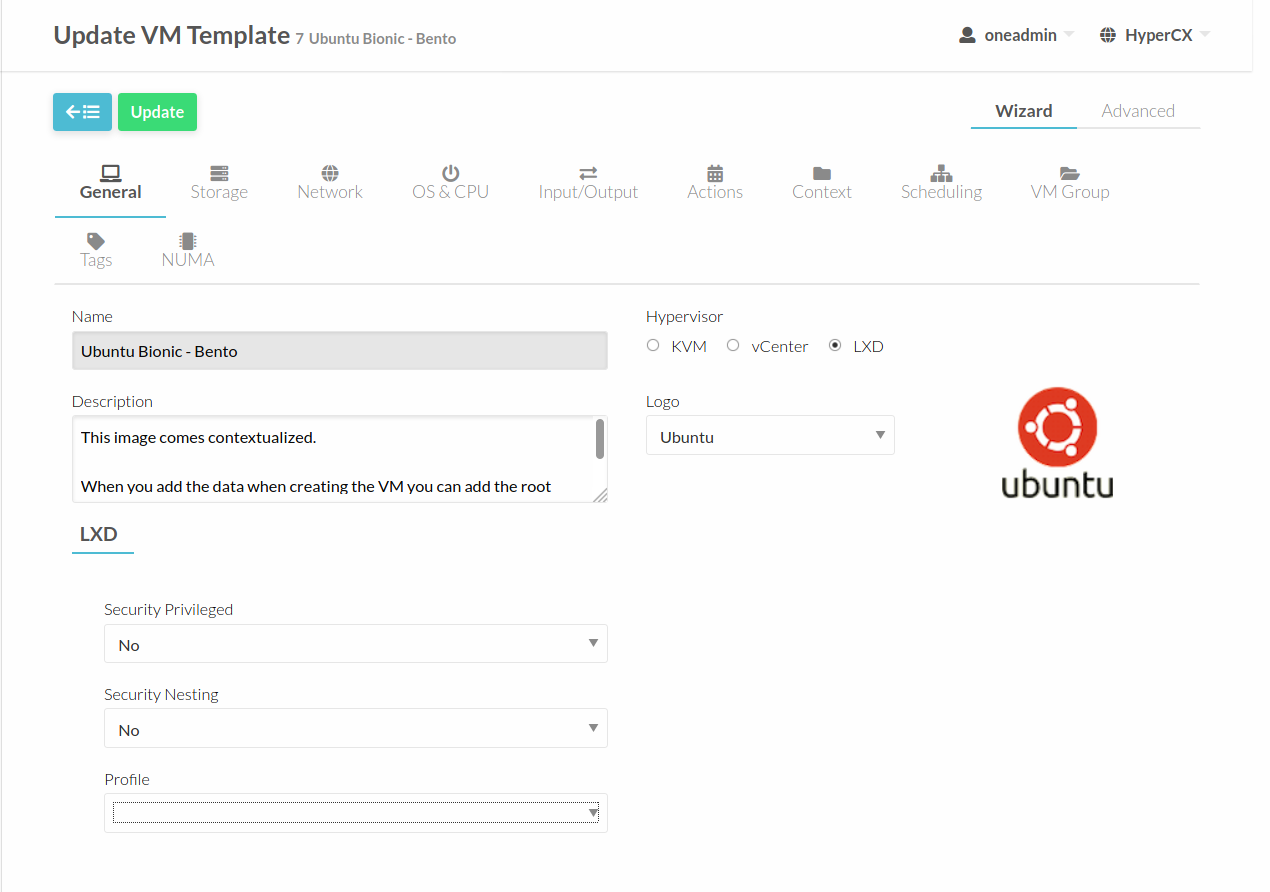
The specific configurations are described below.
Security Privileged
By default, LXD creates unprivileged containers. This means that root in the container is a non-root UID on the host. It is privileged against the resources owned by the container, but unprivileged with respect to the host, making root in a container roughly equivalent to an unprivileged user on the host. (The main exception is the increased attack surface exposed through the system call interface)
Briefly, in an unprivileged container, 65536 UIDs are 'shifted' into the container. For instance, UID 0 in the container may be 100000 on the host, UID 1 in the container is 100001, etc, up to 165535.
If security privileged is set to true, a container will be set to run without a UID mapping. Note however that in this case the root user in the container is the root user on the host.
Security Nesting
Containers all share the same host kernel. This means that there is always an inherent trade-off between features exposed to the container and host security from malicious containers. Containers by default are therefore restricted from features needed to nest child containers. In order to run lxc or LXD containers under a LXD container, the 'security.nesting' feature must be set to true.
Containers deployed with this feature will be able to start sub-containers.
Profile
LXD containers use a default profile provided by HyperCX. This is the recommended profile although it is restrictive for security reasons. It will allow to do most of the day to day tasks, but for some more specific features, like being able to mount specific filesystems or use some kernel modules, it will not be enough. For this, HyperCX also provides a special profile called permissive. Containers using this profile will be able to:
- Mount NFS filesystems.
- Use the following kernel modules: ip_vs, ip_vs_rr, ip_vs_wrr, ip_vs_sh, nf_conntrack_ipv4, ip_tables, ip6_tables, netlink_diag, nf_nat, overlay, nbd, openvswitch.
- Apparmor profile will be set to unconfined.
Note that using this profile will weaken isolation between the container and the physical server, so this profile is not recommended for Public Clouds or other multi-tenant heavy deployments.
Preparing Templates for End-Users
Besides the basic VM definition attributes, you can setup extra options in your VM Template.
Capacity
The capacity attributes (CPU, MEMORY, VCPU) can be modified each time a VM Template is instantiated. The Template owner can decide if and how each attribute can be customized.
The modification options available in the drop-down are:
- fixed: The value cannot be modified.
- any value: The value can be changed to any number by the user instantiating the Template.
- range: Users will be offered a range slider between the given minimum and maximum values.
- list: Users will be offered a drop-down menu to select one of the given options.
- list-multiple: Users will be offered a drop-down menu to select multiple of the given options.
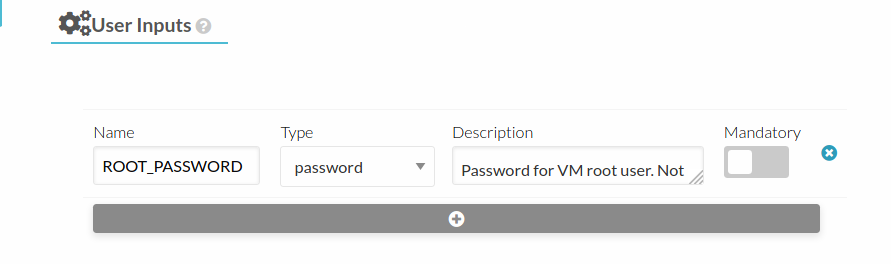
Ask for User Inputs
The User Inputs functionality provides the Template creator the possibility to dynamically ask the user instantiating the Template dynamic values that must be defined. It is configured in the template in the Context section, under Configuration.
A user input can be one of the following types: * text: any text value. * password: any text value. The interface will block the input visually, but the value will be stored as plain text. * text64: will be encoded in base64 before the value is passed to the VM. * number: any integer number. * number-float: any number. * range: any integer number within the defined min..max range. * range-float: any number within the defined min..max range. * list: the user will select from a pre-defined list of values. * list-multiple: the user will select one or more options from a predefined list of values.
One example of the user input is the Password dialog that will be shown when instantiating any OS obtained from Virtalus marketplace.
Another usage case of this feature is to set a variable that will be used for the start script. Imagine creating a variable called PACKAGE. User will fill this field when instantiating the VM with the package(s) names he wants to automatically install as soon as the VM is up and running. To make this work, a start script similar to this one should be added to the template:
#!/bin/bash
apt update
apt install $PACKAGE -y
Set a cost
Each VM Template can have a cost per hour. This cost is set by CPU and MEMORY MB, to allow users to change the capacity and see the cost updated accordingly. VMs with a cost will appear in the showback reports. This feature is used and exemplified when creating Simple Public Clouds out of Virtalus HyperCX Private Clusters.
Enable End User Features
There are a few features of the Cloud View that will work if you configure the Template to make use of them:
- Users will see the Template logo and description, something that is not so visible in the normal admin view.
- The Cloud View gives access to the VM’s VNC, but only if it is configured in the Template.
- End users can upload their public ssh key. This requires the VM guest to be contextualized, and the Template must have the ssh contextualization enabled.