Advanced View
The Advanced View allows the same actions as the Simple View, and adds some advanced features like:
- Create your own templates, or download from existing marketplaces.
- Create virtual, isolated networks on demand.
- Advanced and easy to use NFV features thanks to HyperCX NFV.
- Create empty disk images.
This is the default view for account owners when logging to the portal. If deploying and managing VMs is the only interest, Simple View is encouraged instead.
Manage Resources
Create new VMs
This view allows to create VMs in the same way as Simple User by instantiating templates from a predefined list. The Advanced View is very similar to the Administrator View available on HyperCX private clusters, so the same documentation can be used. To learn more about how to deploy and manage VMs, the Virtual Machine Management section can be consulted.

Note
Both in the Simple View and the Advanced View the user can select between HDD storage and SSD storage for their virtual disks. Price will vary as shown on the product description when acquiring the HyperCX Public Cloud account. To select the type of storage, go to Deploy VM in a specific Datastore when instantiating a new VM.
Obtaining templates
More templates can be obtained by the user to be used later on. Any template created by the user will only be visible by this user, and can be shared only with other users from the same group. There are two ways to obtain new templates:
- Download them from the marketplace. This is the recommended approach. More information can be obtained here
- Create a new template from scratch. This approach is not recommended except for specific cases. More information can be obtained here
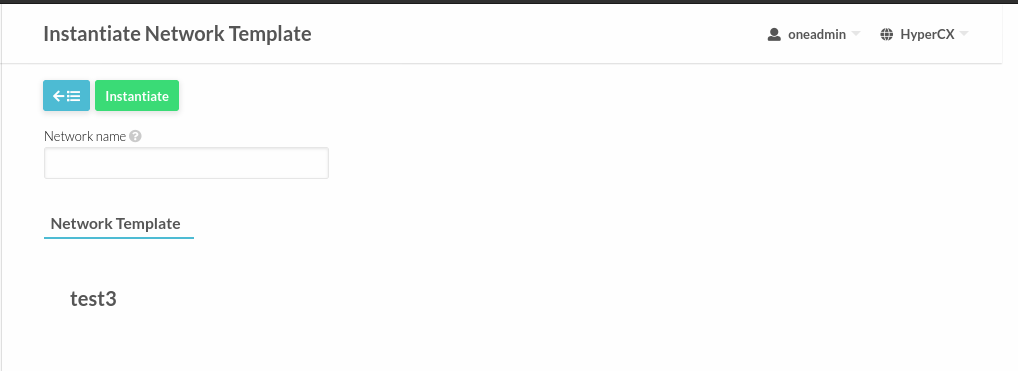
Create new virtual networks
A special network template is available on HyperCX public clouds. This special template can be used to create (instantiate) new virtual networks by users using this view. The new virtual networks will be completely isolated from other virtual networks created by other users, or the same user. These virtual networks will not be able to reach the Internet by default since there is no provided Gateway. The parameter entered in Gateway will be used to configure the default route on the VMs, but an instance capable of routing to the Internet must be deployed. This can be a custom firewall like a PfSense deployed on one VM using two NICs: one with a Public IP and the other on the same virtual network as the VM containing the Gateway IP. These firewalls can be hard or time consuming to deploy, this is why Virtalus provides HyperCX NFV instances that can be deployed with just a few clicks. Click here to learn more.
Instantiating a virtual network from the available template is very similar to create a new virtual network from scratch. The difference is that some parameters can not be modified, like the Physical Network Attributes. Address Space and Guest Configuration Attributes must be set.
In order to instantiate a new virtual network:
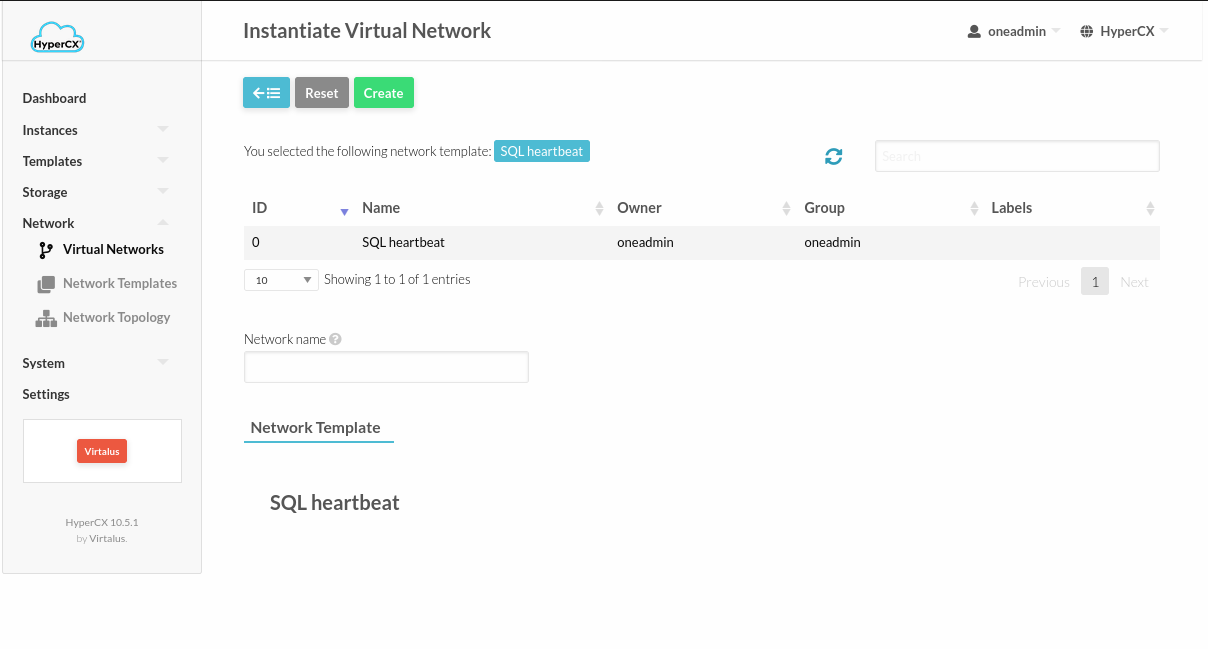
- Set a name for the new virtual network
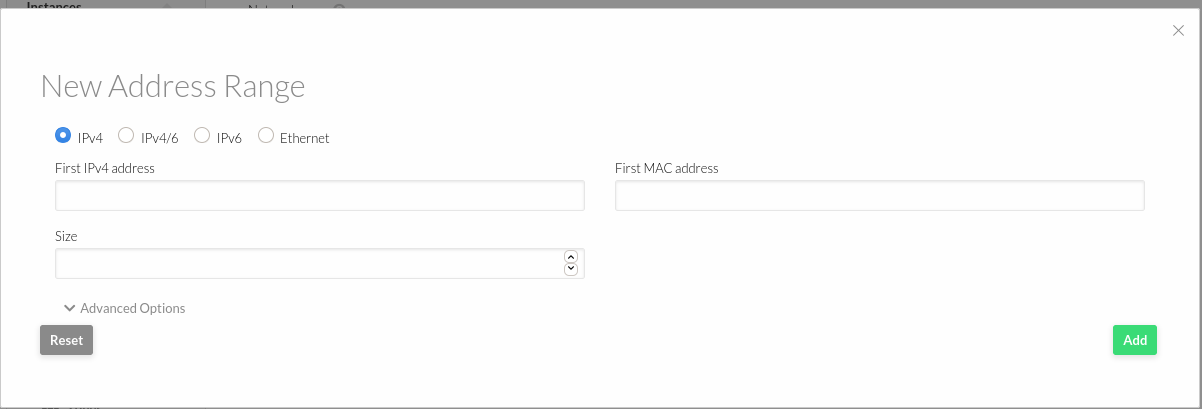
- Add an Address Range. For this a First IPv4 (most likely scenario) address and a Size is needed (e.x. First IPv4 address: 10.10.10.1 Size: 254, for a 10.10.10.0/24 network)
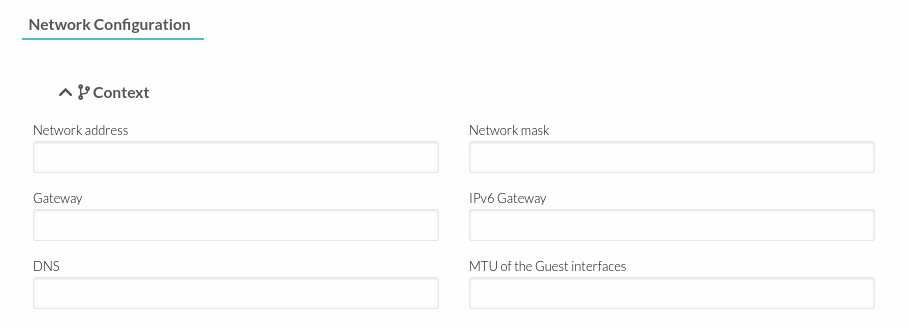
- In the Context section, a Network address, Network mask, Gateway, DNS is needed
You can consult your network topology any time:

Security Groups
Security Groups (SGs) cannot be used in the Public IPv4 vnet as, by default, a default SG has been applied that allows all inbound and outbound traffic.
The default security group also applied to all vnets that are instantiated.