Overview
IaaS (Infrastructure as a Service) has been a hot topic in IT for some time now. Virtalus architects and designs cloud platforms capable of delivering IaaS through on-premises Private Clouds, off-premises Private Clouds and Public Clouds. The following section acts as a user guide for Virtalus Public Cloud. Note that, while everything else on this documentation deals with HyperCX private clouds management, this is the only section that is intended to public cloud users. This documentation is useful for users of Virtalus managed public cloud and users of any public cloud built by third parties from HyperCX private clusters.
Virtalus Public Cloud offers an easy way to have a complex infrastructure without care for the common things of a data center. Based on the proven HyperCX Bento architecture, users can expect the same benefits offered by HyperCX Bento private clusters: performance, high availability, access to ready to deploy appliances and stability. It provides facilities to deploy an enterprise or private environment in just a few steps and leverages a metered billing system (also known as pay as you go pricing) not available on private clusters.
Virtalus Public Cloud differentiates to other Public Cloud providers in that, while being feature reach by offering advanced possibilities like:
- Create and manage virtual machine instances.
- Hot and cold attach new virtual disks and NICs to existing VMs or templates.
- Create your own templates, or download from existing marketplaces.
- Full backups and snapshot support for existing VMs.
- Create users on demand.
- Create virtual, isolated networks on demand.
- Advanced and easy to use NFV features thanks to HyperCX NFV.
- Paid public IPv4 addresses and free public IPv6 addresses.
- Single run and periodic scheduled actions.
it provides a high usability level by providing an intuitive and easy to use interface that can be suited to specific user's requirements. It accomplishes this by offering three ways to interact with the different resources:
- The Simple View, this way is for users that only intend to simply deploy VMs based on a set of predefined templates offered in the platform, and manage those VMs. The Simple View only allows to instantiate VMs and manage them.
- The Advanced View allows the same features as the Simple View while adding some advanced features like instantiating your own network (learn more), downloading templates from HyperCX marketplace or uploading your own templates (learn more), managing HyperCX NFV and other features that are explained in the Advanced View section.
- The Group Admin View is designed for users who are administrators of their respective group (default when acquiring an account via accounts.virtalus.com). This view is identical to the advanced view, with the single difference that it will allow to create new users, and manage some aspects of the group and it's respective users.
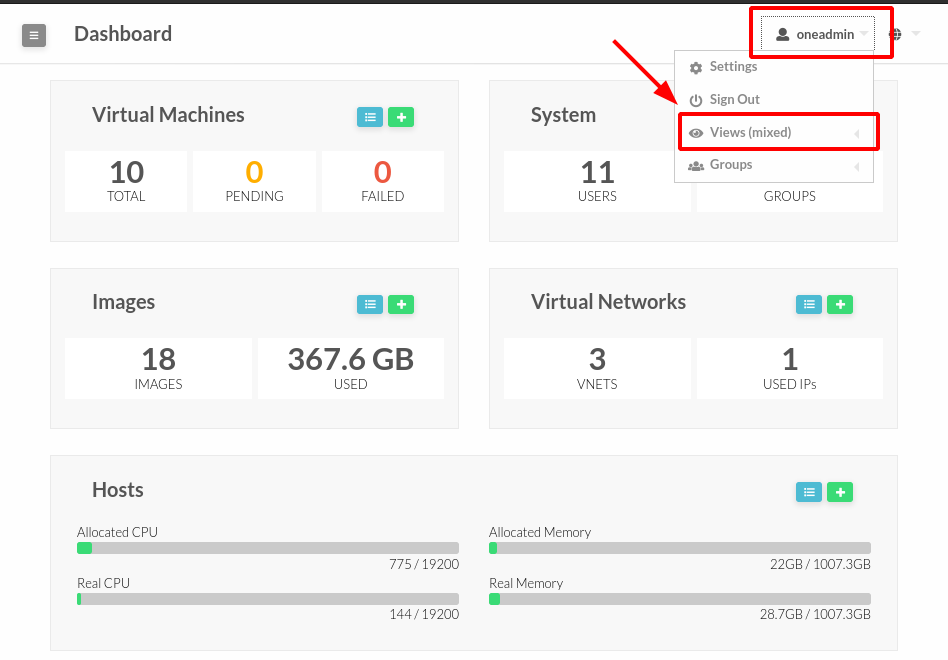
The view can be switched in the top-right of the web at the user dropdown
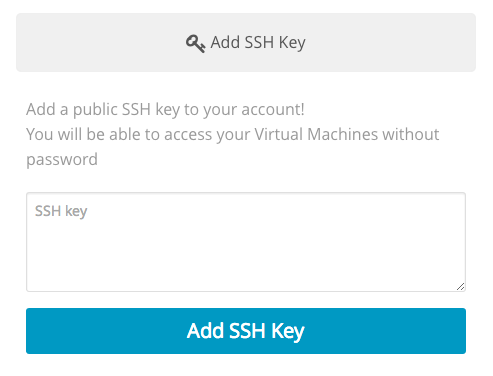
NOTE: Before starting, it is recommended to use public keys to log in to any deployed VM (instead of relying on passwords). Any user can provide his own ssh public key to be included in the VMs created through this view. Each user should configure his public key on his user settings.learn more
Before explaining each view, you might want to check the Managing Account section. This section will explain how to acquire an account to be able to use Virtalus Public Cloud, and manage this account.
Next, each view will be explained in detail. Remember that if you create an account on Virtalus Public Cloud, you will be able to use the Simple View and the Advanced View. This might change if you are using a public cloud from a third party based on HyperCX.
If you are an administrator of a HyperCX private cloud, and you are looking to build a public cloud using your existing cluster, or part of it, you should check under Architecting Public Clouds.