Quick Start guide
Overview
HyperCX can be set up with just a click of a button and it’s that easy. Everything else has already been taken care of although for full control over a Virtual Machine (VM),it’s images and it’s context we recommend understanding VM templates and images but if you need a VM up and running with few or no modifications you can follow this guide without worrying about that part.
Note
Some HyperCX clusters are only accessible from inside a VPN. If this is your case, make sure you are connected using the provided VPN configuration file. For detailed steps on how to connect to VPN learn more
Getting Started
- (Optional) With HyperCX users can utilize passwordless SSH(Only for Linux), for windows a password must be provided when launching the VM. If you intend to launch a Windows VM you can skip this part. All a user needs to do is navigate to settings

- Then navigate to update SSH key

Add their public SSH key then click on update SSH key. From now on, this public key will be configured inside the root user for each new Linux VM or container deployed.
Downloading a template to HyperCX
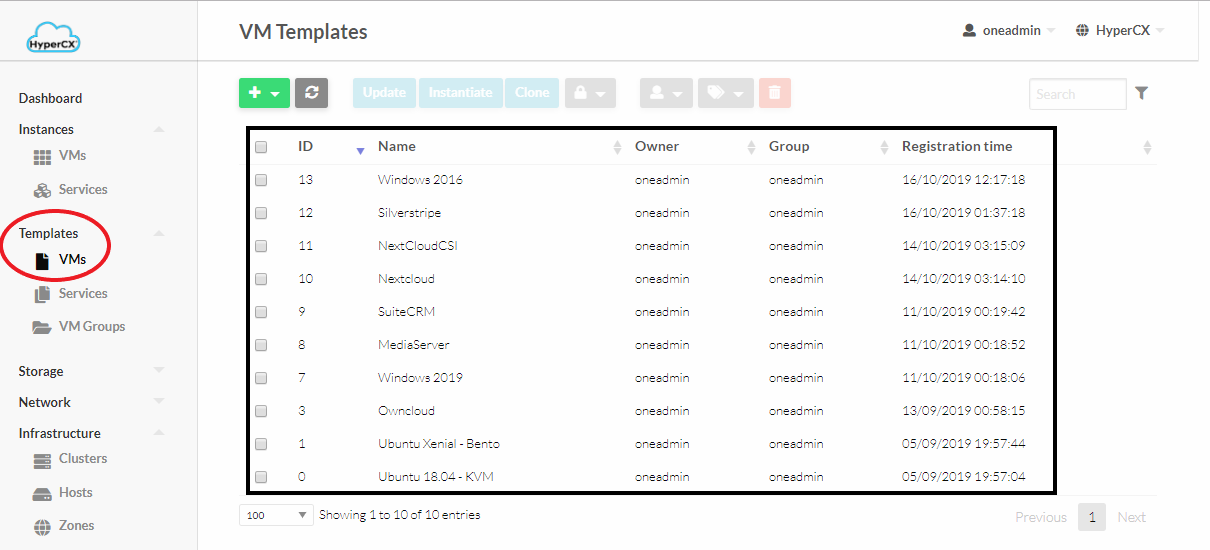
VMs are created from templates. If this is a new cluster, chances are the needed template will not be available (although some clusters come with some pre-downloaded templates, like in the case of Proof of Concept (PoC)). You can check if you’re template is already available by heading over to templates->VMs
If your desired template is available you can head over to the next subchapter. If not, you will need to download the required template or appliance from one of Vitalus marketplaces.
-
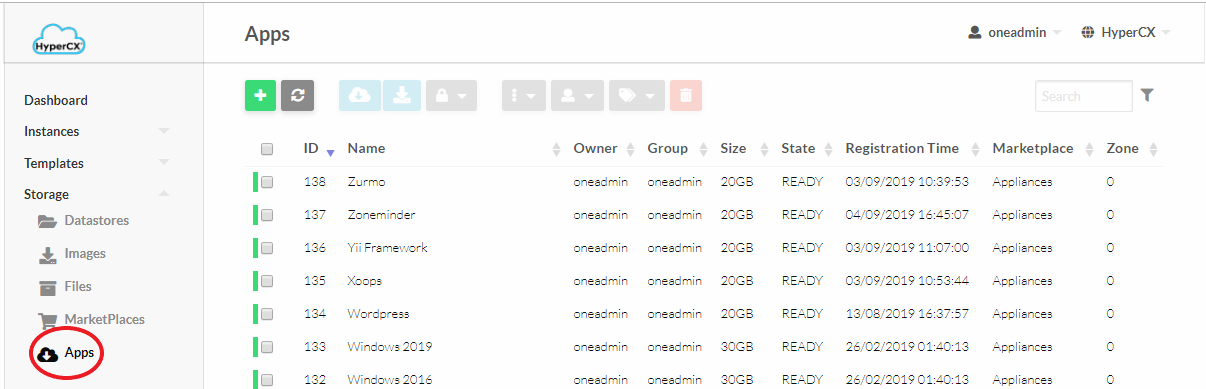
Appliances can be accessed under Storage 🡪 Apps.
-
Once in the Apps UI select an existing appliance and click on the appliance to view its description.
-
Now click on
 icon to start the download template creation process.. This process will download the OS image and create a new template.
 -
Enter the template name, its Image name and click on
 .
. -
Wait for the Image to be downloaded. It’s status can be checked by accessing Storage -> Images
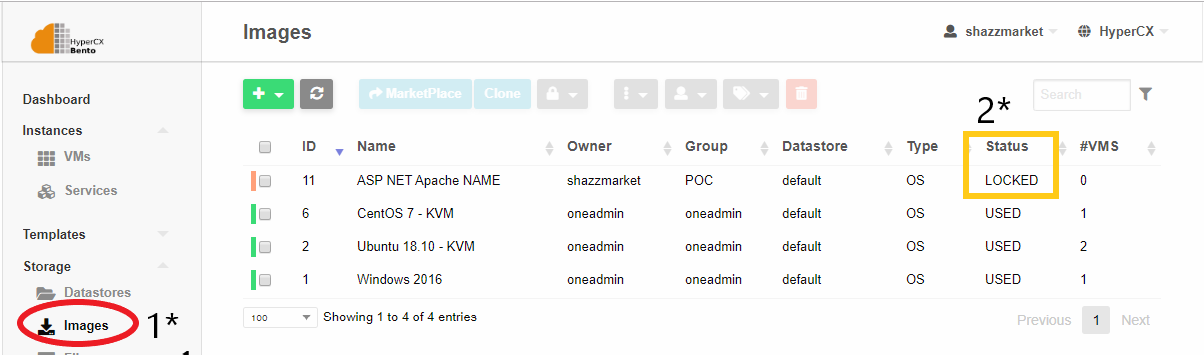
The status of the image will be LOCKED while the download is in progress. Once the image is downloaded its status is changed from LOCKED to READY, the new template will be ready to be instantiated.
Click here to learn more about templates and images.
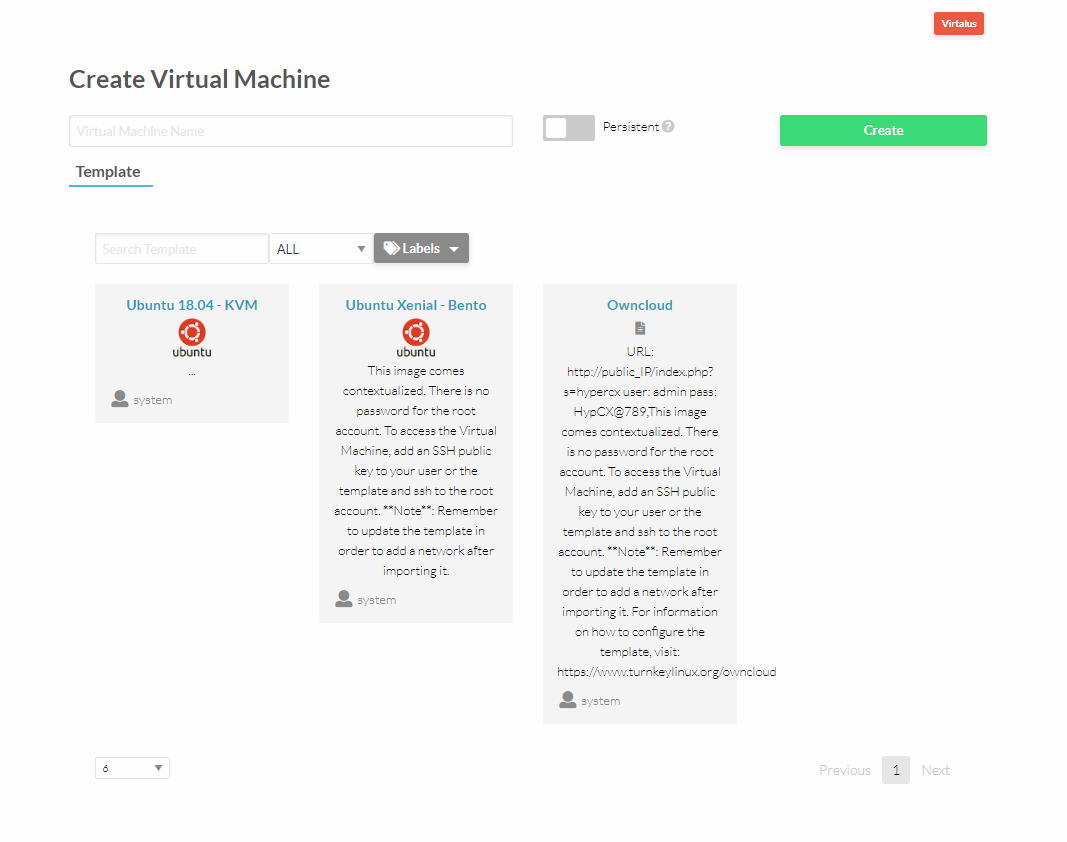
Instantiating a VM
Instantiating a VM can be easily done by,
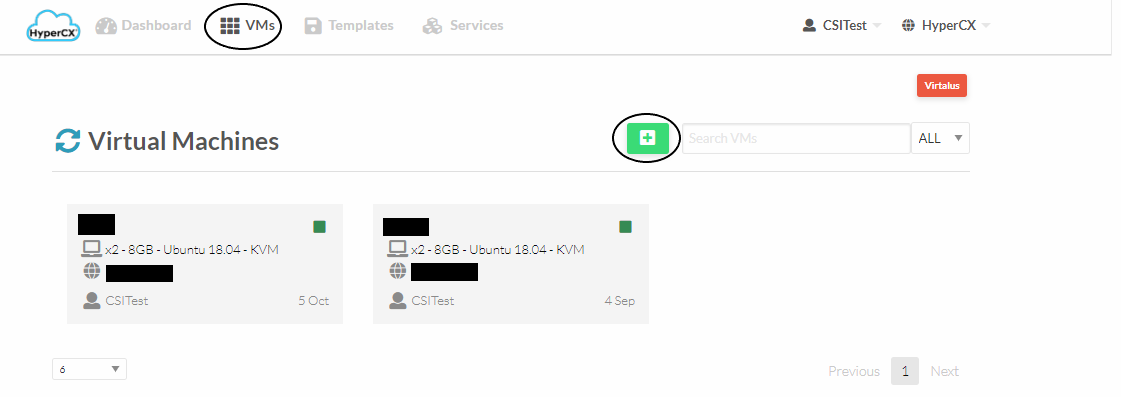
- Navigate to VMs and then clicking on the add button.
- Now select a predefined template that you want to use, it can be an OS or prebuilt image with everything preinstalled. Now enter a name for the virtual machine(This is optional and can be left blank)
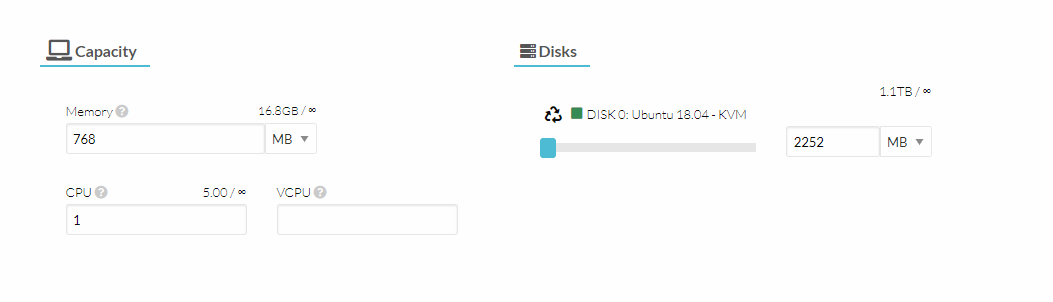
- Once the VM template is selected just specify capacity of the VM.
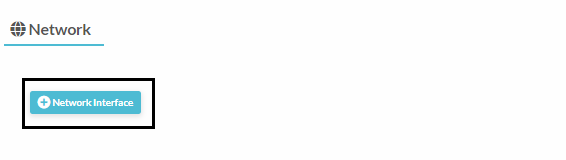
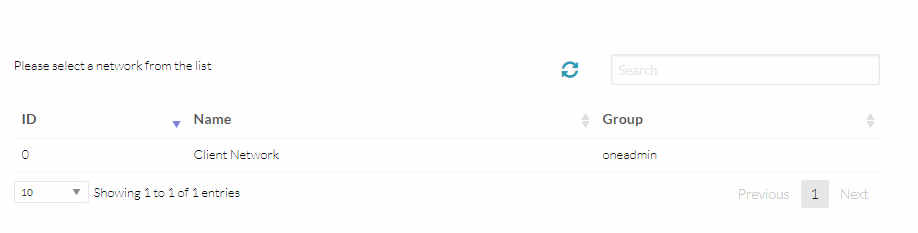
- Now carry on to the network part and attach the required network interface.
- Now scroll back up and click on the create button that’s all required to instantiate a VM.
Accessing the VM
Determine the IP address of the VM by navigating to VMs and then under your newly created VM IP address will be mentioned.
Linux VM
Linux VMs can be accessed using passwordless ssh (if the public key was previously defined). If a password was defined, this will be the root password, but ssh access using the root user and a password is not allowed for security reasons. If this is your case, you must use the VNC screen and either remove this restriction from the VM's SSH server or create a new user (recommended).
Windows VM
Remotely access the VM by using Remote Desktop Protocol(RDP) using the IP address determined earlier.
VNC
Users can also get a direct display of the VM using VNC by navigating to VMs and then clicking on the respective VM, now click on 
For more detailed information about how to manage VMs and it’s templates follow our documentation.
FAQ
- Q: I don’t know the password of my windows or Linux machine`
A: Your virtual instance (VM o container) will only contain a password if this was specified when instantiating the instance. If not, there is no password associated to the instance. Windows VMs require a password, if not, they will not be abled to be accessed later on via VNC or RDP. For Linux VMs, password is optional, although public keys are recommended. If a password was set, it will be found on the VM configuration parameters.